X
wikiHow is a “wiki,” similar to Wikipedia, which means that many of our articles are co-written by multiple authors. To create this article, 11 people, some anonymous, worked to edit and improve it over time.
This article has been viewed 30,087 times.
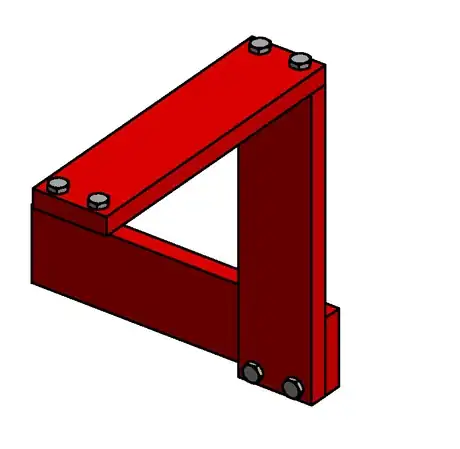
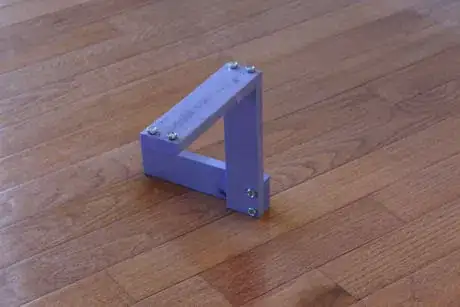
This is a modified version of the Penrose “Impossible” Triangle which is an interesting example of how the brain can be fooled. The main difference in this version is the use of hardware to simulate the triangle side connections. Watching the video (see below) is the easiest way to see how it works.
Note that this is a very simple project. It took about 10 minutes and was “free” since it was built out of pallet wood and recycled bolts. A drawing is included.
Steps
-
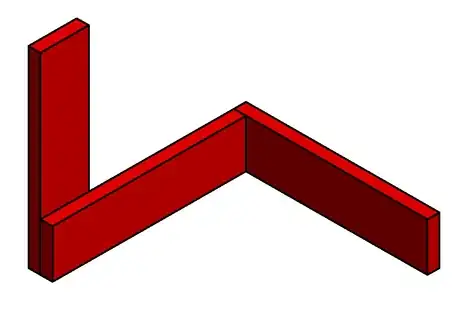
1Cut three boards. Each 8” long x 2” wide x ½” thick. Note that the size can be scaled up or down.
-
2Attach boards. Use wood glue and clamps to apply pressure.
-
3Drill holes and add bolts/screws. Note that these bolts are just used to give the illusion that the wood is connected.
-
4Add weights to the back side of the bottom piece to allow the triangle to stand upright. Other options include adding a center axle under the bottom to allow it to spin or placing holes in the bottom side and providing a matching plate with dowel pins. The second option would allow you to reposition the triangle in the exact same spot (relative to camera or person) which would be nice for video.
-
5Take a photo or make a video. A Canon DSLR camera was used for the photo and video. It took a few minutes on a tripod to line up the angles.
-
6Paint the triangle. This step is optional.
Things You'll Need
-
Tools
- Saw
- Tape measure
- Drill & bits
- Sander (optional)
-
Materials:
- Wood (enough to make three 2” slats, 8” long)…this project used one slat from a pallet
- Wood glue
- Lag bolts or something similar – used only for show


