
/en/office2000basics/menus/content/
The key components of Office 2000 are Word, Excel, PowerPoint, and Access. We will focus on these four applications throughout the Office 2000 skill sets.
In the previous lesson, you learned to choose a command using menus. You can also choose a command using a toolbar.
![]() Toolbars contain icons representing the most commonly used commands. Sometimes it's easier to click an icon than it is to open a menu and search for a command.
Toolbars contain icons representing the most commonly used commands. Sometimes it's easier to click an icon than it is to open a menu and search for a command.
![]() Certain toolbar icons (and their corresponding commands) are unique to specific Office applications, but there are others such as New, Open, and Save that are common to all of them.
Certain toolbar icons (and their corresponding commands) are unique to specific Office applications, but there are others such as New, Open, and Save that are common to all of them.
Forgot what an icon on the toolbar means?
Hover your mouse pointer over the icon. A label will appear telling you what the button does. This label is called a tooltip.
![]() It doesn't matter which way you choose to perform a command; it's just a matter of preference.
It doesn't matter which way you choose to perform a command; it's just a matter of preference.
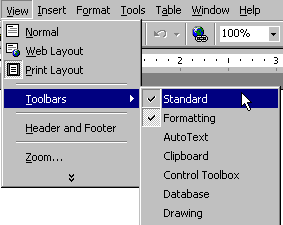
![]() The Standard and Formatting toolbars are the two most common toolbars in Microsoft Office 2000.
The Standard and Formatting toolbars are the two most common toolbars in Microsoft Office 2000.
The Standard toolbar is located just below the menu bar. It contains icons representing universal commands such as New, Open, and Save. The Formatting toolbar is located just below the Standard toolbar. It contains icons representing text-modifying commands like text size, bold, and ordered lists.

Many people find the Standard and Formatting toolbars helpful. If you find displaying both the Standard and Formatting toolbars too bulky, you can:


![]() To view all options on the combined Standard and Formatting toolbar, click the double right-pointing arrows
To view all options on the combined Standard and Formatting toolbar, click the double right-pointing arrows ![]() . These double arrows expand your toolbar options just as they do in the menus.
. These double arrows expand your toolbar options just as they do in the menus.
/en/office2000basics/dialog-boxes/content/