This article was co-authored by wikiHow staff writer, Travis Boylls. Travis Boylls is a Technology Writer and Editor for wikiHow. Travis has experience writing technology-related articles, providing software customer service, and in graphic design. He specializes in Windows, macOS, Android, iOS, and Linux platforms. He studied graphic design at Pikes Peak Community College.
The wikiHow Tech Team also followed the article's instructions and verified that they work.
This article has been viewed 12,634 times.
Learn more...
This wikiHow teaches you how to accept an Apple Pay Payment online. To use Apple Pay, you need a compatible device with iOS 11.2 or later, or WatchOS 4.2 or later, and an Apple ID with two-factor authentication. By default, Apple Pay payments are accepted automatically and kept in Apple Pay Cash which can be used in stores that accept Apple Pay, in the App Store, on the web, or transferred to your bank account.
Steps
Choosing a Method for Accepting Payments
-
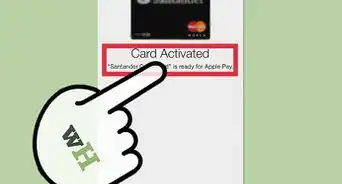
1Set up Apple Pay. Before you can use Apple Pay, you need to set it up. Read How to Set Up Apple Pay to learn more about how to set up your Apple Pay account.
-
2Open the Wallet app. The Wallet app is the app that has an icon that resembles the inside of a wallet with several cards.
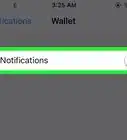
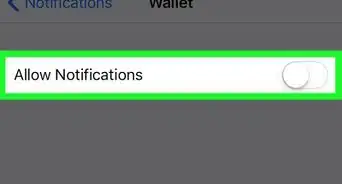
- On iPad, there is no Wallet app. Instead, open the "Settings" app, and then tap "Wallet & Apple Pay" in the right column.
Advertisement -
3Tap the Apple Pay Cash card. It's the black card with a colorful dot pattern on it. This selects the
-
4Tap the info icon. It's the blue circle icon that has a lowercase "i" in the middle.
- If you are using iPad, ignore this step.
-
5Tap the Info tab. It's the blue tab on the right at the top. It's just below the Apple Pay Cash icon.
-
6Tap Automatically Accept Payments or Manually Accept Payments. By default, Apple Pay Cash is set to automatically accept payments. When someone sends you a payment, it will automatically be added to your Apple Pay Cash balance. If you select "Manually Accept Payments", you will need to tap to accept a payment that is sent.[1]


Manually Accepting a Payment
-
1
-
2Tap the Apple Pay Cash card. It's the black card with a colorful dot pattern on it. This opens the details for
-
3Tap the info icon. It's the blue circle icon with a lowercase "i" in the middle.
- If you are using iPad, ignore this step.
-
4Tap the Transactions tab. It's the blue tab at the top-left below the "Apple Pay Cash" title at the top. This displays a list of transactions and pending transactions.
-
5Tap Accept next to a transaction. This accepts a transaction and adds the payment to your Apple Pay Cash balance.
- You can also accept a payment in the Messages by tapping "Accept" when a friend sends you a payment in a conversation.


Transfering a Payment to Your Bank
-
1
-
2Tap Apple Pay Cash. It's under the "Cards" header. It's next to a black icon with a colorful dot pattern.
-
3Tap the info icon. It's the blue circle icon that has a lowercase "i" in the middle.
- If you are using iPad, ignore this step.
-
4Tap the Info tab. It's the blue tab on the right at the top. It's just below the Apple Pay Cash icon.
-
5Tap Transfer to Bank. It's the second option below "Balance" at the top.
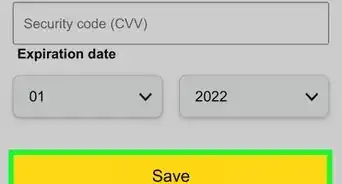
- If you haven't added a bank account yet, tap "Add Bank Account". Type your account and routing numbers, and tap "Next" and then confirm the numbers.
-
6Type an amount. Use the number pad to enter the dollar amount you want to transfer to your bank account.
-
7Tap Transfer. It's in the upper-right corner of the screen.
-
8Confirm the transfer. You can confirm you transfer with your passcode, FaceID, or Touch ID. Allow 1-3 days for the money to transfer to your bank.[2]


About This Article