X
This article was co-authored by Luigi Oppido and by wikiHow staff writer, Jack Lloyd. Luigi Oppido is the Owner and Operator of Pleasure Point Computers in Santa Cruz, California. Luigi has over 25 years of experience in general computer repair, data recovery, virus removal, and upgrades. He is also the host of the Computer Man Show! broadcasted on KSQD covering central California for over two years.
The wikiHow Tech Team also followed the article's instructions and verified that they work.
This article has been viewed 192,266 times.
This wikiHow teaches you how to choose, attach, and format an external hard drive for your Windows or Mac computer.
Things You Should Know
- When choosing an external hard drive, make sure it's compatible with your computer and offers the space you need.
- Installing an external hard drive involves connecting it to the USB port on your computer.
- When formatting a hard drive, make sure to back up any files if it isn't empty.
Steps
Part 1
Part 1 of 3:
Choosing an External Hard Drive
-
1Understand how to add an external hard drive to your computer. While some external hard drives will be usable immediately after plugging them into an available USB port on your computer, most external hard drives need to be formatted to fit your computer's specific file system before you can use them.
- Formatting is a quick process that you can perform from within your computer's built-in settings.
-
2Check your computer's connections. Most computers have USB 3.0 ports—which resemble rectangular holes in the side or front of your computer's housing—but modern Macs and some Microsoft-produced Windows computers use USB-C connections instead:
- USB 3.0 — A rectangular port found on the majority of computers produced before 2017. Most external hard drives use USB 3.0 connectors.
- USB-C — An oval port found on MacBooks and some Microsoft laptops. If you have a USB-C port, you'll either need to buy a USB 3.0 to USB-C adapter or find an external hard drive that includes a USB-C cable.
Advertisement -
3Consider your space requirements. External hard drives usually come in flavors of anything from 512 gigabytes to several terabytes in size. Make sure that you buy a hard drive that has more space than you need.
- Generally speaking, it isn't much more expensive to buy a terabyte (1024 gigabytes) hard drive than it is to buy a 512 gigabyte hard drive. Storage also tends to get cheaper the more of it you buy (e.g., a two terabyte hard drive will cost significantly less than two one terabyte hard drives).
-
4Choose between a traditional hard drive and a solid-state drive. Solid-state drives (SSDs) are significantly faster than traditional external hard drives, but they're also much more expensive. If you're planning on running an operating system or editing software from the external drive, though, an SSD will be better for responsiveness than a traditional hard drive.
-
5Know which brands to look for. Storage is cheap, but you'll still want to make sure that you're buying from a reputable manufacturer; don't pay more for a hard drive with a fancy case but a low-quality drive inside. If you're backing up something important, you want to make sure it's going to work![1] Popular external hard drive manufacturers include the following:[2]
- Western Digital
- Adata
- Buffalo
- Seagate
- Samsung
- Also check that the hard drive company will cover data recovery later down the road if there are issues with the hard drive.[3]
-
6Buy an external hard drive that fits your requirements. Once you've purchased your drive from a tech department store or an online outlet, you can proceed with installing it on your Windows computer or Mac.


Advertisement
Part 2
Part 2 of 3:
Installing an External Hard Drive on Windows
-
1Find your computer's USB port. You'll usually find your computer's USB 3.0 or USB-C on one of the sides of the housing, though desktop users may find the USB port(s) on the front or side of the tower.
- Make sure that you're plugging the external hard drive into a USB port on your computer itself, not a hub or a keyboard USB port.
-
2Plug one end of the external hard drive's cable into the USB port. If the cable uses a USB 3.0 connection, it should only fit one way. USB-C connections can be inserted in any way that fits the port.
-
3Plug the other end of the cable into your external hard drive. The other end of the cable will usually be a proprietary connection that only fits one port on the external hard drive.
-
4
-
5Click This PC. It's on the left side of the window, though you may have to scroll up or down in the left-hand pane to find it.
-
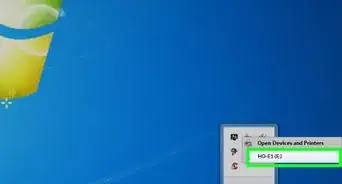
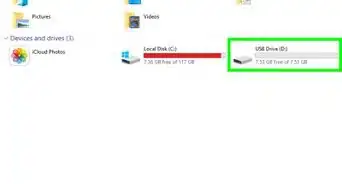
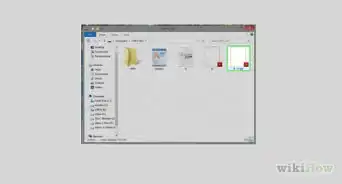
6Right-click your external hard drive's name. You should see it below the "Devices and drives" heading. A drop-down menu will appear.
- If you don't see anything listed below the "Devices and drives" heading, double-click the heading to expand it.
-
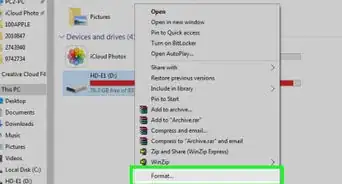
7Click Format. It's in the drop-down menu. The Format window will open.
-
8Click the "File system" drop-down box. This is in the middle of the Format window. A drop-down menu will appear.
-
9Select a file system. Click one of the following options in the drop-down menu:
- NTFS — Select this option if you only want to use the hard drive with Windows computers.
- exFAT — Select this option if you want to use the hard drive with both Windows and Mac computers.
- FAT32 — Select this option if you want to use the hard drive with computers and non-computer sources alike. Some Linux computers or installations will require a FAT32 drive.
-
10Click Start. It's at the bottom of the window. Doing so will prompt Windows to begin formatting your external drive.
- If the drive belonged to another person before you, consider first unchecking the "Quick format" box. This will cause the formatting process to take significantly longer, but it will also overwrite completely the hard drive.
-
11Click OK when prompted. This is at the bottom of the window. Doing so closes the Format window; your drive should now be formatted.


Advertisement
Part 3
Part 3 of 3:
Installing an External Hard Drive on Mac
-
1Find your Mac's USB port. You'll usually find the USB port on the sides of the housing (MacBook) or on the back of the monitor (iMac).
-
2Plug one end of the external hard drive's cable into the USB port. If the cable uses a USB 3.0 connection, it should only fit one way. USB-C connections can be inserted in any way that fits the port.
-
3Plug the other end of the cable into your external hard drive. The other end of the cable will usually be a proprietary connection that only fits one port on the external hard drive.
-
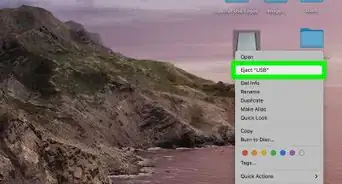
4Open Spotlight . Click the Spotlight icon, which resembles a magnifying glass, in the top-right corner of the screen.
- When you plug in an external drive, it will oftentimes show up in Finder on the left hand side, so you don’t even have to try and locate it on the desktop.[4]
-
5Open Disk Utility. Type in disk utility, then double-click Disk Utility when it appears in the search results. The Disk Utility window will pop up.
-
6Select your external hard drive. In the upper-left side of the Disk Utility window, click your external hard drive's name.
-
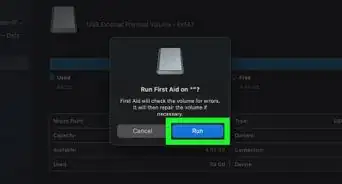
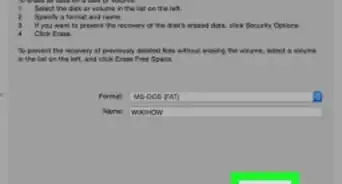
7Click Erase. It's a tab at the top of the Disk Utility window. Doing so prompts a pop-up window.
-
8Click the "Format" drop-down box. You'll find it in the middle of the pop-up window.
-
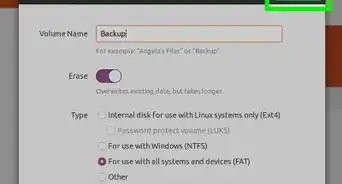
9Select a file system. Click one of the following options:
- Mac OS Extended (Journaled) — Select this option if you just want to use your external hard drive with a Mac computer.
- ExFAT — Select this option if you want to use your external hard drive with both Windows and Mac computers.
-
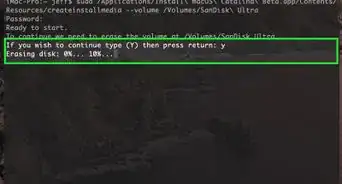
10Click Erase. It's at the bottom of the window.
-
11Click Erase when prompted. Doing so will prompt your Mac to begin formatting your drive. Once the formatting process is complete, you can proceed with using your drive as you please.


Advertisement
Community Q&A
-
QuestionCan I run a separate operating system on it?
 DenneiskTop AnswererYes. You could put Windows, Linux or iOS onto an external drive. You can put anything on it.
 -
QuestionDo I need to overwrite my external hard drive to make a more current image of my C: drive?DenneiskTop AnswererYes. Alternatively, you could attempt to specifically overwrite certain parts of the external hard drive only.
-
QuestionWill I know if my new hard drive needs to be formatted?
 Community AnswerThey are generally pre-formatted. You can either try copying a file to it or double-clicking on the drive in My Computer; if the drive needs to be formatted, your OS will tell you.
Advertisement
Warnings
- Not all file systems are compatible with other computers. If you use a proprietary file system (e.g., NTFS on a Windows computer), attempting to add the external hard drive to a non-Windows computer will result in an error.⧼thumbs_response⧽
- Formatting a drive will erase its contents.⧼thumbs_response⧽
Advertisement

References
- ↑ Luigi Oppido. Computer & Tech Specialist. Expert Interview. 31 July 2019.
- ↑ https://www.techradar.com/news/best-external-desktop-and-portable-hard-disk-drives
- ↑ Luigi Oppido. Computer & Tech Specialist. Expert Interview. 26 February 2020.
- ↑ Luigi Oppido. Computer & Tech Specialist. Expert Interview. 31 July 2019.
About This Article

Luigi Oppido
Computer & Tech Specialist
This article was co-authored by Luigi Oppido and by wikiHow staff writer, Jack Lloyd. Luigi Oppido is the Owner and Operator of Pleasure Point Computers in Santa Cruz, California. Luigi has over 25 years of experience in general computer repair, data recovery, virus removal, and upgrades. He is also the host of the Computer Man Show! broadcasted on KSQD covering central California for over two years. This article has been viewed 192,266 times.
How helpful is this?
Co-authors: 18
Updated: October 25, 2022
Views: 192,266
Categories: External Storage Devices
Advertisement