This article was co-authored by wikiHow staff writer, Nicole Levine, MFA. Nicole Levine is a Technology Writer and Editor for wikiHow. She has more than 20 years of experience creating technical documentation and leading support teams at major web hosting and software companies. Nicole also holds an MFA in Creative Writing from Portland State University and teaches composition, fiction-writing, and zine-making at various institutions.
The wikiHow Tech Team also followed the article's instructions and verified that they work.
This article has been viewed 34,208 times.
Learn more...
This wikiHow teaches you how to set up one Windows PC to accept remote connections from another. If you're using Windows 10 Professional, you can use the built-in Remote Desktop feature to connect to other computers on your local network. If you want to connect to a computer on another network or just don't have Windows 10 Professional, TeamViewer is a free option that can give you complete remote control over another PC.
Steps
Using TeamViewer
-
1Install TeamViewer on the PC you want to connect to. Here's how:
- Go to https://www.teamviewer.com/en-us/info/remote-desktop.
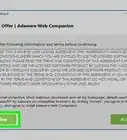
- Click the green Free Download button and click Save to start the download (if required).
- Open the downloaded file to start the installer.
- Choose the Custom option and click Next.
- Choose whether to start a trial or keep using the free version, and then click Finish.
- When TeamViewer opens, it'll open to the "Unattended access" walkthrough.
-
2Click Next on the "Setup unattended access" window. Now you'll be asked to create an account that you can use to access the computer whenever you want—nobody will need to be at the other PC to generate a password when you want to sign in.
- This is optional—if you'd rather only sign in to this computer when a new password is generated on the spot, you can click Cancel and skip to step 4.
Advertisement -
3Create a password and click Next. The password you create lets you sign in to the remote computer when its unattended so nobody will need to approve the connection.
-
4Create or sign in to a TeamViewer account. To create a new account, select Create a free TeamViewer account, fill out the form, and click Next. To sign in to an existing account, select I already have a TeamViewer account and sign in.
- You can also proceed without an account by selecting I don't want to create a TeamViewer account now. You won't be able to add this computer and password to your contacts, however.
-
5Write down the TeamViewer ID. You'll see a screen containing the PC's TeamViewer ID number on the next screen. Write down the number and click Finish, which brings you back to the main TeamViewer screen.
- This brings you back to the main TeamViewer screen, where you'll now see "Allow Remote Control," followed by the number you wrote down and a new password. This password was just generated—you can regenerate a password at any time by clicking the small blue curved beside it. Each time you open the app a new password will be generated, and you'll need that password to sign in remotely (unless you created an unattended password earlier).
-
6Install TeamViewer on the computer making the connection. Now that TeamViewer is set up on the remote computer, you'll need it on the other computer so you can make the connection. This time when installing, you can choose the Default installation if you don't think you'll want to allow remote access to that computer as well. Once you're finished setting up TeamViewer, it will launch automatically.
-
7Click Connect on the computer making the connection. It's at the top-right corner of TeamViewer.
-
8Enter the ID of the remote computer in the "Partner ID" field and click Connect. After a few seconds, you'll be asked to enter a password.
-
9Enter the password from the remote PC and click Log On. This is the password on the "Allow Remote Control" screen on the remote computer. Or, if you created a password earlier for unattended access, you can enter that instead. Either will work to sign in. Once the password is accepted, the contents of the screen will appear in the TeamViewer window.


Using Windows Remote Desktop
-
1Press ⊞ Win+i on the computer receiving the connection. This opens your Windows Settings.
-
2Click the System icon. It's the first icon.
-
3Click Remote Desktop. It's in the left panel.
- Remote Desktop is not available on Windows 10 Home edition, so you'll need to make sure you're using Pro.[1] If you see "Your Home edition of Windows 10 doesn't support Remote Desktop," you can click Learn how to upgrade your Windows 10 edition if you'd like to upgrade.
-
4
-
5Set up your network preferences on the remote PC. The remaining options on this page let you customize how remote connections will work.
- If you want this computer to always be available for remote connections on the local network, check the box next to "Make my PC discoverable on private networks." You can also place a check next to "Keep my PC awake for connections when it is plugged in" if you want your remote connection attempts to automatically wake the PC from sleep.[2]
- To select specific users who can connect to the PC remotely, click Select users that can remotely access this PC and make your selection(s).
-
6Open Remote Desktop Connection on the computer making the connection. Now you'll need to go back to the PC you want to use to connect to the other PC. To open Remote Desktop:
- Press the Windows key on the keyboard and type remote into the Search bar.
- Click Remote Desktop Connection.
-
7Click Show options. This expands more login options.
-
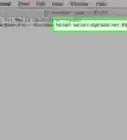
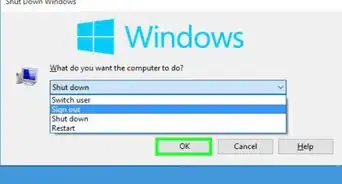
8Enter the name of the remote computer. If you're on the same local network and domain as the computer you're connecting to, just enter the computer's name you wrote down earlier. If your network is set up another way, enter the full path or IP address to the remote computer.
- If you don’t know the name of the computer, you can choose the computer among the list of available ones in the network by clicking on the drop-down menu.
- You can click the Display tab at the top if you'd like to choose the size and color quality of the remote desktop.
- Click the Local Resources tab to control how remote audio, printers, connected drives, and keyboard shortcuts work while connected.
-
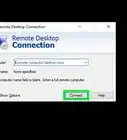
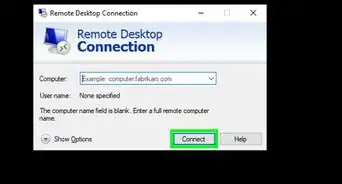
9Click the Connect button. This connects you to the other PC and asks you to log in.
-
10Enter the username and password and click OK. Make sure you sign in with a username and password that has access to log into the computer. After a few moments, the connection will be established.


References
About This Article

1. Install TeamViewer on both computers.
2. Open TeamViewer on both computers.
3. Click Connect on the computer you're connecting from.
4. Enter the ID of the remote computer.
5. Enter the password.
6. Click Connect.