This article was co-authored by wikiHow staff writer, Janice Tieperman. Janice is a professional and creative writer who has worked at wikiHow since 2019. With both a B.A. and M.A. in English from East Stroudsburg University, she has a passion for writing a wide variety of content for anyone and everyone. In her free time, you can find her working on a new crochet pattern, listening to true crime podcasts, or tackling a new creative writing project.
There are 11 references cited in this article, which can be found at the bottom of the page.
This article has been viewed 7,059 times.
Learn more...
Have you ever seen a wooden drawer or compartment with a soft, velvety sheen? Chances are, this wasn’t made with felt or fabric—it was actually made with flock! Flock is a soft, fine powder made with tiny fiber particles that helps give your handcrafted projects a soft, professional touch. Despite its luxurious appearance, flock only takes a few minutes to apply, though it needs a bit of time to dry and cure completely.
Steps
Project and Workplace Setup
-
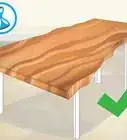
1Seal your project if it has a porous surface. When you apply flock, you’re actually sticking a fine powder to a layer of special adhesive. If the surface isn’t sealed, the adhesive might soak into the wood instead of creating a sticky surface. Apply your sealant of choice to your project, whether it’s shellac, lacquer, polyurethane, or sanding sealer—just make sure the surface is smooth and sealed off, so the adhesive sticks properly.[1]
- Let the sealant dry and cure completely before adding any flocking powder.
- If your project isn’t porous, then you don’t have to worry about this.
-
2Sand any non-wood surface so the adhesive sticks better. Grab any kind of sandpaper and buff over the surface you plan on flocking. Keep sanding until the surface feels rough to the touch.[2]Advertisement
-
3Tape off the sections of your project that you don’t plan on flocking. Chances are, you aren’t flocking your entire project. In this case, apply strips of painter’s tape all around the section you plan on flocking. This way, the powder won’t get on the outer sections of your handiwork.[3]
-
4Place small projects in a lined cardboard box. Cardboard boxes are a great, protective option for your workspace, since the sides help catch any stray powder during the flocking process. For easy clean-up, arrange a plastic bag along the inside of the box. Then, place your project inside for safekeeping.[4]
- If your project is too big to fit in a cardboard box, move it to a large, open area, like a garage. Place your project on a sturdy surface, like a sawhorse, and lay out some drop cloths or plastic sheeting for easier clean-up.


Flock Applicator Setup
-
1Slip on a dust mask and a pair of plastic gloves. Flocking powder tends to go everywhere, and it’s easy to breathe by mistake if if you aren’t wearing a mask. Then, protect your skin from the sticky adhesive with a pair of disposable plastic gloves.[5]
-
2Separate your flocking applicator into 2 tubes. A flocking applicator looks like a cross between a pepper shaker and a hand-held balloon pump. One section of the tube is perforated, which helps you apply the flock in a smooth, polished layer. The other section is closed-off, and is where you’ll add the flocking powder.[6]
- You can find flocking applicators, powder, and adhesive online, or at some specialty stores.
-
3Fill the bottom, unperforated tube halfway with flocking powder. Scoop out the powder from its bag or container and dump it into the applicator. It’s okay if you scoop a little more than you need—you can reuse any leftover powder later on.[7]
-
4Slide the perforated tube section on top of the lower half. Align the perforated section on top of the lower half, and push it into place. Your flocking powder and applicator are now ready to go![8]


Adhesive and Flock Application
-
1Pick an adhesive that matches your flocking powder. Flock powder and flocking adhesive are a package deal. For a smooth, consistent color on your project, choose an adhesive that exactly matches your flocking powder.[9]
- For instance, if your flock powder is blue, choose a blue flocking adhesive for your project.
-
2Brush the adhesive quickly over the surface you’d like to flock. Dip a small, 1 in (2.5 cm) paint brush into adhesive can. Apply the product all over your project in smooth strokes, creating a thin layer of adhesive.[10] Try to do this as quickly and efficiently as possible—flocking adhesive dries very quickly, and you only have a 10-15 minute window to apply both the adhesive and flocking powder.[11]
- You can also use spray-on adhesive to get the job done a little more quickly.[12]
-
3Spray larger projects with an adhesive spray gun. Fill up your gun with a diluted adhesive mixture—1 US tbsp (15 mL) of flocking adhesive to 1 US pt (470 mL) of mineral spirits should do the trick. Spritz an even layer of adhesive over the entire surface that you plan on flocking.[13]
-
4Hold the flocking powder applicator at a 90-degree angle. Hold the applicator at a downward angle, about 8 to 10 in (20 to 25 cm) above your project. Check that the perforated end of the applicator faces your project.[14]
-
5Pump the flocking applicator to spread the powder over the surface. A flocking pump works really similarly to a hand-held balloon pump—simply twist and pump the bottom half of the applicator in quick, rapid motions to spray the powder. Move the applicator back and forth so you cover the entire surface that you’d like to flock, such as the sides.[15]
-
6Apply flock to larger projects with an air-assisted spray gun. Attach a flock canister to an air-assisted spray gun, which offers more efficient coverage for your project. Set the compressor around 10-15 psi, holding the gun about 8 to 10 in (20 to 25 cm) away from the surface you’d like to flock. Hold the gun at a 90-degree angle and spray the flock all over your desired surface.[16]
- The higher the psi setting, the more often you’ll need to refill your flock canister.
- Always check that flock is coming out of the canister—if you spray compressed air onto your project, you’ll end up drying the adhesive.


Drying and Curing Times
-
1Let the flock dry for 10-15 hours. While flock is applied really quickly, it takes a lot longer to set. Keep your project in an open area where it can air-dry.[17]
- If you’re in a rush, set a non-blowing heating lamp at least 18 in (46 cm) away from the recently-flocked surface. This will lower the total drying time to 7 hours.
-
2Dust off any loose flocking powder with a clean brush. In light, gentle strokes, wipe away any stray powder that didn’t end up sticking to the adhesive. Go over all the surfaces you flocked, so your finished project is smooth and clean.[18]
-
3Transfer any leftover flocking powder to the original container. Pick up the plastic bag beneath your project and place it along the opening of your flock bag or container. Pour all the unused powder back into the container so you can reuse it for your next project![19]
- This might be a bit trickier to do if you’re working on a big project in a large workspace. Just do the best that you can!
-
4Wait 3-7 days for the flocking to cure. Although the flocking is dried, it still isn’t totally cured. Let the project dry for at least 3 days before placing anything on the flocked surface.[20]
- You can transport the project to a different spot—just be really careful when you move it around.


Warnings
- Always wear a dust mask when working with flocking powder! This powder is very fine, and easy to breathe in by accident.⧼thumbs_response⧽
- Avoid applying the flock in multiple sections—this will create noticeable lines in the finished flocking.[21]⧼thumbs_response⧽
Things You’ll Need
- Dust mask
- Plastic gloves
- Cardboard box
- Plastic bag
- Sealant
- Colored flocking adhesive
- Paint brush or roller
- Flocking powder
- Flocking applicator
- Air-assisted spray gun (optional)
- Flock canister (optional)


References
- ↑ http://www.flockit.com/How%20To%20Apply%20Suede-Tex.pdf
- ↑ http://www.flockit.com/How%20To%20Apply%20Suede-Tex.pdf
- ↑ https://m.youtube.com/watch?v=PJFjorzlI3k&t=1m15s
- ↑ https://m.youtube.com/watch?v=3XOX-9dSJ28&t=5m38s
- ↑ https://m.youtube.com/watch?v=3XOX-9dSJ28&t=7m59s
- ↑ https://m.youtube.com/watch?v=3XOX-9dSJ28&t=3m26s
- ↑ http://www.craftflocking.com/About_Flocking.php
- ↑ https://m.youtube.com/watch?v=PJFjorzlI3k&t=2m17s
- ↑ http://www.flockit.com/How%20To%20Apply%20Suede-Tex.pdf
- ↑ https://m.youtube.com/watch?v=PJFjorzlI3k&t=1m24s
- ↑ http://www.flockit.com/How%20To%20Apply%20Suede-Tex.pdf
- ↑ https://m.youtube.com/watch?v=0vYfIcx2N1A&t=1m43s
- ↑ http://www.flockit.com/How%20To%20Apply%20Suede-Tex.pdf
- ↑ http://www.flockit.com/How%20To%20Apply%20Suede-Tex.pdf
- ↑ http://www.flockit.com/How%20To%20Apply%20Suede-Tex.pdf
- ↑ http://www.flockit.com/How%20To%20Apply%20Suede-Tex.pdf
- ↑ http://www.flockit.com/How%20To%20Apply%20Suede-Tex.pdf
- ↑ https://m.youtube.com/watch?v=3XOX-9dSJ28&t=13m5s
- ↑ https://m.youtube.com/watch?v=3XOX-9dSJ28&t=13m56s
- ↑ http://www.flockit.com/How%20To%20Apply%20Suede-Tex.pdf
- ↑ http://www.flockit.com/How%20To%20Apply%20Suede-Tex.pdf