This article was co-authored by OrthoNOW. OrthoNOW is a network of orthopedic, rehabilitative, and emergency care professionals based in the Miami, Florida metro area. Providing services such as diagnosis, digital x-ray, ultrasound, fluoroscopy, MRI, and pre-concussion testing, OrthoNow focuses on an alternative urgent care delivery model. OrthoNOW was founded by Alejandro Badia, MD, FACS, who completed his MD at New York University and completed fellowships at Allegheny General Hospital in Pittsburgh, Pennsylvania and in Freiburg, Germany.
This article has been viewed 8,920 times.
Rocktape is a specific brand of kinesiology tape that helps injured muscles and inflammation while giving you total range of motion. To apply it, you'll want to use the Rocktape website to find out how to apply the tape to your specific injury. Round the corners of the tape with scissors, and then apply the tape to your skin without stretching either end of it.
Steps
Planning the Application
-
1Ask someone to help you apply the Rocktape for best results. Even if you’re applying the tape to an area you can easily reach, such as your leg, you’ll likely need to position your body a certain way before the tape is applied. Ask a friend or family member to help you apply the Rocktape, or ask your doctor to do it if necessary.
- For example, if you’re applying Rocktape to your ankle, you may need to be laying horizontally with your ankle slightly propped up, so you would need someone to help you with the tape.
-
2Plan to apply the Rocktape 1-2 days before exercising. Rocktape lasts for about 3 days, so you don’t need to wait until right before you exercise to apply it. Put it on a day or 2 before you’ll be strenuously exercising so that the tape has more time to start helping your body.
- If you do put it on before exercising, make sure you apply it at least 20 minutes beforehand.
Advertisement -
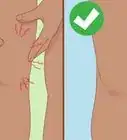
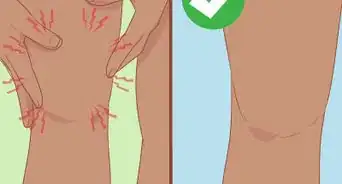
3Apply Rocktape to clean, dry skin. Shower before applying the Rocktape to ensure you’re not sweaty and don't have dirt on the area that the tape will be stuck to. Make sure the area is completely dry before applying the tape so that the adhesive stays on well.[1]
-
4Find the application instructions for your specific injury. You can do this by visiting the Rocktape website at https://www.rocktape.co.uk/how-to-use/. Since the way you apply the tape will depend entirely on which area of your body is being treated, use the site to choose your specific injury area from the drop down menus.[2]
- For example, click on “Arm” and then “Shoulder Swelling” to be taken directly to the video on how to apply Rocktape to a swollen shoulder.
- There are over 30 injury options with videos that show you how to apply the tape, ensuring that you get the right care for your injury.
- You can also look on YouTube for helpful Rocktape application videos, if necessary.


Positioning the Tape
-
1Cut the tape to the appropriate length and round the corners. The instructional video will tell you how long the strip of Rocktape should be. Use scissors to cut the strip and then round the edges so that the corners don’t catch on clothing, sheets, or anything else that they might touch.
- Creating a rounded edge with the scissors is important so that the tape doesn’t peel off easily.
-
2Tear the paper off at one end of the tape. Create a tear in the paper covering up the Rocktape’s adhesive, roughly 1–2 inches (2.5–5.1 cm) away from one of the ends. Remove the paper covering the shortest end, and fold the other side of the paper over so that it’s ready to be pulled off.[3]
- Once you remove the paper, avoid touching the sticky part of the tape with your hands.
-
3Stick the paper-free end onto your skin without stretching it. You want the end of the piece of Rocktape to stick to your skin without having any tension in it, so don’t stretch the end section of adhesive when you apply it. Place the end of the tape, sticky side down, onto your skin in the spot according to your specific injury.[4]
- The Rocktape instructional video shows you exactly where to place the first end of Rocktape for your injury.


Adhering the Tape
-
1Pull off the paper as you apply the Rocktape to your skin. If you folded over the paper that’s still attached to the Rocktape, you can easily pull this off slowly while using your other hand to guide the Rocktape onto your skin. Pull the paper until it’s completely off.[5]
- It’s okay to stretch the middle section of the Rocktape.
- The instructional video will show you exactly how to position your piece (or pieces, if your injury requires more than one) of Rocktape across your body.
-
2Apply the last 1–2 inches (2.5–5.1 cm) of tape without stretching it. Make sure you don’t stretch the other end of the Rocktape as you adhere it to your skin, just like you did with the first end. This ensures that the tape remains in place on your body and will be able to work properly.[6]
-
3Rub the tape with your hands so that it’s completely adhered. Once the piece of Rocktape is placed on your body properly, gently use your hands to rub the tape in circles. This helps the adhesive stick to your skin even better and prevents any section of the tape from coming loose from your skin.[7]
- It takes Rocktape 20 minutes to fully adhere to your skin.
-
4Peel an end of the tape off gently to remove it. Peel up a rounded edge of the Rocktape and start to slowly peel it off of your skin, holding the strip close to your body as you pull. If you end up with sticky residue from the tape still left on your skin, rub the sticky side of the tape you just removed on the residue to help remove it.[8]
- If you're trying to remove the tape from a sensitive area, rub massage oil around the edges before peeling it off.


References
- ↑ https://www.youtube.com/watch?v=WIbmiaNBKsk
- ↑ OrthoNOW. Orthopedic Professionals. Expert Interview. 13 July 2021.
- ↑ https://www.youtube.com/watch?v=WIbmiaNBKsk
- ↑ https://www.youtube.com/watch?v=WIbmiaNBKsk
- ↑ https://www.youtube.com/watch?v=WIbmiaNBKsk
- ↑ https://www.youtube.com/watch?v=WIbmiaNBKsk
- ↑ https://www.youtube.com/watch?v=WIbmiaNBKsk
- ↑ https://www.youtube.com/watch?v=WIbmiaNBKsk#t=3m58s
About This Article