This article was co-authored by Sina Kamran and by wikiHow staff writer, Janice Tieperman. Sina Kamran is a Hardscaping Specialist and the Owner of Design Scapes, Inc. in Santa Monica, California. With over 15 years of experience, he specializes in customized, site-specific hardscaping and landscaping design/build projects. He's a certified National Concrete Masonry Association (NCMA) designer, a certified installer with the Interlocking Concrete Pavement Institute (ICPI), and a Rain Bird Certified Irrigation Professional. Additionally, Design Scapes, Inc. has many 5-star rated reviews.
There are 11 references cited in this article, which can be found at the bottom of the page.
This article has been viewed 11,532 times.
Slow-release fertilizer is a useful supplement that nourishes your lawn and garden over several months. Unlike its quick-release counterpart, slow-release fertilizers come in “coated” or “slowly-soluble” varieties that help the substance dissolve more slowly into the soil.[1] After checking the conditions of your lawn, use a broadcast spreader to apply nitrogen-rich fertilizer around your lawn and perennial plants. With the proper research and preparation, slow-release fertilizer could be a great addition to your yard!
Steps
Choosing the Right Fertilizer
-
1Test your soil to see what nutrients it needs. Use an at-home testing kit see which nutrients are present in your soil, or send a sample over to the agricultural department of your local university. Study the results of the test to see if your soil is naturally high in nitrogen, phosphorus, or potassium. If your lawn or garden is naturally high in a certain nutrient, you might not need to use a fertilizer that contains a lot of that substance.[2]
- If there aren’t any local colleges in your area, see if there’s a laboratory nearby that would be willing to test your soil.
- Home improvement stores also sell soil test kits for $15.
- If you’re using containers in your garden, test an area of soil that you plan to use in your pot or planter.
-
2Measure the area of your lawn to know how much fertilizer to buy. Take a tape measure and stretch it across the length and width of your yard. Jot down the measurements on a scrap piece of paper, so you can quickly calculate the total square footage of your yard. Divide your yard’s square footage by the total weight of a fertilizer bag to determine how much product you need for your property.[3]
- If you’re working with a small pot or container, sprinkle a small amount of fertilizer over the surface of the soil.
- If you own a large piece of property, try using blueprints to determine the total area.
Tip: Use a measuring tape to measure the square footage of your yard. Next, check your bag of slow-release fertilizer to see how much area it covers. For instance, if you have a 36 lb (16 kg) bag of fertilizer that covers 2,500 square feet (230 m2) of yard, solve this equation: 36 divided by 2.5. This will tell you that you need 14.4 lb (6.5 kg) of fertilizer per 1,000 square feet (93 m2). If your yard is 3,000 square feet (280 m2), you’ll need two 36 lb (16 kg) bags of fertilizer.
You need to use 2.5 instead of 2,500 to get a non-decimal result from the equation.
Advertisement -
3Choose organic fertilizers to be environmentally friendly. Look for slow-release fertilizers that are made with plant, animal, and mineral ingredients. If you’re looking for an eco-friendly alternative for your yard, search for fertilizers with ingredients like fish emulsion and blood meal. Since organic fertilizers come in the form of water insoluble pellets, you don’t have to worry about them dissolving with water.[4]
- Synthetic fertilizers are made with chemicals, and often include ingredients like urea and ammonium nitrate. While these slow-release products tend to work more quickly than organic fertilizers, they have a higher risk of burning your plants and vegetation.
-
4Select a fertilizer with the proper ratio of nitrogen, phosphorus, and potassium. Check the label of your fertilizer bag for 3 numbers with dashes in between them, which indicate the amounts of nitrogen, phosphorus, and potassium that are in the formula. While 3-1-2 is the standard NPK ratio used in slow-release fertilizer, your lawn or garden might need different amounts of nutrients to supplement the soil properly.[5]
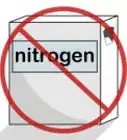
- If your soil is high in phosphorus, use a slow-release fertilizer with a 20-5-10 label. If your soil is high in nitrogen or potassium, choose fertilizers with lower amounts of these nutrients, like 4-6-0.
- If you’re planting sweet corn, use a fertilizer with a 2-2-1 NPK ratio. Vegetable gardens do best with a 1-1-1.[6]
- Check the needs of the specific crop you’d like to plant before purchasing a fertilizer. If your soil contains a high level of a specific nutrient, consider using containers and pre-purchased soil to plant your crops.
-
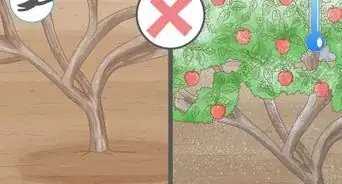
5Choose a “3 to 4” or “5 to 6” month fertilizer. Before purchasing any fertilizer, examine the label of the bag to see how long the product will deliver nutrients to your lawn. If you’re planning on adding any extra flower or lawn food to your yard, choose a 3 to 4 month fertilizer. If you’re only planning on fertilizing your lawn once, choose a bag with a longer time label.[7]
- If you’re a casual gardener or homeowner, you might prefer the 5 to 6 month product.


Sowing Fertilizer with a Broadcast Spreader
-
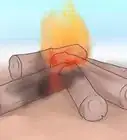
1Spread your fertilizer in spring when your soil is consistently 55 °F (13 °C). Plan ahead so you can stay on top of your landscaping and gardening schedule. For your slow-release fertilizer to be the most effective, aim to spread it out at some point in April. Place a soil thermometer into several inches or centimeters of your soil to get a read on the current conditions. Since slow-release fertilizer doesn’t work well in cold conditions, check that your lawn and/or garden soil is at least 55 °F (13 °C).[8]
- Long-term fertilizers take the stress out of tending your yard in the summer months.
- If your lawn hasn’t quite reached this temperature yet, monitor the soil over several days or weeks to take note of any changes.
- If you’re planning on touching or scooping any fertilizer or soil with your hands, be sure to put on gardening gloves beforehand.[9]
-
2Place a broadcast spreader on a piece of tarp. Take a section of tarp that’s at least 3 by 3 feet (0.91 by 0.91 m) and place it on your driveway. Center the device on top of the tarp sheet, so fertilizer granules don’t litter the surrounding area. If you’re treating an area that’s less than 2,500 square feet (230 m2), consider using a hand-powered broadcast spreader, which doesn’t take up as much space.[10]
- You can purchase a broadcast spreader at your local home improvement or lawn care store. Handheld spreaders go for $10 and up, while larger ones go for $30 or more.
- Handheld spreaders are best for yards that are smaller than 2,500 square feet (232.26 m2).
Did you know? Drop and broadcast spreaders are the main pieces of fertilizing equipment on the market. Broadcast spreaders are the better option since they spread the product more evenly. Drop spreaders are also a lot more expensive.
-
3Fill your spreader with fertilizer granules. Use your yard calculations to pour the necessary amount of slow-release granules into the spreader. Depending on the size of your yard, you might need refill your spreader later on. Before adding any product to the device, check that the bottom slot is closed—if it’s open, your fertilizer will start spreading onto the tarp and surrounding area.[11]
- You need to fill any type of fertilizer with granules before conditioning your lawn.
- The bottom slot of a fertilizer spreader is similar to a salt shaker. Twist it to the left or right to keep the spreader open or closed.[12]
-
4Push the spreader in a grid-like pattern at a 3.5 miles per hour (5.6 km/h) pace. Start along the edge of your lawn, working the spreader in a straight line. Once you reach the opposite edge of your yard, rotate the device 180 degrees and begin pushing the spreader in a straight line again. Try to keep your fertilizing tracks lined up, as though you’re forming a grid-like pattern on your lawn. As you go, work at a consistent brisk walking pace so your fertilizer can be spread evenly.[13]
- Follow the same path that you would if you were using a walk-behind lawn mower.
- It’s always better to apply less fertilizer than too much.
-
5Sweep up any stray fertilizer granules with a broom. Check the edges of your yard for any stray granules. Next, use a broom and dustpan to sweep up any extra pieces of fertilizer that littered your driveway or sidewalk. Take your collected granules and pour them back into the fertilizer bag, so you can use them later.[14]
- While some slow-release fertilizers come with a coating, you still don’t want to leave this product on the ground for a long period of time. When spread through run-off, fertilizer can be harmful to the environment.
-
6Pour any extra fertilizer back into the bag. Secure the bottom of your spreader so no granules leak out. Next, tilt your spreader over the opening of the fertilizer bag to return any excess product. Once you’ve done this, securely shut the bag and store it in a cool, dry area.[15]


Adding Fertilizer by Hand
-
1Put on gloves before touching the fertilizer. Whether you’re using organic or synthetic fertilizer, protect your skin by not making physical contact with the gardening product. Slide on a pair of gardening gloves to prevent contaminating yourself with tetanus, Salmonella, and E. Coli.[16] For optimal results, wait for the soil to reach a temperature of 55 °F (13 °C) consistently.[17]
- If you don’t have a pair of gardening gloves on hand, purchase a pair at your local hardware or home improvement store.
- Apply fertilizer by hand if you’re covering less than 2,500 square feet (230 m2).
-
2Sprinkle slow-release fertilizer around individual perennials. While wearing gardening gloves, layer a few spoonfuls of fertilizing granules in a circle around the roots of your flowers and other perennials. Try not to place any fertilizer directly on top of the plant, as this will damage your perennials over time.[18]
- If the slow-release fertilizer doesn’t have an impact on your plants after several weeks or months, try using a liquid plant feed to nourish your perennials instead.
- Check the fertilizer bag’s label for instructions regarding specific plants and perennials.
-
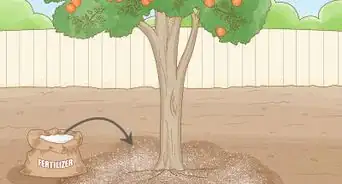
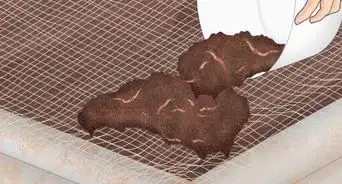
3Arrange fertilizer around the base of shrubs and perennials. Scoop out a handful of slow-release granules and scatter them along the base of the plant. Focus on covering as much soil as possible, without covering the actual shrub or perennial plant with fertilizer. Continue spreading the product over the soil until you’ve covered the roots, or until you reach the drip line.[19]
- Drip lines exist along the edge of drip irrigation systems.
-
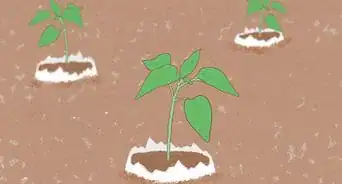
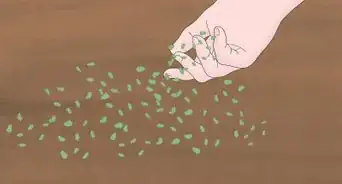
4Spread slow-release fertilizer next your vegetable plants. Walk along the edge of your vegetable garden to identify the strips of soil where the seeds are planted. Look to the empty soil gap that runs in a parallel line to your vegetable seeds. Using your hands, scoop out a handful of fertilizer and spread it along the parallel gap of soil next to the planted seeds.[20]
- You don’t need to apply too much fertilizer. Instead, just apply enough to cover the soil gap in the garden.


Things You’ll Need
Choosing the Right Fertilizer
- Soil test kit
- Measuring tape
- Slow-release fertilizer
Sowing Fertilizer with a Broadcast Spreader
- Soil thermometer
- Tarp
- Broadcast spreader
- Handheld spreader (optional)
- Slow-release fertilizer
- Broom and dustpan
Adding Fertilizer by Hand
- Gloves
- Slow-release fertilizer


-Step-10-Version-3.webp)


References
- ↑ https://www.tbep.org/how_you_can_help-lawn_fertilizer_and_tampa_bay-time_it_right:_use_slow-release_fertilizer_in_spring_and_fall.html
- ↑ https://chatham.ces.ncsu.edu/soil-testing-for-lawns-and-gardens/
- ↑ https://m.youtube.com/watch?v=qMJf4m82VcI&t=2m43s
- ↑ https://www.bobvila.com/articles/types-of-fertilizer/
- ↑ http://agebb.missouri.edu/fertcalc/
- ↑ https://www.bobvila.com/articles/types-of-fertilizer/
- ↑ https://www.canr.msu.edu/news/fertilizing_established_perennial_gardens_feed_em_and_weep
- ↑ https://www.popularmechanics.com/home/lawn-garden/how-to/g237/the-quick-and-easy-guide-to-fertilizing-your-lawn/
- ↑ https://imb.uq.edu.au/article/2018/01/least-five-reasons-you-should-wear-gardening-gloves
- ↑ https://www.popularmechanics.com/home/lawn-garden/how-to/g237/the-quick-and-easy-guide-to-fertilizing-your-lawn/
- ↑ https://www.popularmechanics.com/home/lawn-garden/how-to/g237/the-quick-and-easy-guide-to-fertilizing-your-lawn/
- ↑ https://m.youtube.com/watch?v=aIfmaxfJVzk&t=29s
- ↑ https://m.youtube.com/watch?v=aIfmaxfJVzk&t=1m22s
- ↑ https://www.popularmechanics.com/home/lawn-garden/how-to/g237/the-quick-and-easy-guide-to-fertilizing-your-lawn/
- ↑ https://www.popularmechanics.com/home/lawn-garden/how-to/g237/the-quick-and-easy-guide-to-fertilizing-your-lawn/
- ↑ https://imb.uq.edu.au/article/2018/01/least-five-reasons-you-should-wear-gardening-gloves
- ↑ https://www.popularmechanics.com/home/lawn-garden/how-to/g237/the-quick-and-easy-guide-to-fertilizing-your-lawn/
- ↑ https://www.canr.msu.edu/news/fertilizing_established_perennial_gardens_feed_em_and_weep
- ↑ https://www.finegardening.com/article/fertilizing-basics
- ↑ https://www.finegardening.com/article/fertilizing-basics
- ↑ https://chatham.ces.ncsu.edu/soil-testing-for-lawns-and-gardens/
About This Article