X
wikiHow is a “wiki,” similar to Wikipedia, which means that many of our articles are co-written by multiple authors. To create this article, 12 people, some anonymous, worked to edit and improve it over time.
This article has been viewed 52,657 times.
Learn more...
You have your dream cabin on the lake or in the woods, but it does not have kitchen cabinets. Perhaps it does have some, and they are so bad you will not agree to use them. Unfortunately, your budget doesn't allow for custom cabinets to be built. That just leaves one option - to build inexpensive kitchen cabinets yourself.
Steps
-
1Draw up a plan. Never wing it, even for your own cabinets, without a plan of some kind.
- Measurements from the original cabinets (if possible) or even from a set of drawings from an Internet site are a good place to start.
- Don't try to build the kitchen cabinets with just an idea of how to do it. You will have a multitude of failure and frustration if you do.
-
2Choose materials that fit your budget and cabinet style. The ultimate secret to success begins with watching your material costs.
- The case, doors, drawers and shelves of the cabinets can easily be made of plywood or MDF (medium density fiberboard) to save money. You can opt for higher quality wood options if your budget allows.
- Hardware can also be a budget buster if you are not careful. An example of this would be your using traditional cabinet door hinges and making drawer slides yourself by using them for guides.
Advertisement -
3Cut the sheet goods and framing materials to the dimension specified in your plans.
- Cut a rabbit on the back side of the case to the depth of the plywood backing before assembly.
- Build two cases to fit on either side of the sink and bridge across them if the section of cabinet has a kitchen sink. You need it to have a case open at the back. This way you have access to water and drainage.
-
4Assemble the cases and frame with finishing nails plus glue. Counter-sink the nails with a nail punch then fill with wood putty. Be sure that the case remains square by measuring from one corner to the opposite (front and back).
-
5Adjust accordingly if the measurements do not match.
- Hang the doors following the manufacturer's instructions for the hinges you have chosen.
- Install and adjust the drawers so they slide easily. Follow the manufacturer's instructions for metal drawer slides.
-
6Paint or stain and varnish the drawers after sanding all exposed surfaces. Be sure your finish is water resistant if you are painting with interior enamel.
-
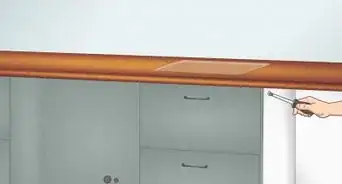
7Install the cabinet's bottom case. Slide it up against the back wall and check to see how straight it fits. Use scrap wood wedges to fill gaps between the back of the case and wall if needed. Fasten deck screws into the wall to secure the bottom case. Make sure the bottom cabinet is level. Adjust the bottom as needed.
-
8Hang the top cabinet using a "French cleat" to make the job easier. This is a board that has been split down the middle at a 45-degree angle.
- One piece attaches across the cabinet open back with the angled part turned inward.
- Square the top of the cleat to the side of the cabinet. Attach the second piece to the wall with deck screws fastened to wall studs. Turn the leveled and the angled section toward the wall. Set the cleat attached to the cabinet on top of the cleat attached to the wall.
- The top cabinet should be level and ready to attach to the wall studs with deck screws.
-
9Buy the cabinet top from your local home improvement store to save yourself a lot of grief. They will probably have the length you need in stock. It will be quicker and easier if you just buy it - unless you are familiar with Formicas, tile or some other inexpensive top covering. A cabinet top takes a lot of abuse during its lifetime. This is particularly true if a sink is to be installed.
-
10Finished.


Advertisement
Warnings
- You need to take extra care in sealing the material when you paint it if you choose to use MDF. MDF is sensitive to prolonged moisture exposure. It is subject to sagging and will come apart. Plywood has much less of a problem.⧼thumbs_response⧽
- Keep in mind that a shelf should not be longer than 32 inches (81.8 cm) in length when building the section of cabinet where you will have shelves. Anything longer than this, and they could sag under the weight.⧼thumbs_response⧽
Advertisement
Things You'll Need
- Sheet goods (plywood or Medium Density Fiberboard)
- Pine or white wood for face frames
- Finish nails (8P and 10P)
- Deck screws 3 inch ( 7.6 cm) minimum
- Wood putty
- Cabinet door hinges
- Cabinet door latches
- Door and drawer handles
- Finish materials (exterior grade enamel or stain and varnish)
- Plywood edging
- Circular saw
- Miter saw
- Power drill/driver
- Router with round-over bit and rabbit straight bit
- Hammer
- Finish nail punch
- Table saw
- 2 foot (60.96 cm) level


References
About This Article
Advertisement


