X
wikiHow is a “wiki,” similar to Wikipedia, which means that many of our articles are co-written by multiple authors. To create this article, volunteer authors worked to edit and improve it over time.
This article has been viewed 8,356 times.
Learn more...
Building a sky house in Minecraft solves many problems - the ultimate protection from monsters, a comfy place to sleep in, craft in, and store things in, and just something you can show off to your friends. So why not build a sky house? Don't know how? Well, you've come to the right place!
Steps
Part 1
Part 1 of 5:
Obtaining the Building Materials (Survival Mode Only)
-
1Gather Dirt. You can find Dirt practically anywhere and obtain it easily; just destroy some Grass blocks with your hands or a Shovel (preferably Stone or better) without Silk Touch. Dirt is one of the most common items in Minecraft, so it should be easy to gather a few blocks.
-
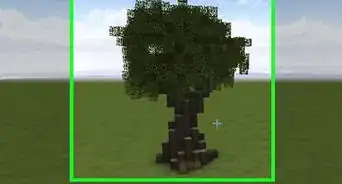
2Gather Wood. Wood is obtained from Trees. You can use your hands or an Axe (Stone or better for the fastest results).
- After gathering Wood, craft them into Wood Planks.
Advertisement -
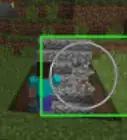
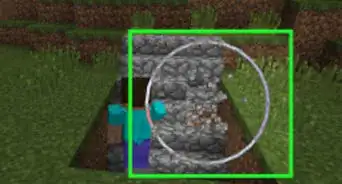
3Gather Cobblestone. You will need a Pickaxe without Silk Touch (as always, Stone or better) to obtain Cobblestone. You must first dig a few blocks down, and you should run into a gray block - Stone. Then, use your Pickaxe to mine the Stone, and you will obtain a block of Cobblestone.
- You can also make a Cobblestone Generator (using Lava, Water, and Glass) to obtain Cobblestone.
- If you want to use pure Stone, use a Pickaxe with Silk Touch.
-
4Craft Torches. Torches require Sticks and Coal/Charcoal. You can obtain Sticks by visiting a Crafting Table and using a few Wood Planks. Coal can be found in cliffs, caves, and anywhere where lots of Stone is exposed. Coal looks like a normal Stone, except with some black flecks. Use Coal and Wood Planks to make Torches.
- If you can't find any Coal, consult this article.
-
5Craft Beds. You will need Wool (obtained by killing or shearing Sheep) and Wood Planks.
- Prior to 1.12, it is possible to make colored beds. Just change the colors of the Wool. Experiment with colors to discover which one you like best!
-
6Craft Glass. You'll need a Furnace, fuel (Coal, Charcoal, Wood), and Sand. Put the fuel in the bottom part of the Furnace and Sand in the top, and eventually, you will get Glass.
- Glass Panes look less blocky and are thinner than just plain Glass, so you can use that instead if you want to.
-
7Craft Ladders. You will need seven sticks to craft 3 ladders.
-
8Craft Stairs. There are several materials available to craft stairs. Just a few choices are:
- Bricks
- Cobblestone
- Quartz
- Sandstone
- Stone
- Wood
-
9Craft a Lever. Crafting Levers is fairly inexpensive - you'll only need Cobblestone and some Sticks.
-
10Craft Brick Blocks. They are made by putting Clay in a Furnace and then crafting the Brick Blocks by using 4 Bricks.
-
11Obtain Netherrack. Netherrack can be found in the Nether.
-
12Craft a Flint and Steel. You will need Flint and an Iron Ingot - rather inexpensive.
-
13Craft an Iron block. Iron blocks are slightly expensive, requiring 9 Iron Ingots.
-
14Craft a dispenser. Dispensers need seven Cobblestone, one Bow, and Redstone.
-
15Craft an Iron Door. You will need six Iron Ingots to craft one.
-
16Craft a Button. Buttons are inexpensive to make, requiring only either Wood Planks or Stone.
-
17Craft a Cauldron. Cauldrons require 7 iron ingots.
-
18Obtain a Bucket and fill it with Water. Buckets need 3 Iron Ingots to make.
-
19Craft a Tripwire Hook. You will need an Iron Ingot, a Stick, and a Wooden Plank.
-
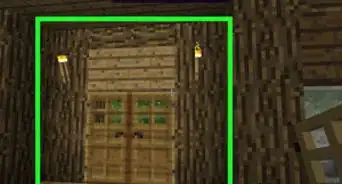
20Craft a non-Iron Door. You'll need approximately six blocks of Wood Planks to craft a non-Iron Door.
-
21Craft a Fence. You can craft Fences using Wood Planks and Sticks, or Nether Brick. You can also find Fences in Abandoned Mineshafts, Villages, Witch Huts, Nether Fortresses, and even Strongholds.


-Step-6.jpg)


Advertisement
Part 2
Part 2 of 5:
Building the Basic Outline
-
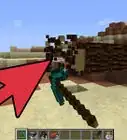
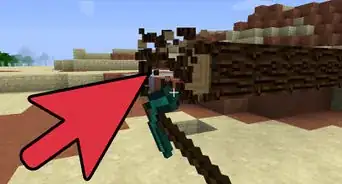
1Build a pillar of the Dirt you've gathered. To do this, place a Dirt block down and jump on it. Then move the crosshairs so they point down at the Dirt block. Jump and, in midair, place a block. Do this continuously until you have a pillar of Dirt at least 22 blocks high. If you are on Survival mode, you can survive a height of up to 22 blocks if you have full health (at 23 blocks up, you will receive enough damage to kill you unless your armor has Feather Fall.) You may continue to build up if you want to, though.
- On Creative mode, you can fly while placing the blocks instead of having to jump and place the blocks, meaning a less tedious experience.
-
2Build a platform. Crouch, so you will not fall off the side of the pillar, then build out from your pillar by placing blocks on all edge sides.
- Remember the size of the platform contributes to the size of the house. If you have a tiny platform, you will end up having a tiny house. If you have a gigantic platform, you will have a gigantic house.
-
3Add Ladders to the pillar of Dirt. Once you've finished the platform, add Ladders to either side (or both) of the Dirt pillar. This will provide you with a way to move to and from your house.
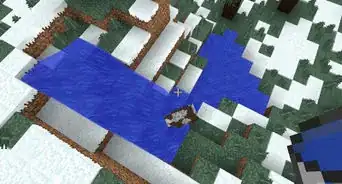
- You can use two Water Buckets to place Water streams on either side of the Dirt Pillar, providing you with yet another way to climb to and fro. You can also use Vines or Stairs.
-
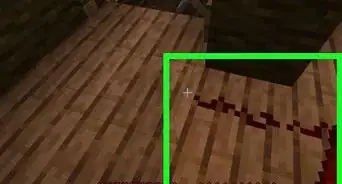
4Build the outside of the house. You can use any material you'd like, but non-flammable materials and/or materials with high blast resistance work best.
- The roof of your house can be from two blocks high to slightly over 250 blocks high. Note that Endermen can spawn/teleport/enter your house if the roof is over 2 blocks high. You can also put Slabs on the floor, but that takes time if your house is very large and it only prevents Endermen from spawning and teleporting inside the house and does not prevent them from walking inside the house.
- Your house can be any size. If you want, your house could be 2x2, or your house could be 1000x1000. Just remember that the size of the house must correspond with the size of the platform!


Advertisement
Part 3
Part 3 of 5:
Adding Decor
-
1Decorate the living room.
- Make couches and chairs. On the edges of the living room, place a line of Stairs in a row and two Signs on each side for a couch. For a chair, place a single Stair and then a Sign on each of the sides.
- Make a TV. Place two blocks of black stained Clay in the center of the living room, and then two blocks of Clay on top of them. Add a Painting over each side of the Clay. Near the TV, place a block and then a Lever on top of it. This will be your TV's remote.
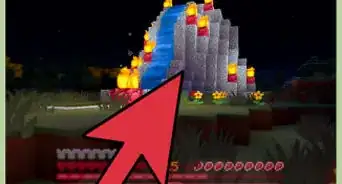
- Make a fireplace. Fill the remaining spaces of the living room with Brick Blocks. Then, in the center of the Bricks, dig a space that is one block wide and one block deep. Place Netherrack in the space, and then light the Netherrack with some Flint and Steel. As of 1.14, you can replace the Netherrack with a Campfire, or dig a hole two blocks deep, fill the second (deepest) block with a Hay Bale, and then a Campfire, to increase the smoke that is generated by the Campfire.
-
2Decorate the kitchen.[[Image:Make-a-Kitchen-in-Minecraft-Step-14.jpg}center]]
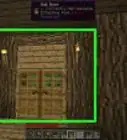
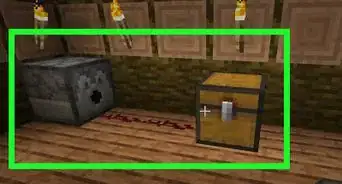
- Make a refrigerator. Place an Iron Block and then a Dispenser (loaded with food) on top of the Iron Block. Then place a button on either side of the Iron Block and an Iron Door on the Iron Block as well.
- Make a stove. Place Gray Wool (or another solid block) where you want the stove to be. Place a Button on the front side of the "stove," and then place a Trapdoor on top of the stove and close it. You can also simply use a Furnace to make a stove that functions.
- Make counters. Against one side of a wall, place a block of White Concrete or White Wool, and then a block of Black Concrete or Black Wool, then a block of White Concrete/Wool, and then a block of Black Concrete/Wool. Continue the pattern until the counter reaches the other side of the wall.
- Make a microwave. Place a block of Polished Andesite on a counter block, then close a Trapdoor over the Andesite.
- Make a sink. Place a Cauldron where you want the sink to go. You can fill it with a Water Bucket and then place a Tripwire Hook above the Cauldron.
- Make a table and chairs. Put a Fencepost on the ground and a Pressure Plate on top. This will be a table. Then place a line of Stairs down and place a Sign on each side of the Stairs. This will be your chairs.
- Make lights. There are two good methods for building lights. You can place two Fence posts on top of each other, and then a Sea Lantern on top. You can also dig a one-block-wide and three-block-long hole, and fill it with Glowstone.
-
3Decorate the bedroom.
- Make the beds. Place two Beds next to each to each other, and then two White Wool blocks behind the Beds, for pillows. You can make the number of Beds larger or smaller if you want to.
- Make the desk. Place a Fencepost down near the Beds, and Wool Carpet on top. You can add Stairs next to the desk.
- Make the closet. Place two Fence posts on top of each other, and then two Doors (non-Iron) on the sides. You can also replace the Fence posts with Bookshelves.
-
4Decorate the dining room.
- Make the table. Dig two blocks down and fill the bottom with Redstone Torches and then Pistons on top.
- Make the chairs. Place Stairs around the Pistons.
-
5Decorate the bathroom.
- Make the toilet. Stacks two solid blocks on top of each other (Iron Blocks are recommended) and then, in front of the blocks, a Cauldron filled with Water. If you're feeling mischievous, you can dye the Water yellow or brown using Dye.
- Make the sink. Place a Cauldron filled with Water, with a Tripwire Hook above it. Be careful, because the sink may not distinguish well with the toilet, so you may want to put a Sign nearby the sink reading something like "Sink."
- Make the shower. Dig out a hole in the ceiling and replace it with a Sticky Piston. Behind the Sticky Piston, create a small room (sealed, but make sure there is a space that allows you to access the Sticky Piston) and link a Lever with the Piston. Then fill the room with Water. If you did it right, you should be able to turn the Water on and off via the lever. To avoid flooding the bathroom, surround the shower's base with Slabs or solid blocks.
- Make the bath. Make a line out of solid blocks across the area you want the bath to be one block higher than the floor. Dig a block deep under the line and fill the hole with Water. You can make the Water deeper or shallower.


Advertisement
Part 4
Part 4 of 5:
Finishing off the House
-
1Decorate the front lawn. If you built your house at the edge of the sky island, increase the total of the island perimeter by at least 6 blocks, maybe even 7 or 8. Now add Flowers, Trees, and Grass to the front of the house (make sure not to use Tall Grass, or your lawn will have an overgrown look). Make sure to have some Bonemeal on hand! You can even make a driveway, mailbox, and garage if you want your front lawn to look extra spiffy.
-
2Make a backyard. Fill a small (or large) space with Flowers and Grass (if your backyard is extra-large, you can add a few Trees). Then, square in the borders of the backyard with Fence posts.
-
3Build a shed. The shed should be nearby your house and should be small, no bigger than 10 blocks. The shed will hold most of your valuable storage in case that dreaded Creeper comes along (or a griefer).
-
4Place walls around your property. Use Tree Leaves for bushes (only much less gnarly and prettier). You can obtain Tree Leaves by using Shears. Stack two blocks of Tree Leaves on top of each other and continue the pattern until the "bushes" cover the entire property. Make sure that a small area is open for someone to enter.
-
5Make sure your house is well-lit. You don't want monsters roaming around your property, now do you?


Advertisement
Part 5
Part 5 of 5:
Inviting Others
-
1Open your game to Multiplayer. If Multiplayer is set to "off," switch it to "on." Some players will switch multiplayer off while they are building the world, and this is fine. But after your house is finished, you may want more players. After you are finished, go to Settings and switch Multiplayer on.
-
2Avoid Friendly Fire. Never switch "Friendly Fire" on, unless you want death and destruction in your world. Players will eventually leave if Friendly Fire is left on because players can attack others and possibly get away with it.
-
3Take it easy with other players' control of the world. On the first game, switch their control of the game to "Visitor" (especially if you don't know the person or if they're just beginning Minecraft). If they feel angry/sad/irritated about this, simply talk with them (face-to-face or in the chat page) or switch their control back to "Member."

Advertisement
Warnings
- Be careful with trusting unknown players with anything. There's no way to tell what they might do in your world!⧼thumbs_response⧽
Advertisement


.webp)
About This Article
Advertisement