This article was co-authored by John Jess. John Jess is a Dog Breeder and the Founder of Central Illinois Doodles, a family business located in Arthur, Illinois. He specializes in breeding Goldendoodles and Bernedoodles. Central Illinois Doodles has been named one of the Top 10 Bernedoodle breeders in the United States by Bubbly Pet and Pupvine. They’ve also been named one of the best Goldendoodle breeders by Trending Breeds and Devoted to Dog.
This article has been viewed 81,033 times.
Whelping mothers need to be contained with their puppies in the one area for a few weeks after birth. The best way to contain the puppies and the mother is by placing them in a whelping box. While you can buy a whelping box at the local pet store, it's easy and cheap to build a whelping box at home. The design is simple but effective for whelping mothers. It allows them to enter and exit the box whenever they like.
Steps
Cutting the Plywood
-
1Slice your .75 inches (1.9 cm) thick sheet of plywood in half. The plywood sheet should be 4 feet (1.2 m) by 8 feet (2.4 m) starting out. Use a pencil and ruler to mark the halfway point on the sheet of plywood. You can use either a hand saw or circular saw to slice through the sheet.
- You can ask at the lumber yard or home center where you bought the plywood if they can cut it for you.
-
2Keep a 4 feet (1.2 m) square of plywood for the floor. After you've cut the plywood sheet, cut it again to make this 4 feet (1.2 m) square. This square will form the basis for the floor of the whelping box.[1]Advertisement
-
3Cut 3 strips, each 4 feet (1.2 m) long and 16 inches (41 cm) wide. These strips will form the outside walls of the whelping box later in the process. Use your pencil and ruler to outline the size of the strips on the plywood before you cut the strips.
-
4Make a strip 1 in (2.5 cm) thick, 4 ft (1.2 m) long, and 1 ft (0.30 m) wide. This strip will be the doorway which the mother of the puppies can use to enter and exit the whelping box. Once again, mark the outline of this strip with a pencil and ruler before you cut it.
- Make the doorway a couple of inches taller for larger breeds.


Constructing the Box
-
1Cover the 4 feet (1.2 m) square with self-adhesive contact paper. Lay your contact paper out beforehand and measure it. Use a ruler to measure the contact paper and mark the measurements with a pencil. Cut the sections of contact paper using scissors.[2]
- Lay the contact paper on the plywood square and use your fingers to stick it to the wood.
- Remove any air bubbles in the contact paper by rubbing it with your palms.
-
2Secure the contact paper to the plywood with a staple gun. The self-adhesive contact paper should stick to the plywood itself. Even if the contact paper seems secure, it might lift up and the puppies could chew on it. Use the staple gun to secure the contact paper to the floor of the whelping box. Staple as close to the sides of the floor as you can.
- Place staples between 2 different pieces of contact paper if you want extra security. Aim the staple gun so the staple pierces the edge of one piece and the edge of another, binding them.
-
3Place the 3 4 feet (1.2 m) long strips along the sides of the floor. Make sure you line the strips up perfectly with the floor of the box. These strips will form the 3 walls of the whelping box.
- When you're finished, the 3 strips should form a "U" shape along the sides of the floor.
-
4Drill holes in the walls and floor with a 1.5 inches (3.8 cm) drill-bit. If you need to, have someone stand on the plywood floor and hold each wall as you drill the holes into the plywood. Drill holes at the corners of each wall and another hole in the center of each wall.[3]
- When you're finished, each wall should have a hole at its left and right sides and another hole in the middle.
-
5Attach the walls to the floor using 1.5 inches (3.8 cm) screws. Use your screwdriver and screws to secure the walls to the floor of the whelping box. Turn the screws to the right to secure them in place. Keep turning the screwdriver until it's very difficult to keep turning it.[4]
- When all the screws are in place, pull and push on the walls with a medium amount of force. If they rattle or feel insecure, use the screwdriver to tighten the screws.
- You might need to drill extra holes between the middle screws and the outside screws in each wall if the walls aren't secure enough. Use the screwdriver to place the screws in these holes.
-
6Line the doorway strip up and secure it to the floor with screws. Again, drill holes in the left side, middle, and right side of the doorway strip when you have it lined up with the floor of the whelping box. Use your screwdriver and 1.5 inches (3.8 cm) screws to secure the doorway strip to the rest of the whelping box.[5]
- If the walls needed extra holes and screws to be adequately secured, do the same with the doorway strip.


Positioning and Maintaining Your Whelping Box
-
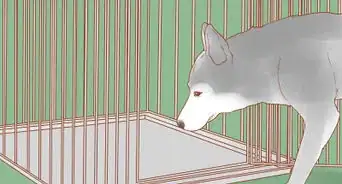
1Place the box in a quiet location in your house. While your bitch is whelping, you'll need to be able to keep a constant eye on her and her puppies. It's vital that your bitch and her puppies have the space to sleep and relax. If you have kids, you'll need to put your whelping box in a place where your dogs won't be frequently disturbed.[6]
- An easily accessible location in the house is the best place for the box.
- The basement, garage, attic, and laundry room are all suitable places for your whelping box.
-
2Make sure the temperature of the room suits your dog. Some breeds are double coated, such as Huskies and German Shepherds. These dogs will be more comfortable in cooler rooms such as the attic or garage. If the weather is warm, use a fan or air-conditioning to cool your dogs.[7]
- On the other hand, small dogs will feel the cold more. Try and keep small dogs in warmer areas of the house. You can add a small heater to the whelping box that the dogs can use if they feel cold.
-
3Lay newspaper down on the floor of the box. The young puppies will probably need to go to the toilet frequently in their first few weeks. Whenever the puppies do go to the toilet in the box, remove the newspaper and replace it with fresh newspaper.[8]
- Use gloves when removing the old newspaper from the box.
-
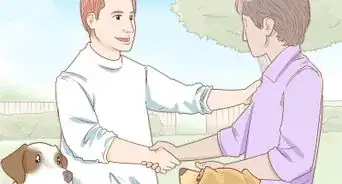
4Place your bitch and puppies in the box. You can also decide to place your bitch in the whelping box before she gives birth. This way all the puppies will be born in the whelping box. If she gives birth outside the box, guide her into it with a lead. Lift the puppies and place them gently into the whelping box.[9]
- Don't lift your bitch as she will be fragile after giving birth.
-
5Move the dogs to a kennel or pen 4 weeks after birth. As the puppies grow, the whelping box will become more and more crowded. The puppies will get more inquisitive and they will want to explore the areas outside of the small whelping box. After 3 to 4 weeks, the dogs should be healthy and big enough to move to a kennel.
- After 3 to 4 weeks, the whelping box will also develop an odor.
- If you can't move the puppies to a kennel or pen, let them roam around outside for a few hours each day. Keep an eye on them as they roam. It's important that you play and interact with them at this stage. Socializing with people is vital for a dog's development at a young age.


Community Q&A
-
QuestionWhat is a whelping box?
 Community AnswerA whelping box is a quiet, warm designated area for a dog, cat, or other animal to give birth in. The box provides safety and comfort to the mother and her young during the first few weeks of life.
Things You'll Need
- 1 4 feet (1.2 m) by 8 feet (2.4 m) sheet of .75 inches (1.9 cm) thick plywood
- 1 4 feet (1.2 m) by 12 inches (30 cm) sheet of 1 inch (2.5 cm) thick plywood
- A hand saw or a power saw
- A pencil
- A ruler
- Self-adhesive contact paper
- A staple gun
- A screwdriver
- 1.5 inches (3.8 cm) screws
- A drill with a 1.5 inches (3.8 cm) drill-bit.


References
- ↑ https://dogcare.dailypuppy.com/build-cheap-whelping-box-6298.html
- ↑ https://dogcare.dailypuppy.com/build-cheap-whelping-box-6298.html
- ↑ https://dogcare.dailypuppy.com/build-cheap-whelping-box-6298.html
- ↑ https://dogcare.dailypuppy.com/build-cheap-whelping-box-6298.html
- ↑ https://dogcare.dailypuppy.com/build-cheap-whelping-box-6298.html
- ↑ https://www.professorshouse.com/whelping-box/
- ↑ https://www.professorshouse.com/whelping-box/
- ↑ https://www.professorshouse.com/whelping-box/
- ↑ https://www.professorshouse.com/whelping-box/
About This Article

To build a whelping box, start by getting a 4- by 8-foot sheet of plywood and cutting it into panels so you have a bottom panel and 3 side panels. Then, attach the side panels to the bottom panel using screws so the walls make a "u" shape. Next, attach a plywood strip across the open side of the box to make a doorway. Finally, lay newspaper down on the floor of the box, and set it in a calm, quiet spot. To learn how to measure and cut the plywood for your whelping box, read on!