This article was co-authored by wikiHow staff writer, Jack Lloyd. Jack Lloyd is a Technology Writer and Editor for wikiHow. He has over two years of experience writing and editing technology-related articles. He is technology enthusiast and an English teacher.
This article has been viewed 79,919 times.
Learn more...
This wikiHow teaches you how to use different eCommerce site builders to create an online store for your products or services.
Steps
Using Shopify
-
1Go to the Shopify website. It's located at https://www.shopify.com/. Shopify is one of the most popular eCommerce builders to date.[1]
- Shopify also comes with a free mobile app so you can view and manage your eCommerce site on mobile after you've set it up.
-
2Click Get started. This black button is in the top-right corner of the page.[2]Advertisement
-
3Enter your sign-in details. This will include your email address, password, and store name.[3]
- Make sure you choose an email address to which you have access.
-
4Click Create your store. It's the green button at the bottom of the page.[4]
-
5Enter details about your current selling habits. This includes the following information:[5]
- Are you already selling?
- When would you like to launch your store?
- How much revenue does your business currently make in a year?
- Depending on your answers to the above questions, you may have to enter additional information.
-
6Click Next. It's at the bottom of the page.[6]
-
7Enter your profile information. This will include your name, address, phone number, and business website (optional).
-
8Click Enter my store. Doing so will open your completed Shopify dashboard.[7]
-
9Click the Products tab. It's on the left side of the page.[8]
-
10Click Add product. You'll see this option in the top-right corner of the page.[9]
- Once you've added at least one product, you'll be able to view a list of your inventory here.
-
11Enter your product's information. Depending on your product, this process will vary; however, most products benefit from having the following information:
- Title - The name of your product.
- Description - A product description.
- Images - A picture (or multiple pictures) of the product.
- Price - Your product's price. You can also add a "Compare at price" value to show the disparity between your product and a competitor's.
- You can also add things like the product's shipping details, weight, SKU number, and so on.
-
12Click Save. It's in the top-right corner of the page.
-
13Click the Online Store tab. You'll find this on the left side of the page.
-
14Click Customize theme. It's near the top-right corner of the Online Store page. This option will take you to your store's appearance page.
- You can also browse for a new theme to install or purchase by clicking Visit theme store in the top-right corner of the page.
-
15Review your store's layout. The layout you see on the left side of the page is how customers will see your shop. You can customize this appearance in the window on the left side of the screen.
- For example: to change the background image at the top of your site, you'd click Image with text overlay, click Upload image, and select an image from your computer.
- Any changes you make will be reflected in the site preview that's on the right side of the page.
-
16Click Save. It's at the bottom of the left-hand window. Doing so will save any changes you make to your site's appearance.
-
17Click Back to Shopify. This link, which is in the top-left corner of the page, will take you back to the Shopify Themes page.
-
18Upgrade your Shopify plan. Once your fourteen-day trial expires, you'll have to open the Shopify plan page and select a plan to continue using Shopify.
- Plans range from $29/month to $299/month, depending on the features you want.


Using BigCommerce
-
1Go to the BigCommerce website. You'll find it at https://www.bigcommerce.com/.[10]
-
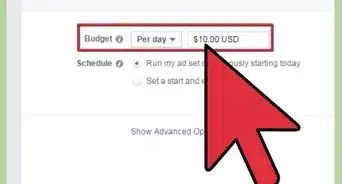
2Click START YOUR FREE TRIAL. It's a purple button on the left side of the page.[11]
-
3Enter your email address. This should be an email at which you're comfortable receiving business emails.
-
4Click START FREE TRIAL. This button is at the bottom of the email field.[12]
-
5Enter your store information. This will include the following details:[13]
- Store name
- Login details (first and last name, and password)
- Phone number
- Country
- Business size
-
6Click CREATE YOUR STORE. It's at the bottom of the page.[14]
-
7Enter further store details. This will include your website, the types of things you'll be selling, and your current selling method.[15]
- You can also skip this step by clicking Ask me later.
-
8Click FINISH. This button is at the bottom of the page. Doing so will take you to your store's dashboard.[16]
-
9Click Products. This tab is on the left side of the page.[17]
-
10Click Add. It's below the Products tab.
-
11Add a product's details. The information you'll enter for individual products will vary, but the following details are mandatory:
- Name - Your product's name. This is what customers will see when browsing for similar products.
- Tax Class - The product's tax designation. This will typically be "Default".
- Product type - Determine whether your product is physical or downloadable.
- Weight - Your product's weight. You won't see this if you're selling a downloadable item.
- Description - A description of your product.
- While not required, it's also a good idea to add a physical product's dimensions.
-
12Click Save. It's in the bottom-right corner of the page.
-
13Click Dashboard. This option is near the top-left corner of the page. Clicking it will take you back to your eCommerce site's home page.
-
14Click Storefront Design. You'll see it about halfway down the column of tabs on the left-hand side of the page. This option will load your store's appearance page.
-
15Review your store's design information. You can change the details of your store's appearance and layout on this page.
- For example: to change the heading on your website's home page, you would edit the text in the "Heading" box at the top of the page.
- Scrolling down on the default tab (Carousel & Social Media) will allow you to add links to your social media accounts.
-
16Click Save. It's in the bottom-right corner of the screen. Doing so will save your changes to your website.
-
17Upgrade to a full BigCommerce account. After fourteen days, you'll need to purchase a month-to-month plan to continue selling with BigCommerce. You can do so by clicking Select a plan at the top of your site's dashboard.
- Plans range from $29.95/month for a full eCommerce site to $249.95/month for a premium site with additional security and search features.


Warnings
- Choose a website builder that will allow you to scale up your business as you grow. Don't settle for a cheaper option that will necessitate moving to a different platform once your business grows.⧼thumbs_response⧽


References
- ↑ https://www.shopify.com/partners/blog/topics/shopify-tutorials
- ↑ https://www.shopify.com/partners/blog/topics/shopify-tutorials
- ↑ https://www.shopify.com/partners/blog/topics/shopify-tutorials
- ↑ https://www.shopify.com/partners/blog/topics/shopify-tutorials
- ↑ https://www.shopify.com/partners/blog/topics/shopify-tutorials
- ↑ https://www.shopify.com/partners/blog/topics/shopify-tutorials
- ↑ https://www.shopify.com/partners/blog/topics/shopify-tutorials
- ↑ https://www.shopify.com/partners/blog/topics/shopify-tutorials
- ↑ https://www.shopify.com/partners/blog/topics/shopify-tutorials
- ↑ https://support.bigcommerce.com/s/article/Getting-Started-Video
- ↑ https://support.bigcommerce.com/s/article/Getting-Started-Video
- ↑ https://support.bigcommerce.com/s/article/Getting-Started-Video
- ↑ https://support.bigcommerce.com/s/article/Getting-Started-Video
- ↑ https://support.bigcommerce.com/s/article/Getting-Started-Video
- ↑ https://support.bigcommerce.com/s/article/Getting-Started-Video
- ↑ https://support.bigcommerce.com/s/article/Getting-Started-Video
- ↑ https://support.bigcommerce.com/s/article/Getting-Started-Video
About This Article
To build an eCommerce website, try using Shopify, which allows you to create your own eCommerce website through its platform. Shopify also offers a free mobile app, so you can easily view and manage your store on the go. Or, you can set up your shop with BigCommerce, which is similar to Shopify. Whichever platform you use, you'll be able to upload product names and descriptions, photographs, and other information you need to sell products through your store. To learn how to set up an account with Shopify or BigCommerce, read on!