This article was co-authored by Gerber Ortiz-Vega. Gerber Ortiz-Vega is a Masonry Specialist and the Founder of GO Masonry LLC, a masonry company based in Northern Virginia. Gerber specializes in providing brick and stone laying services, concrete installations, and masonry repairs. Gerber has over four years of experience running GO Masonry and over ten years of general masonry work experience. He earned a BA in Marketing from the University of Mary Washington in 2017.
This article has been viewed 15,543 times.
"Buttering" a brick refers to the process of applying mortar to the end of a brick before setting it into an established row. Properly loading the trowel with mortar is probably the trickiest part of the process. After you've managed to do that, applying the mortar to the brick and setting that brick in place will be fairly simple.
Steps
Part One: Load the Trowel
-
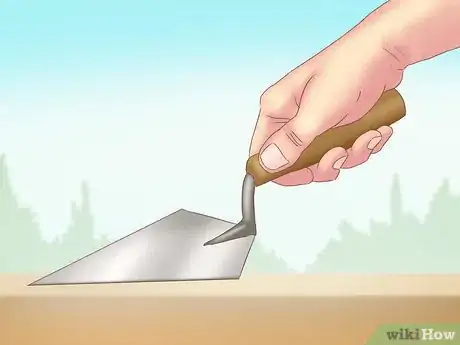
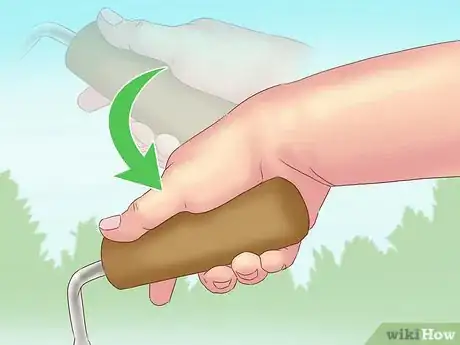
1Grab the trowel. Grab the trowel handle with your dominant hand. Your fingers should curl around the width of the handle, but your thumb should be extended along the length.
- Holding the trowel in this manner will give you greater control over it. Your wrapped fingers should keep the trowel sturdy and secure in your hands, and your extended thumb should make it easier to control the direction you move the trowel.
- Make sure that you maintain a firm grip on the trowel throughout the entire process.
-
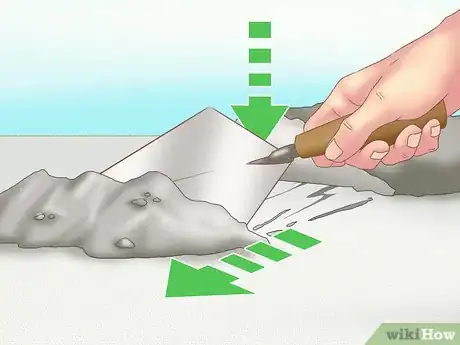
2Cut a section of mortar. Using the side of the trowel head, cut away a portion of mortar from a larger pile of previously mixed mortar. Drag this portion away from the primary pile and toward you.
- Note that the mortar should already be prepared and sitting in a large pile on your mortar board. Use freshly prepared mortar that is still wet and easy to shape.
- The portion you cut away should be from the edge of the pile. Make sure that you remove enough mortar to cover the length and width of the trowel head, if not a little more.
- Drag this portion roughly 6 inches (15 cm) away from the primary pile so that you won't accidentally mix it back in as you work.
Advertisement -
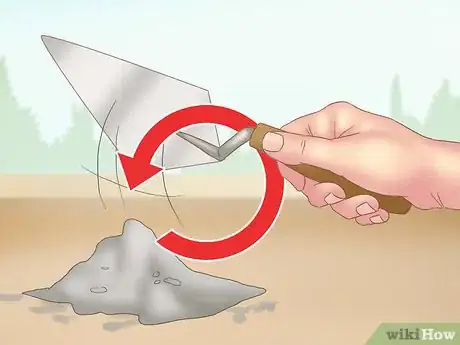
3Turn the mortar. Turn the cut portion of mortar several times using the trowel. After a few turns, the mortar should take on a smooth texture and paste-like consistency.[1]
- Once the texture seems correct, use the trowel to shape the portion of mortar so that it roughly matches the length and width of the trowel head.
-
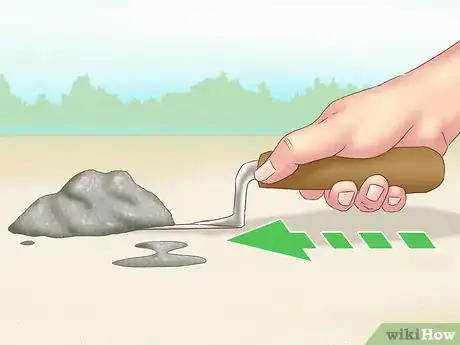
4Slide the trowel beneath the mortar. Slide the edge of the trowel beneath the portion of mortar, lifting it onto the flat face of the trowel head.
- It should be easy to slip the mortar onto the trowel, especially after turning it over several times on the mortar board. If the mortar sticks to the board and does not slip over the trowel, it might be too wet to use.
-
5Flick your wrist downward. While holding the trowel horizontally with the mortar side facing up, flick your wrist and the trowel downward with a quick snap before stopping abruptly.[2]
- Keep a firm grip on the trowel as you flick your wrist. The mortar on your trowel should slightly flatten out over the head once you stop the motion.
- The force used to snap your wrist adheres the mortar to the trowel. When done correctly, you should be able to invert the trowel upside-down, and the mortar should still remain securely in place. If you do not perform this step, the mortar will slide off as soon as you turn the trowel on its side.
- Alternatively, you can usually create enough suction to keep the mortar on the trowel if you tap the bottom of the trowel head against the mortar board. This is a good option to use if you are unable to support the trowel well enough to flick your wrist.[3]
Part Two: Butter the Brick
-
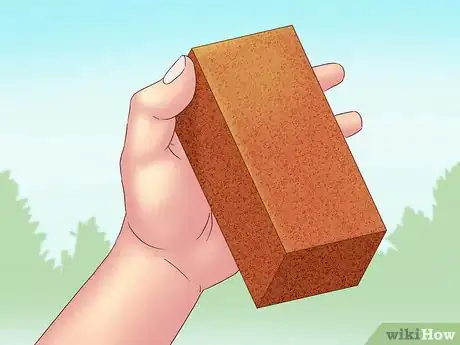
1Grab the brick. Pick up the brick you want to butter using your non-dominant hand. Tip the brick downward at an approximate 45-degree angle.
- The end you plan to butter should be tilted slightly upward.
- Note that you will only apply mortar to one end of the brick. Do not butter both ends.
-
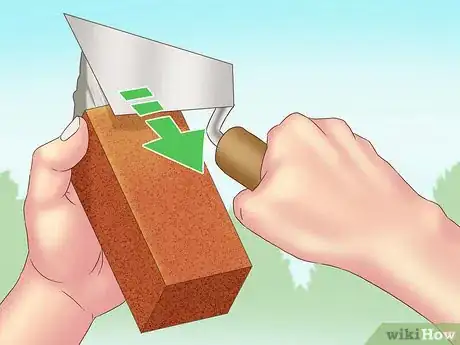
2Slice the mortar onto one end. Invert the head of the trowel and slap the mortar onto one end of the brick using a downward motion.[4]
- Turn the trowel so that the mortar-side faces the end of the brick and sits at a nearly parallel angle.
- Starting from the top of the brick, slide the loaded trowel down the end, scraping the mortar off the trowel head and onto the brick end.
-
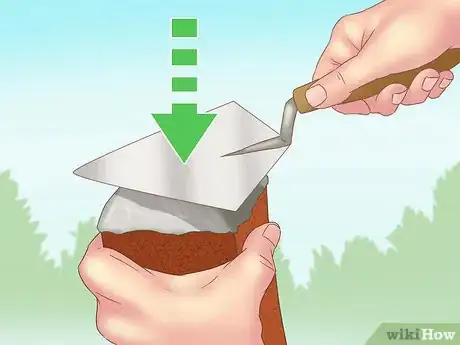
3Squeeze the mortar into the center. Use the tip of the trowel to press the glob of mortar inward toward the center of the brick end.
- Scrape around the perimeter of the brick end, as well, to remove any excess mortar from the sides. Try to keep the entire portion of mortar positioned directly over the end of the brick.
- When done correctly, the mortar should roughly form a four-sided pyramid on the end of the brick.
- Don't worry if the amount of mortar looks like a lot. Buttering the brick with excess mortar is actually a good thing because it ensures a tight, secure seal when you join the brick. The excess mortar is also easy to remove after you've set the brick, so it should not cause any problems later on.
Part Three: Set the Subsequent Brick
-
1Place the brick on the bed. Set the buttered brick down onto a prepared bed of mortar. The buttered end should face the brick previously set on the bed.
- If using frogged (indented) or perforated bricks, the frogged or perforated side of each brick should face up when you set it.
- Note that the first brick in any row will not be buttered. Only subsequent bricks are buttered within each row.
- Also not that there should be a layer of mortar on top of the foundation or the previous row of bricks. The bottom of your buttered brick will need to be set into this previously applied mortar.
- Place the brick onto the mortar bed so that the buttered end is directly next to the end of the preceding brick. Try to get the brick as close as possible without scraping off any of the mortar.
-
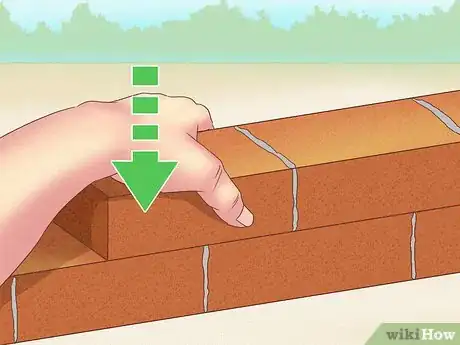
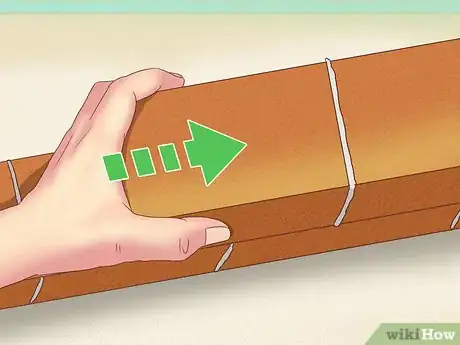
2Push the brick against its predecessor. Shift your hand to the non-buttered end of the brick, then push the brick inward toward the end of the preceding brick.
- Continue pushing until the buttered mortar smashes against the side of the other brick. The mortar should push out at the joining side and top of the joint.
- When done, the mortar joint should be about 3/8 inch (9.5 mm) thick.
-
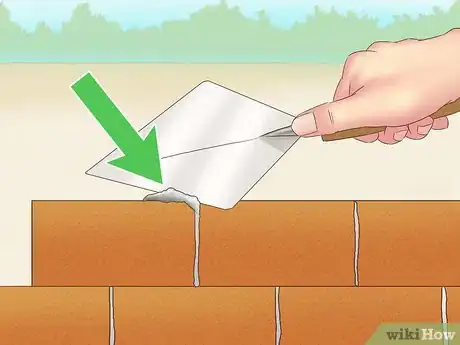
3Scrape away the excess. Slide the edge of the trowel head along the bottom and end joints of the newly set brick. [5]
- Use the excess mortar to butter the next brick. If you prepared the right amount of mortar when buttering the first brick, you should have enough to butter three standard bricks before you'll need to load the trowel with additional mortar.
- You shouldn't need to snap the excess mortar onto the trowel. The pressure used in scraping the excess mortar onto the trowel should be enough to securely adhere it.
- Any excess mortar you scrape away after setting the last brick of a row should be slapped over the end joints of subsequent bricks. Use the back and edge of the trowel head to smooth the excess into those joints and onto the tops of the bricks.
-
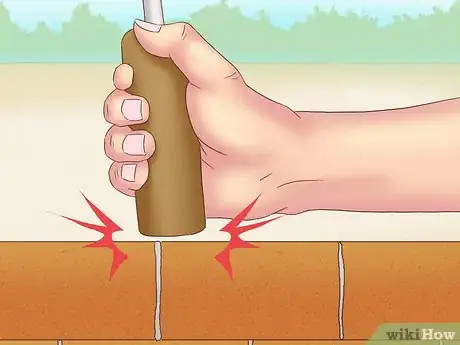
4Tap on the placed bricks. After setting each brick, tap on sides and top of the brick with the end of the trowel handle to help settle the brick in place.
- This action should also help level the bricks.
- Note that the first brick of the row should be leveled before you butter and join the second brick. Likewise, you should level each brick after you set it and before you join any subsequent bricks.
- Use a torpedo level or similar tool to make sure that each brick is level with the one before it. Both the tops and sides of the brick must be checked.
Community Q&A
Did you know you can get expert answers for this article?
Unlock expert answers by supporting wikiHow
-
QuestionWhat safety equipment do I need to wear when I'm mixing the mortar?
 Gerber Ortiz-VegaGerber Ortiz-Vega is a Masonry Specialist and the Founder of GO Masonry LLC, a masonry company based in Northern Virginia. Gerber specializes in providing brick and stone laying services, concrete installations, and masonry repairs. Gerber has over four years of experience running GO Masonry and over ten years of general masonry work experience. He earned a BA in Marketing from the University of Mary Washington in 2017.
Masonry Specialist & Founder, GO Masonry LLC
-
QuestionHow do I clean my mixing tools when I'm done using them?
 Gerber Ortiz-VegaGerber Ortiz-Vega is a Masonry Specialist and the Founder of GO Masonry LLC, a masonry company based in Northern Virginia. Gerber specializes in providing brick and stone laying services, concrete installations, and masonry repairs. Gerber has over four years of experience running GO Masonry and over ten years of general masonry work experience. He earned a BA in Marketing from the University of Mary Washington in 2017.
Masonry Specialist & Founder, GO Masonry LLC
Things You'll Need
- Prepared mortar
- Mortar board
- Bricks
- Trowel
- Torpedo level
References
- ↑ http://www.goldtrowel.co.uk/bricklaying_rolling_the_mortar.html
- ↑ http://www.realtor.com/home-garden/do-it-yourself/masonry-concrete/mixing-handling-mortar.aspx
- ↑ https://www.youtube.com/watch?v=tmjr0zkX0DE
- ↑ http://www.goldtrowel.co.uk/bricklaying_buttering_up_the_perp.html
- ↑ https://www.youtube.com/watch?v=2xTw5sJCdzg
- ↑ Gerber Ortiz-Vega. Masonry Specialist. Expert Interview. 10 March 2020.
