wikiHow is a “wiki,” similar to Wikipedia, which means that many of our articles are co-written by multiple authors. To create this article, volunteer authors worked to edit and improve it over time.
This article has been viewed 22,005 times.
Learn more...
Changing your cars oil regularly/monthly is very important to keep your car running strong. Overtime the oil in your engine begins to break down, and particles begin to clog and your oil filter will not work properly. Changing your cars oil depends on two things, how far you drive, and the type of vehicle you drive. Usually people will get their cars oil changed every 3 months or 3000-4000km. Getting your oil changed at the dealership or lube shop gets expensive, so I am going to tell you how to change your oil in a 1999 Honda CRV for half the price.
Steps
-
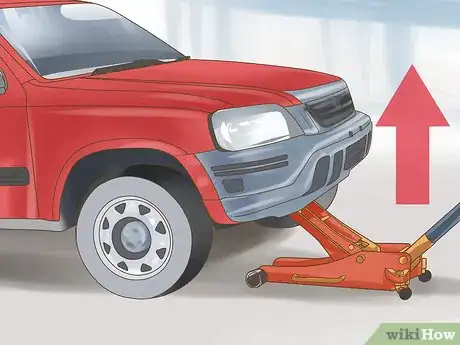
1Hoist or jack up your car.
- There are many ways you can jack up/hoist your car. The three most common ways to hoist/jack up your car is with a two-post hoist, hydraulic floor jack, and ramps.
- If you are using the two-post hoist, you can drive your car in between the two posts and then position the hoist legs onto the pinch welds of your vehicle or the designated hoisting points. (You can find the designated hoisting points in your owner's manual). Make sure the car is in neutral in case you need to move it back or forward to get the hoist legs positioned properly.
- If you are not fortunate to have a two-post jack, you are not out of luck. You can use a hydraulic floor jack or ramps. When jacking up your car with a hydraulic floor jack, you will position the hydraulic floor jack directly under the pinch welds. CAUTION: ALWAYS USE SAFETY STANDS when lifting your vehicle with a hydraulic floor jack so it doesn't slip of the pinch welds. When using ramps, just drive your vehicle up the ramps and make sure your put it in park and place a piece of wood or metal pipe behind the rear wheels so it doesn't roll.
-
2Get the tools ready.
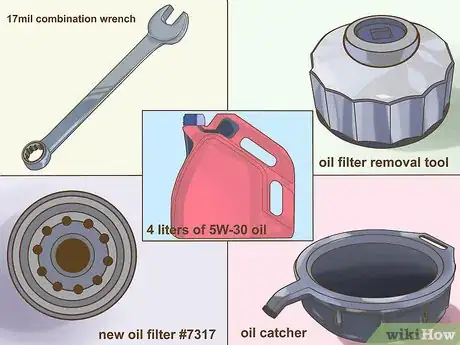
- Tools needed to do an oil change on a 1999 Honda CRV are going to be; 17mil combination wrench or 17mil box end wrench doesn't really matter, oil catcher, rags, oil filter remover tool, new oil filter #7317, and 4 liters of 5W-30 oil. WARNING ALWAYS GET THE SAME OIL AND OIL FILTER.
Advertisement -
3Locate oil cap.
- Open the cars hood, and locate the oil cap. The oil cap is usually black in color, has a symbol of an oil canister, and usually has what type of oil the car requires.
- Once you locate the oil cap remove it. Removing the oil cap will make the oil flow out of the oil pan more smoothly because there is no pressure build up.
-
4Locate the oil pan.
- Once you lift the car up, you will locate the oil pan. The oil pan is usually flat with a plug coming out of it toward the bottom. One way of telling which is the oil pan and which isn't is the oil pan is usually hot to the touch.
-
5Remove the oil plug.
- Before you can remove the oil plug make sure you have the oil catcher underneath the oil pan. Once you have the oil catcher underneath the oil pan, remove the oil plug with the 17mil combination or box-end wrench. To remove the oil pan bolt you are going to turn the combination wrench to the left. Once you have it loosened, you can loosen it the remainder of the way with your fingers.
-
6Re-install the oil plug.
- Once the old used oil has been completely drained out of the oil pan, you will re-install the oil plug. You will start the oil plug by hand until it doesn't turn anymore, then you get the 17mil combination wrench and tighten it to the right but not to tight because you will begin to strip the threads of the oil pan causing it to leak in the future.
-
7Locate the oil filter.
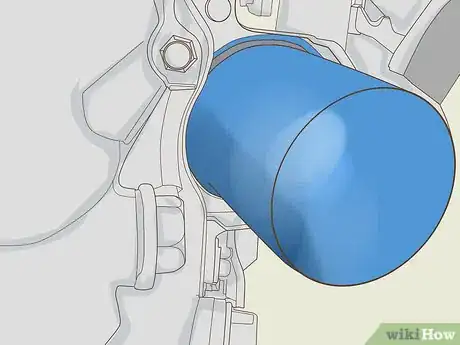
- The oil filter is usually located near the oil pan or above it. The oil filter is usually white in color unless it is on a Toyota it will have a black protector cover on it. To remove the oil filter on the 1999 Honda CRV you can use your hands, but if it is too tight you can use the oil filter remover tool. Just like the oil plug you will loosen the filter to the left.
-
8Get the new oil filter ready
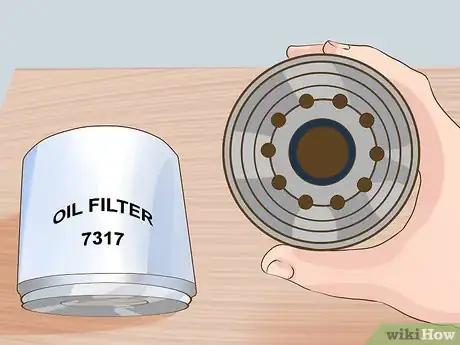
- The 1999 Honda CRV uses an oil filter with the part number 7317. Before installing it dip your finger into the oil and spread the oil onto the new oil filter seal. Also before installing the new oil filter make sure the old seal from the old oil filter is not stuck there. If the old seal is stuck there just remove it and install the new filter by hand. The reason why you tighten it by hand instead of using a tool is because it will get tighter from the heat.
-
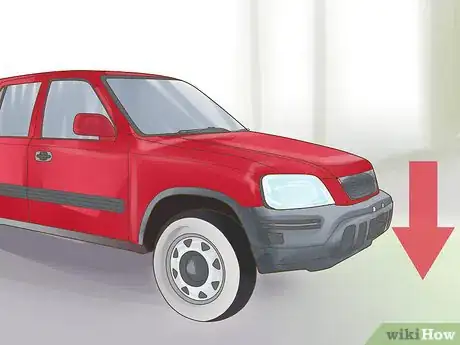
9Lower the vehicle.
-
10Add the new oil.
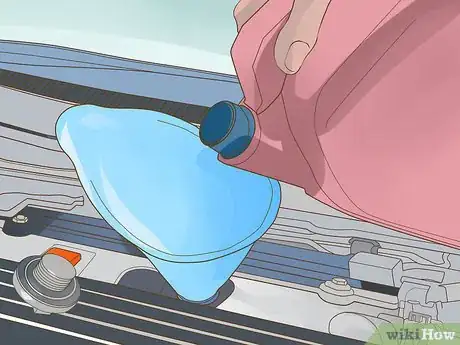
- Add the specific oil your car needs. To know which oil your car needs you can find it in the owner's manual with how much oil is needed for you car. For the 1999 Honda CRV it takes 4 liters of 5W 30 oil but its ok if you go a little over 4 Liters. If your cars oil looks very dark black in color you can add an additive called Lucas oil stabilizer.
-
11Put back the oil cap.
- Put the oil cap back where you took it off from. Some oil caps make a "clicking" sound to let you know when it has been tightened all the way.
-
12Start the car.
- Before you check the oil level you are going to have to start the car for around one minute to get the oil into the engine. Once you started the car for one minute turn it off and check the oil level if it is good don't add any more oil, but if it below the full line add some oil.
-
13Restart the oil light.
- On the 1999 Honda CRV restarting the oil light is very simple. The oil reset switch is located right in front of the speedometer. To reset it push the reset button and it.
Warnings
- DO NOT START THE OIL PLUG WITH THE 17mil WRENCH YOU WILL RUIN THE THREADS ON THE OIL PAN AND BOLT!⧼thumbs_response⧽
- ALWAYS USE SAFETY STANDS when lifting your vehicle with a hydraulic floor jack so it doesn't slip of the pinch welds⧼thumbs_response⧽







-Beetle-Step-5-Version-3.webp)

