This article was co-authored by Daniel Stoescu. Daniel Stoescu is a Master Electrician and the Owner and Operator of Home Tech Solutions, LLC in Hampton, Virginia. With over a decade of experience, Daniel specializes in wiring residential, commercial, and light industrial structures. The Home Tech Solutions team has over four decades of combined experience and offers comprehensive solutions for residential electrical needs.
This article has been viewed 439,161 times.
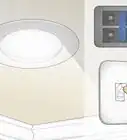
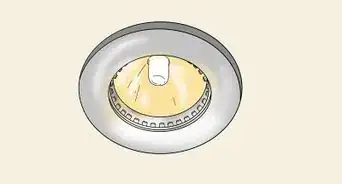
A recessed light bulb lies flush with the ceiling or other surface, making it nearly impossible to grab and unscrew it by hand. As with so many other problems where you need to get a grip, duct tape is one of the easiest solutions. If this doesn't work, you may have to try a few different approaches to remove the retaining collar around the bulb.
Steps
Using Duct Tape
-
1Wait until the bulb is cool. If the light was recently on, wait until it is cool to the touch. This shouldn't take more than five minutes for a normal light bulb. Halogen lights may take twenty minutes.[1]
-
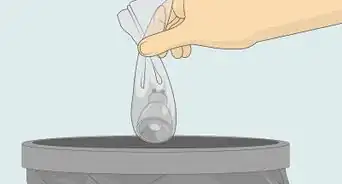
2Tear off a strip of duct tape. The strip should be about 12 inches (30 cm) long, or half as long as your arm.Advertisement
-
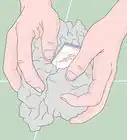
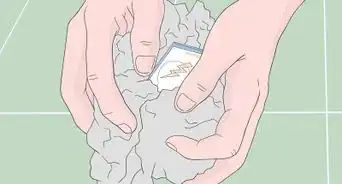
3Fold over each end of the duct tape. Fold a short section of the duct tape over and stick it to itself. Repeat on the other side. These folded "handles" should be long enough for you to grip, with a sticky segment in between them.[2]
- If you find it easier, you can wrap the duct tape in a circle instead, with the adhesive on the outside. Make the circle large enough to fit your hand through it.
-
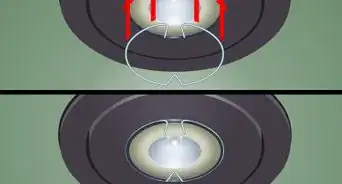
4Stick the duct tape to the light bulb. Hold the handles of the duct tape and press the sticky segment against the flat surface of the recessed bulb.
-
5Twist to unscrew. Once the tape sticks to the light bulb, you should have enough leverage to get it loose. Almost all light bulbs use standard screw threading, so turn the bulb counterclockwise to unscrew it.
- If it doesn't budge, read the method below for help removing the surrounding collar.
-
6Finish unscrewing by hand. Once the light bulb has emerged enough for you to grip the sides, pull off the duct tape. It's faster at this point to spin the bulb out by hand.
-
7Replace the light bulb with the same method. Screw in the new light bulb as far as you can by hand. When it's nearly flush, stick on the duct tape and turn clockwise to tighten to a secure fit.


Removing a Retaining Collar
-
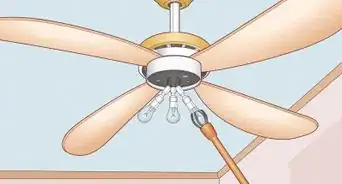
1Turn off the light. Let the bulb cool to room temperature before you handle it.
-
2Look for a metal ring around the light bulb. Many recessed fixtures hold the bulb in with a metal collar. These are often removable, but follow the instructions below to avoid damaging your ceiling.
- This is not necessarily the large ring that holds in the entire fixture, although it can be. Look closely for a second ring flush against the light bulb.[3]
-
3Cut away paint if necessary. If someone has painted over the ring, it may rip away pieces of drywall when you unscrew it. To avoid this, cut the paint around the ring with a utility knife, working it against the collar.[4] Now try the steps below until you find one that works for your model.
-
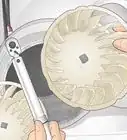
4Look for a screw or button. If you're lucky, your collar is simply held in place by a couple of screws. Some models have a small metal button, which you push or slide sideways to free the fixture.[5]
-
5Test whether the collar twists or pulls out. Some models can be twisted or pulled out by hand. Use light pressure only, unless you have confirmed this is the intended approach with a manual or the manufacturer. Here are two examples of light fixtures you can remove this way:
- Modern recessed halogen lights often have a plastic collar with three tabs. Press your fingers against these tabs and rotate counterclockwise. Once you have access to the bulb, grip the base and the wire and wiggle them apart.
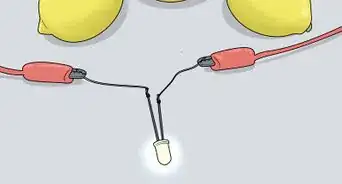
- Some recessed LED light fixtures can be pulled directly out of the ceiling. Watch your fingers, as a sharp metal clip will pop downward from the edge as the fixture emerges. You can then unclip the bulb from the wire.
-
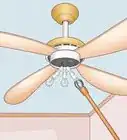
6Pry out the ring with a screwdriver. Some older halogen fixtures use a small, toothed, metal ring with no special fastener. Carefully insert a flathead screwdriver in between the ring and the light bulb, and pry outward. There is a gap in the ring, so you can flex it outward and carefully pull it down with your fingers. Grip the base of the bulb and gently wiggle the two prongs out of the socket to remove it.[6]
- Take care not to chip the glass with the screwdriver.
-
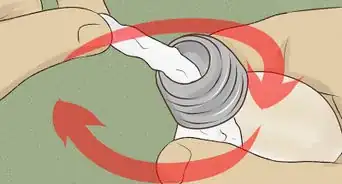
7Remove a stuck ring. If there is no obvious fastener for the ring, but it refuses to twist out, it may be jammed. Try gently pushing up on the light bulb with a couple fingers from each hand. If the bulb recesses further into the ceiling, press your fingers outward against opposite sides of the ring. Try to rotate the ring while pressing to improve your grip.
- If this still doesn't work, and your model has three small tabs on the plastic collar, grip one of the tabs with a pair of pliers. Push with the pliers as you push another tab by hand.


Community Q&A
-
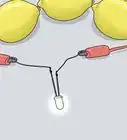
QuestionIs it possible to replace just the diode in an LED without buying a new light?
 Community AnswerYou will need to buy a new light for your fixture unless you have the electronics experience to take it apart and solder in new LEDs. LED lights last a very long time and do not screw in like an ordinary bulb, so they are not designed for easy user replacement.
 -
QuestionHow do I remove the glass dome covering the light fixture?
 Community AnswerYou may be able to push the dome upward and rotate it until it can slide down. If that doesn't do it, the instructions above for removing a retaining collar may work for the dome's collar as well.
 -
QuestionWhen I replace the globe the light bulb keeps falling out. How do I make the light stay in?
 Community AnswerThere are different ways of securing bulbs according to type. In general you should turn it clockwise (when looked at from underneath), but how far you have to turn can vary from 10 degrees to about three revolutions. Stop when it will not turn any more.
Warnings
- To avoid an electric shock, make sure the light is off before you insert the new bulb.⧼thumbs_response⧽
Things You'll Need
- Recessed light bulb
- Duct tape


References
- ↑ https://www.youtube.com/watch?v=4D-Ft-YF4yY
- ↑ http://www.thisoldhouse.com/toh/skill-builder/0,,192854,00.html
- ↑ https://www.youtube.com/watch?v=4D-Ft-YF4yY
- ↑ http://www.apartmenttherapy.com/recessed-lighting-how-to-chang-1-107180
- ↑ http://technical.sabhlokcity.com/2013/11/how-to-open-twist-off-the-cover-of-some-really-stupid-awkward-flush-mounted-ceiling-light-dome-fittings-fixture-to-replace-change-light-bulb/
- ↑ https://www.youtube.com/watch?v=4D-Ft-YF4yY
- Videos provided by Build.com
About This Article

When you’re changing a recessed lightbulb, getting a grip can be challenging. First, turn off the light and wait for it to cool. Tear a strip of duct tape that’s about 12 inches (30 cm) long, then fold over both ends to create “handles” with a sticky strip in between. Press the sticky side to the lightbulb, then grab the handles and turn them counterclockwise to unscrew the bulb. Once the bulb is out far enough so you can grab it, finish unscrewing it by hand. Start screwing in the new bulb by hand, then use the tape method to tighten it. For tips on how to remove a retaining collar, keep reading!