This article was written by Mike Kapur and by wikiHow staff writer, Eric McClure. Mike Kapur is a home inspector and the owner of Sonic Home Inspections, a home inspection company in Westchester, New York. With over 15 years of experience in pre-inspecting properties, Mike specializes in mold, radon, asbestos, lead, water, and air quality testing as well as hazardous materials, pest, infrared, and general home inspections. Prior to founding Sonic Home Inspections, Mike worked pre-inspecting apartments. Mike holds a BS in Accounting from Queens College and is a Certified Mold Assessor in the state of New York.
There are 13 references cited in this article, which can be found at the bottom of the page.
This article has been viewed 3,171 times.
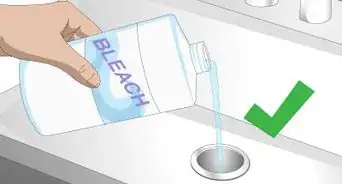
If you only see dark gunk in the grout and/or on the shower curtain in your home, the odds are actually extremely low that you’re dealing with actual mold. It’s much more likely that you’ve got mildew—mold’s less scary and less dangerous little cousin.[1]
Regardless, it makes sense that you’d want to avoid the noxious fumes of bleach to deal with mildew. The good news is that there are a ton of options. We’ll walk you through how to fix the problem regardless of whether you’ve got mold or mildew.
This article is based on an interview with our certified mold assessor & home inspector, Mike Kapur, owner of Sonic Home Inspections. Check out the full interview here.
Steps


References
- ↑ Mike Kapur. Certified Mold Assessor & Home Inspector, Sonic Home Inspections. Expert Interview. 19 August 2020.
- ↑ Mike Kapur. Certified Mold Assessor & Home Inspector, Sonic Home Inspections. Expert Interview. 19 August 2020.
- ↑ Mike Kapur. Certified Mold Assessor & Home Inspector, Sonic Home Inspections. Expert Interview. 19 August 2020.
- ↑ https://www.epa.gov/mold/brief-guide-mold-moisture-and-your-home
- ↑ https://www.epa.gov/mold/brief-guide-mold-moisture-and-your-home
- ↑ NW Maids. House Cleaning Service. Expert Interview. 28 August 2019.
- ↑ Marcus Shields. House Cleaning Professional. Expert Interview. 22 September 2019.
- ↑ https://www.primaryconnections.org.au/themes/custom/connections/assets/SBR/data/Chem/sub/baking/baking.htm
- ↑ Mike Kapur. Certified Mold Assessor & Home Inspector, Sonic Home Inspections. Expert Interview. 19 August 2020.
- ↑ Marcus Shields. House Cleaning Professional. Expert Interview. 22 September 2019.
- ↑ https://www.health.ny.gov/environmental/emergency/chemical_terrorism/ammonia_general.htm
- ↑ Marcus Shields. House Cleaning Professional. Expert Interview. 22 September 2019.
- ↑ https://s3.wp.wsu.edu/uploads/sites/2079/2014/02/septic-additives.pdf
- ↑ Mike Kapur. Certified Mold Assessor & Home Inspector, Sonic Home Inspections. Expert Interview. 19 August 2020.
- ↑ http://www.personal.psu.edu/users/d/d/ddd2/
- ↑ https://www.bobvila.com/articles/what-kills-mold/
- ↑ https://www.bobvila.com/articles/cleaning-grout/
- ↑ https://www.bobvila.com/articles/cleaning-grout/
- ↑ https://www.epa.gov/mold/brief-guide-mold-moisture-and-your-home
- ↑ https://www.epa.gov/mold/mold-cleanup-your-home
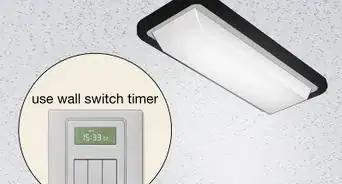
- ↑ https://www.bobvila.com/slideshow/8-ways-to-mildew-proof-your-bathroom-51901
- ↑ https://www.bobvila.com/articles/how-to-seal-grout/
- ↑ https://www.bobvila.com/articles/how-to-seal-grout/
- ↑ https://www.bobvila.com/slideshow/8-ways-to-mildew-proof-your-bathroom-51901
- ↑ Mike Kapur. Certified Mold Assessor & Home Inspector, Sonic Home Inspections. Expert Interview. 19 August 2020.
- ↑ https://www.epa.gov/mold/brief-guide-mold-moisture-and-your-home
About This Article