X
This article was co-authored by wikiHow staff writer, Nicole Levine, MFA. Nicole Levine is a Technology Writer and Editor for wikiHow. She has more than 20 years of experience creating technical documentation and leading support teams at major web hosting and software companies. Nicole also holds an MFA in Creative Writing from Portland State University and teaches composition, fiction-writing, and zine-making at various institutions.
This article has been viewed 85,809 times.
Learn more...
This wikiHow teaches you how to use your iMac as a monitor for a MacBook, as well as how to share files and printers between both computers.
Things You Should Know
- For iMac 2009 and 2010, you'll need a Mini DisplayPort to MiniDisplayPort cable.
- For iMac 2011 to early 2014, you'll need a Thunderbolt cable.
- You won't be able to use iMac models from late 2014 and newer as displays.
Steps
Method 1
Method 1 of 2:
Using your iMac as a Monitor
-
1Determine the cable you’ll need for your iMac. The type of cable you’ll need varies by model:[1]
- iMac 27-inch (2009): Mini DisplayPort to Mini DisplayPort cable.
- iMac 27-inch (2010): Mini DisplayPort to Mini DisplayPort cable.
- iMac (2011- early 2014): Thunderbolt cable.
- iMac models from late 2014 (the Retina 5k model) and later can’t be used as displays.
-
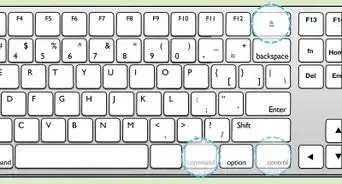
2Locate the port on your MacBook. If both the MacBook and iMac have the same port (Mini DisplayPort or Thunderbolt), you won’t need to purchase an additional adapter. If your MacBook has a Thunderbolt 3 (USB-C) port, you’ll need a Thunderbolt 3 (USB-C) to Thunderbolt 2 adapter.
- See Apple’s Mac port guide to learn how to identify your ports.
Advertisement -
3Turn on both computers. If you haven’t yet logged in to either computer, you should do so now.
-
4Connect the Mini DisplayPort or Thunderbolt cable to both computers.
-
5Press ⌘ Command+2 on the iMac. The iMac’s display will now show the MacBook’s screen instead of its own.


Advertisement
Method 2
Method 2 of 2:
Sharing Files Between Computers
-
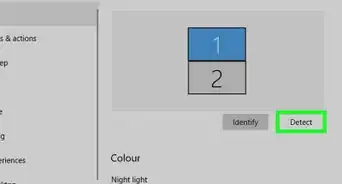
1Connect both Macs to the same wireless network. If you don’t have a wireless network, you can use an Ethernet cable instead (just connect the cable to an Ethernet port on both computers, and then move to the next step). Here’s how to connect both computers to Wi-Fi:[2]
- If you see near the top-right corner of the screen, click it, and then select Turn Wi-Fi On.
- Click at the top-right corner of the screen.
- Select a network.
- Enter the password and click Join.
-
2Click the menu on the computer that has something to share. It’s at the top-left corner of the screen.[3]Advertisement
-
3Click System Preferences.
-
4Click Sharing. A list of sharing services will appear.
-
5Set up file sharing. Here’s how to allow users of the other computer to access the files on this one:[4]
- Click File Sharing.
- Click + under the folder list.
- Select a folder and click Add.
- Anyone with account on this Mac can access it from the other computer. If you want to restrict access to certain users, select the folder, click + under the user list, then select who should have access.
- You can add users with local accounts (regular logins you set up on this Mac) or by Apple ID by selecting them from your contacts.
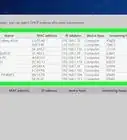
- Make note of the IP address on the Sharing screen. It should look like ″afp://10.0.0.1″ or ″smb://10.0.0.1″.
-
6
-
7Click the Go menu. It’s at the top of the screen.
-
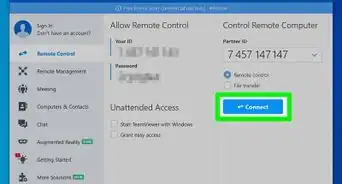
8Click Connect to Server.
-
9Enter the IP address for the other computer. This is the address you found on the other computer’s Sharing screen.
-
10Click Connect.
-
11Choose how to connect.
- Select Registered User if you want to log into a local account on the other computer.
- Select Apple ID to log in that way.
- Select Guest if the files don’t require a login.
-
12Follow the on-screen instructions to log in. Once you’ve connected to the other computer, you can access its files.
-
13Set up printer sharing (optional). If you’d like to share the printer from this computer, return to the Sharing settings, click Printer Sharing, and choose a printer. Once shared, you’ll be able to print to it from any app on the other computer by selecting the printer (and logging in, if prompted to do so).
- Anyone with an account on this computer can print by default. To select specific users, click + under the user list, then choose who should be allowed to print.[5]
-
14Set up other types of sharing (optional). If you want users of the other computer to be able to connect to this one for remote administration or screen sharing, choose one of those options from the list, then follow the same instructions as you did for file and printer sharing.


Advertisement


References
About This Article

Nicole Levine, MFA
wikiHow Technology Writer
This article was co-authored by wikiHow staff writer, Nicole Levine, MFA. Nicole Levine is a Technology Writer and Editor for wikiHow. She has more than 20 years of experience creating technical documentation and leading support teams at major web hosting and software companies. Nicole also holds an MFA in Creative Writing from Portland State University and teaches composition, fiction-writing, and zine-making at various institutions. This article has been viewed 85,809 times.
How helpful is this?
Co-authors: 6
Updated: October 25, 2022
Views: 85,809
Categories: Computers and Electronics | MacBook
Advertisement