This article was co-authored by Anthony "TC" Williams. Anthony "TC" Williams is a Professional Landscaper in Idaho. He is the President and Founder of Aqua Conservation Landscape & Irrigation, an Idaho Registered Landscape Business Entity. With over 21 years of landscaping experience, TC has worked on projects such as the Idaho Botanical Garden in Boise, Idaho. He is a Idaho Registered Contractor and a previously Licensed Irrigator in the State of Texas.
This article has been viewed 38,884 times.
A sandstone wall is one of the oldest walls that can be built in your backyard! This is better done with two people. It includes heavy lifting and meticulous puzzle solving that might frustrate a single person. Give yourself anywhere from two to seven days to complete the job.
Steps
Planning and Gathering Supplies
-
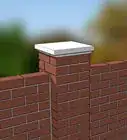
1Pick the Location. Make sure you aren't preventing natural run-off water from the position of the wall and footing. Observe the land in question for a few days prior to doing any work. Pay special attention to the area after it rains. You don't want to disrupt the flow of water so that it floods into your neighbor’s property.
-
2Decide on what type of stone. Stone walls come in different shapes and sizes. Some stone walls are similar in cut to an average 8” concrete block. Other stone walls use disproportionate stones to create a rustic look. Consider the time you’re willing to take on this project.
- The disproportionate stones look the best, but take a long time to install.
Advertisement -
3Purchase footing. Footing is the concrete base that is used as the wall's structure. You can either use dry footing that requires you to mix it with water to activate, or purchase prepared footing.
-
4Gather your supplies. This type of project requires a lot of supplies that can be found at your nearest hardware store. Collect these supplies if you decide to continue:
- Trowel
- Garden hose with an on/off nozzle or fitting
- 3/8" and 5/8" Plywood
- Work gloves
- Level
- Wheelbarrow
- Concrete
- Bucket or plastic tub (optional)
- Hoe
- Shovel
- Rake
- Mattox
- 100' of chord
- Mortar
- Masonry chisel
- 2x4 for framing
- Wooden or concrete stakes
- Screws or duplex nails
- Tie-in-Bars
- Framing hammer
- Saw
- Carpenter's Square
- Drill motor with tip for using screws
- Mortar boards
-
5Weigh your options. Be sure you can afford the time it'll take you to construct, and weigh the price difference of hiring professionals.


Preparing the Footing
-
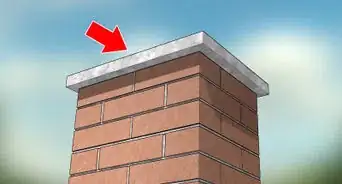
1Understand footing. Every block of wall needs to be placed on a secure footing, which is made from concrete. Footing should be poured twice as deep as the thickness of the wall and twice as wide. Measure out how large you want the wall. If you're using 8” blocks, then your footing should be at least 16" wide. Footing is formed by using a frame of 2x4s and wooden stakes.[1]
-
2Prepare the 2x4s. Double the width of the concrete block with two strips of 2x4s. Hold the 2x4s in place using wooden stakes along the outer wall. The 2x4s should be positioned so that they're secured by the stakes.
-
3Mix your concrete. You can use concrete that you mix on-site or get concrete delivered to you. If you are going to mix your concrete on-site, purchase bags of concrete from your local home improvement store. You buy bags ranging from 60-80 lbs. Pour your concrete into a wheelbarrow, bucket, or plastic tub. Pour a small quantity of water into the concrete powder. Use a hoe to start blending the water and powder. When all of the water has been absorbed, add a little more water. Continue to add small amounts of water until your concrete is thick and smooth.
- If your concrete is clumpy, it needs more water.
- If you concrete is runny, then it has too much water and will not be strong enough. You will need to add more dry concrete to the mixture.
- Use a bucket to add the water, not your garden hose. It's too hard to control the amount of water that comes out of a garden hose.
- You can also use a small mixer to stir the concrete. If you don't have one, they are available for rent at many home improvement and hardware stores.
- Use water to wash off any concrete that gets on your skin.
- Wash your tools immediately after finishing to avoid having the concrete dry on them.
- If your job will require more than 30 bags of concrete, it's best to order a delivery of pre-mixed concrete from a truck.[2]
-
4Pour the base concrete. This will secure your potential wall firmly to the base. Fill the frame up to the edge. Level the freshly poured concrete by running a 2x4 across the top. This will spread the concrete in an even manner. Fill any spots that are low with additional concrete.[3]
-
5Wait for the footing to dry. Before you can begin building, you'll need to give the concrete ample time to dry. If you expect the footing to hold a substantial amount of weight, wait up to three days for it to dry.[4]


Preparing Your Sandstone
-
1Lay out your stones. Gather all your stones and practice forming your wall as your footing dries. A large part of forming a sandstone wall if you’re using uneven blocks is patience.[5] This requires the same amount of focus and concentration as being active in completing a 5000 piece puzzle.
-
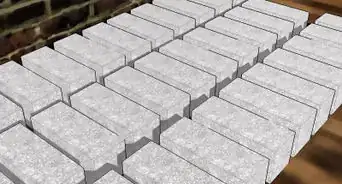
2Organize by size. Once you have a sufficient amount of blocks, create separate piles. Separating the blocks by size could save you a headache when your mortar is wet. You’ll be stacking them from largest to smallest, so arrange your groupings in a way that makes it easier for you to access the largest stones first.
- Having an ample supply of smaller stones will also help fill gaps as you work.
-
3Determine your base. Lay out your larger blocks along the dried footing and see how many you'll need for the first layer. Don't seal these down. Fit them as close as you want. You can use different sized stones to create your preferred look, but the biggest stones must be in the bottom layers. Using too many small stones near the bottom will make your structure unstable.
- Use corner blocks on the corners if available.
- Don’t be discouraged by a curved wall. Many sandstone walls constructed from uneven stones can turn out curvy in certain sections. This is an aesthetic choice that can stand on its own, or be cut for a straight wall.[6]
-
4Prepare the cement mortar. You can purchase standard mortar from your local home improvement or hardware store. Add 3-inches (7.6 cm) of water into your cleaned out wheelbarrow, bucket, or tub. Pour 3/4 of your bag of mortar into the container. Mix the mortar and water using your hoe or a small mixer. Add the rest of your bag of mortar, and stir until the mortar is consistent.
- Your mortar is ready when it has the consistency of buttercream icing.
- You can also find rapid set mortar, but it will only give you about one hour to work, which is not enough time for you to complete your wall.


Laying the Sandstone
-
1Apply mortar to the corner. Use your trowel to spread mortar along the corner of your wall. The mortar should be 1” thick and be the width of your perspective wall. Have the parameters of the width of your wall laid out and marked before applying mortar.[7]
- Continue to spread the mortar out to cover the surrounding three stones.
-
2Set the initial stones. Build up the corners as you would if you were laying bricks. Use a spirit level to ensure the quoins are vertical. Next, stretch a level line from one end of the wall to the other, 300mm-400mm above the footing. Move the line up the wall as you build and use it as a guide until you reach the finished height.
-
3Select the stones. Since you’ve gathered different sized stones, select the necessary stones that will create a level first layer. Place the smaller stones in the gaps in between the larger stones to get an idea what will be level.[8]
- Remember the order of stones once you find an even pattern.
-
4Check the evenness. Use a mason’s level to periodically check the level of your wall. Before mortaring the smaller stones into the larger ones, measure them with the level. This will give you an idea if you need to cut any of the stones that are especially protruding.[9]
-
5Set the mortar. After setting the initial stones, apply mortar to the top and sides of the stone. Do not apply mortar to the side that will act as the corner. Be sure everything is even before laying anything on top of the bricks. Use your trowel to apply 1” of mortar to both the sides and top. Smooth the mortar with the trowel and ensure every stone’s mortar application is even.
-
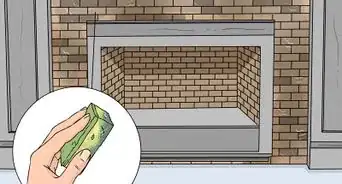
6Clean the sides. As you notice the mortar beginning to settle on the sides, clean off the excess. Use a stiff broom or whisk broom to clean the sides of your wall.[10]
-
7Use a jointer. If the mortar is partially wet, you can compact it for a stronger finish. Use a concave jointer and run it between the stones. This will also create a cleaner look.
- Re-brush after using the jointer for a cleaner look.


References
- ↑ http://www.diyadvice.com/diy/patios-walls/masonry/concrete-block-wall/
- ↑ https://www.familyhandyman.com/masonry/pouring-concrete/how-to-properly-mix-concrete/view-all
- ↑ http://www.diyadvice.com/diy/patios-walls/masonry/concrete-block-wall/
- ↑ http://www.homedepot.ca/know-how/projects/building-a-footing-for-a-stone-or-brick-wall
- ↑ http://www.diyadvice.com/diy/patios-walls/masonry/mortared-stone-wall/
- ↑ http://www.diyadvice.com/diy/patios-walls/masonry/mortared-stone-wall/
- ↑ http://www.diyadvice.com/diy/patios-walls/masonry/mortared-stone-wall/
- ↑ http://www.diyadvice.com/diy/patios-walls/masonry/mortared-stone-wall/
- ↑ http://www.diyadvice.com/diy/patios-walls/masonry/mortared-stone-wall/
About This Article