This article was co-authored by wikiHow staff writer, Janice Tieperman. Janice is a professional and creative writer who has worked at wikiHow since 2019. With both a B.A. and M.A. in English from East Stroudsburg University, she has a passion for writing a wide variety of content for anyone and everyone. In her free time, you can find her working on a new crochet pattern, listening to true crime podcasts, or tackling a new creative writing project.
There are 8 references cited in this article, which can be found at the bottom of the page.
This article has been viewed 16,573 times.
Learn more...
Arctic char can be a fun variation on the usual fish fillets you enjoy for dinner, like salmon. You don’t need a lot of ingredients to cook this fish to sheer perfection—some salt, oil, and other simple garnishes will get the job done. Typically, these fillets can cook in a matter of minutes, and are ready to eat as soon as you can flake them with a fork.[1]
Ingredients
- 1 10 oz (280 g) arctic char fillet
- 1 pinch of salt
Makes 2 servings
- 4 6 oz (170 g) arctic char fillets
- Olive oil
- Salt
- Dill
- Lemon wedges
Makes 4 servings
- Two 7 to 8 oz (200 to 230 g) arctic char fillets
- Salt and pepper
- 1 US tbsp (15 mL) of extra-virgin olive oil
- 1 US tbsp (15 mL) of balsamic vinegar
- 1 tsp (2 g) of orange peel, slivered
Makes 2 servings
Steps
Baked
-
1Set your oven to 400 °F (204 °C). Arctic char needs to be both baked and broiled to reach a good consistency. With this in mind, set your oven to a high temperature, so it’ll be easy for your oven to switch to the broil setting later.[2]
-
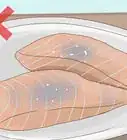
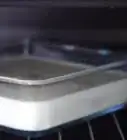
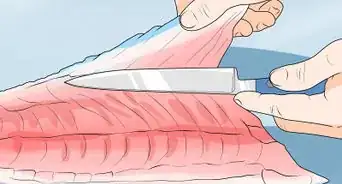
2Place your fillet on a lined baking dish. Place down a section of foil ahead of time, which will keep the fish from sticking to the pan and leaving a lot of residue later on. Put your fillet on top of the foil so it’s ready to go.[3]Advertisement
-
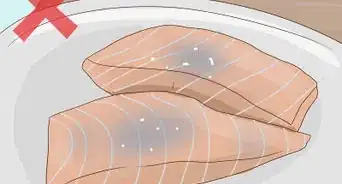
3Season the fillet with a sprinkle of salt. Grab a pinch of salt and dust over the top of the fillet, which helps give it some nice flavor. If you’d like to give your fish some extra zing, add lemon zest on top.[4]
- You can mix rosemary, sherry wine, lime juice, olive oil, and garlic to make a really tasty coating for your char.
- Some people prefer seasoning their arctic char with rosemary and garlic.[5]
-
4Set the fish to bake for 12 minutes. Place the tray in the oven and set your oven timer. Wait until the fish can be flaked apart with a fork before you do anything else.[6]
- If your fish doesn’t look flaky after 12 minutes, keep it in the oven for another 3.
-
5Baste the fillets with their own juice at the 6-minute mark. Set a separate timer for the fish, so you can remember to check up on your fillet. Pull the dish out of the oven slightly, and grab a baster. With this baster, transfer any juices on top of the fillet, which will keep it moist.[7]
-
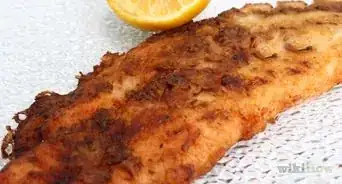
6Broil the fillets after baking them so they crisp up. After the fillets bake for at least 12 minutes, switch the setting on your oven to broil. Wait 2 minutes for the arctic char to finish cooking—it should be nicely browned. At this point, simply wait for the fillet to cool before you enjoy it.[8]

Grilled
-
1Set your grill to a medium-high temperature. Preheat your grill so that it’s ready to go after your arctic char fillets are seasoned. If you have a gas grill, set the temperature automatically. If you use a charcoal grill, check that you have plenty of coals to keep the grill top hot while you cook.[9]
-
2Spread salt and olive oil over each fillet. Place the fillets in a bowl, where you can season them with a pinch or 2 of salt, along with a drizzle of olive oil. There’s no exact amount you need to use—just enough so the fish are fully coated before hitting the grill.[10]
-
3Grill the fish skin-down for 3-5 minutes. Arrange your fillets with skin touching the grill top at first. Set a timer for about 3 minutes, or estimate the time in your head if you’re more experienced behind the grill. Wait for the skin to look crispy along the edges, and the fish itself to look a bit opaque.[11]
- Keep the grill lid closed to lock in the heat.
-
4Flip the fish over and cook them for another 2 minutes. Once the fish looks opaque and slightly crispy, start cooking the other side of the fillet. Set another timer for 2 minutes, which is about how long it will take for the rest of the fish to cook.[12]
- The olive oil coating keeps the fish from sticking to the grill. Once the fish is flaky, you’ll know that it's fully cooked.
- You can also grill the fish skin-side-down for 8-10 minutes without flipping it over.[13]
-
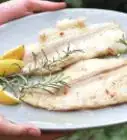
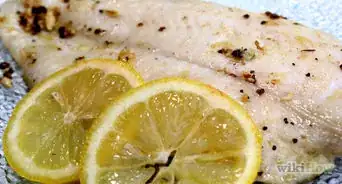
5Serve the fish skin-side up. You can jazz up the fillet with a variety of different sauces or garnishes, like fresh dill or sliced lemon. You may also enjoy eating your fillet with some type of horseradish sauce or cream.[14]
- Some people prefer to eat their arctic char with salsa verde, along with grilled eggplant.[15]
Seared
-
1Grease a large skillet with 1 US tbsp (15 mL) of oil. Set your stovetop to medium-high heat, allowing the oil to melt and coat the surface of the skillet. This will make the fish a lot easier to work with as you cook.[16]
-
2Season the fish with salt and pepper. Set your fillet on a flat, clean surface, like a cutting board. Grab a pinch of salt and pepper and coat it all over the top and bottom of the fillet, which will help give it a little extra flavor.[17]
- You can season your fish with whatever spices and flavors you like, like cilantro, mint, or lemon juice.[18]
-
3Cook the fillet skin-down in the skillet for 3 minutes. Place the fillet down in the skillet, with the skin touching the pan. Set a timer for 3 minutes, and keep a close eye on the edges of the skin—once they look crispy, your arctic char is ready to flip over.[19]
- It may take slightly longer or shorter than 3 minutes for your fish to cook. Just focus on the fish!
-
4Flip the fish and cook it for another 2½ minutes. Turn over the fish so the skin is now facing up. Leave the arctic char to sear for another 2½ minutes, until the rest of the fish starts to look opaque in the middle. Once the fillet is fully cooked, transfer it to a separate plate for serving.[20]
-
5Garnish the seared fish with oil, vinegar, and orange peel. Sprinkle some olive oil on top of the cooked fish, along with 1 US tbsp (15 mL) of balsamic vinegar. As a finishing touch, top the fillet with a pinch of slivered orange peel.[21]
- Seared arctic char tastes great with vegetables on the side, like cooked broccolini.
- Quinoa is a great side dish option for this fish.[22]
Things You’ll Need
Baked
- Baking dish
- Aluminum foil
- Baster
Grilled
- Grill (gas or charcoal)
- Grill spatula
Seared
- Skillet
- Spatula


References
- ↑ https://www.allrecipes.com/recipe/223073/grilled-arctic-char-on-bed-of-greens/
- ↑ https://www.epicurious.com/recipes/member/views/arctic-char-58389845
- ↑ https://www.epicurious.com/recipes/member/views/arctic-char-58389845
- ↑ https://www.epicurious.com/recipes/member/views/arctic-char-58389845
- ↑ https://www.foodnetwork.com/recipes/arctic-char-with-roasted-garlic-and-fresh-rosemary-recipe-1942808
- ↑ https://www.epicurious.com/recipes/member/views/arctic-char-58389845
- ↑ https://www.epicurious.com/recipes/member/views/arctic-char-58389845
- ↑ https://www.foodnetwork.com/recipes/arctic-char-with-roasted-garlic-and-fresh-rosemary-recipe-1942808
- ↑ https://cooking.nytimes.com/recipes/1018127-grilled-arctic-char-with-horseradish-crema
- ↑ https://cooking.nytimes.com/recipes/1018127-grilled-arctic-char-with-horseradish-crema
- ↑ https://cooking.nytimes.com/recipes/1018127-grilled-arctic-char-with-horseradish-crema
- ↑ https://cooking.nytimes.com/recipes/1018127-grilled-arctic-char-with-horseradish-crema
- ↑ https://www.finecooking.com/recipe/grilled-arctic-char-and-eggplant-with-fresh-herb-salsa-verde
- ↑ https://cooking.nytimes.com/recipes/1018127-grilled-arctic-char-with-horseradish-crema
- ↑ https://www.finecooking.com/recipe/grilled-arctic-char-and-eggplant-with-fresh-herb-salsa-verde
- ↑ https://www.epicurious.com/recipes/food/views/seared-arctic-char-with-broccolini-olives-and-garlic-241323
- ↑ https://www.epicurious.com/recipes/food/views/seared-arctic-char-with-broccolini-olives-and-garlic-241323
- ↑ https://www.myrecipes.com/recipe/seared-arctic-char-cucumber-relish
- ↑ https://www.epicurious.com/recipes/food/views/seared-arctic-char-with-broccolini-olives-and-garlic-241323
- ↑ https://www.epicurious.com/recipes/food/views/seared-arctic-char-with-broccolini-olives-and-garlic-241323
- ↑ https://www.epicurious.com/recipes/food/views/seared-arctic-char-with-broccolini-olives-and-garlic-241323
- ↑ https://www.myrecipes.com/recipe/seared-arctic-char-cucumber-relish
- ↑ https://www.epicurious.com/recipes/food/views/seared-arctic-char-with-broccolini-olives-and-garlic-241323