This article was co-authored by wikiHow Staff. Our trained team of editors and researchers validate articles for accuracy and comprehensiveness. wikiHow's Content Management Team carefully monitors the work from our editorial staff to ensure that each article is backed by trusted research and meets our high quality standards.
There are 11 references cited in this article, which can be found at the bottom of the page.
This article has been viewed 29,477 times.
Learn more...
Kina, or Evechinus chloroticus, is a sea urchin found off the coasts of New Zealand. Kina has a briny, creamy flavor that is an acquired taste for many people. To eat kina, you’ll have to remove edible parts from inside of the urchin and properly clean it first. Kina is traditionally served raw, deep fried, or in a pie. There are also other ways that you can add it to food that you regularly eat to enhance the dish's flavor.
Ingredients
- 2 cups (450 g) of kina tongues
- 1 cup (125 g) of breadcrumbs
- 2 slices of raw bacon
Makes 4-6 servings.
- 1 cup (450 g) of kina tongues
- 1 cup (120 g) of flour
- 1 teaspoon (4 g) of baking powder
- 1 teaspoon (4 g) of salt
- 1 teaspoon (4 g) of pepper
- 1/2 cup (125 ml) of milk
- 1 egg
Makes 2-4 servings.
Steps
Shelling Kina
-
1Insert a pair of sharp scissors into the center of the kina's shell. Wear a pair of thick gloves to prevent getting poked by the spines on the kina. Flip the kina over so that the flat side of the urchin is facing up. Press the sharp end of your scissors into the center of the shell until you penetrate it.[1]
- Keep the kina on ice while you store it in the refrigerator.
- Kina will stay good for 2-3 days on ice.[2]
-
2Cut a hole in the kina. Make the hole large enough so that you can fit your fingers or a spoon inside of the hole. The shell itself should be easy to cut into.[3]Advertisement
-
3Pour out the liquid in the hole. Turn the kina over into an empty bowl or your sink and drain the excess water from the urchin.[4]
-
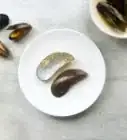
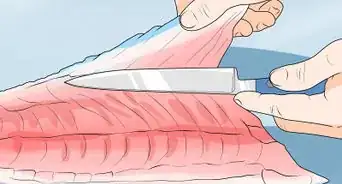
4Remove the yellow parts of the kina. The yellow portions inside of the shell are edible and are usually referred to as kina tongues. Carefully pull them out of the shell with a spoon or your hands.[5]
-
5Rinse the yellow tongues in salt water. Pour a tablespoon of salt into a bowl filled with cold water. Thoroughly swish each piece of kina for 10-15 seconds. Set the tongues aside in a bowl after swishing them. You have now successfully shelled and cleaned your kina. You can eat the yellow parts of the kina raw.[6]
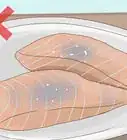
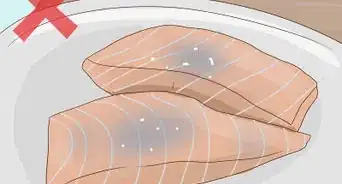
- Kina is best served fresh. The tongues will go bad in a day if you don't eat them right after extracting them.


Making Kina Pie
-
1Preheat your oven to 350 °F (177 °C). Preheating the oven will ensure an even cook across you pie. If you don't preheat your oven the breadcrumbs on the pie won't get as crispy.
-
2Lay down a layer of breadcrumbs in a pie pan. You can purchase breadcrumbs from the supermarket or you can make your own. Sprinkle a liberal amount in a pie dish or pan. This will serve as the bottom of your pie.[7]
- Use a standard 9 inches (23 cm) pie dish.
-
3Cover the breadcrumbs with 1/3 of your kina. You can either chop the tongues into pieces or lay the whole pieces of kina on top of the first layer of breadcrumbs. Only use 1/3 of your kina so that you can stack your pie in several layers.[8]
-
4Repeat the steps, creating several layers of kina and breadcrumbs. Continue to lay down layers of breadcrumbs and kina until you run out of kina. The top layer of the pie should be breadcrumbs.[9]
-
5Cover the top of the pie with raw chopped bacon. Chop up whatever kind of bacon you prefer and sprinkle the pieces on top of the pie. As the pie cooks, the bacon should crisp up.[10]
-
6Bake the pie at 350 °F (177 °C) for 30 minutes. Place your pie in the preheated oven and cook it for 30 minutes. The outside of the pie should look golden brown when it's done.[11]
-
7Remove the pie and let it rest for 5-10 minutes before eating it. Resting the pie will let the inside finish cooking and set the pie. Once the pie is done resting, you can cut slices and serve it.[12]
- The pie tastes the best right after it has been cooked, but can be stored in the refrigerator for 1 to 2 days.


Making Fried Kina
-
1Pour the flour, baking powder, salt, and pepper in a bowl. Mix 1 cup (120 g) of flour with 1 teaspoon (4 g) baking powder. A teaspoon (4 g) of salt and pepper will add more flavor to the batter. Pour the dry ingredients into a bowl and use a fork to mix the ingredients together.[13]
-
2Mix 1/2 cup (125 ml) of milk and one egg into the bowl. Crack an egg over the bowl and then use a fork to whisk the egg into the dry ingredients. Then, measure 1/2 cup (125 ml) of milk and pour it into the bowl. Continue to mix the batter together until it forms a paste-like consistency.[14]
- Make sure that there are no more lumps in your batter before moving on to the next step.
-
3Fill a pot ⅓ of the way with vegetable oil. Use a deep and heavy cast iron or stainless steel pot to fry your urchin. If you have a deep fryer, you can use that as well. You can also use other cooking oils with a high smoke point, such as canola oil, grapeseed oil, or lard.[15]
-
4Bring the oil to 350 °F (177 °C). Turn the burners on and use a cooking thermometer to ensure that the temperature of the oil is 350 °F (177 °C). If the oil is cooler than this, your kina will come out soggy. If the temperature is too high, your kina will burn.
- If you don't have a thermometer, you can pour a small amount of your batter into the oil. If it doesn't bubble, the oil is still too cool. If it bubbles a lot and starts to burn, you know the oil is too hot.
- Oil will start to let off smoke if your heating it up too much.
-
5Coat the kina in the batter. Dip the kina into the batter with a slotted spoon or tongs so that there's an even layer coating it.[16]
-
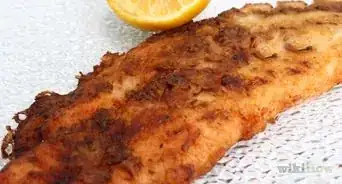
6Dip the kina into the hot oil. Carefully put the kina into the hot oil with a pair of tongs or a slotted spoon. When the kina is submerged, the oil should start to bubble. Continue to cook the kina until they are golden brown. This usually takes 10-15 minutes.[17]
- Don't overcrowd the pot or you kina won't cook evenly. If you have more kina than what will fit in your pot, fry the kina in separate batches.
-
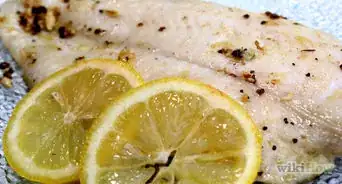
7Remove the kina from the pot and let them drain on paper towels. Remove the fried pieces of kina with a slotted spoon or tongs and place them on a plate lined with paper towels. Let the kina sit for 5-10 minutes before serving them. They will be very hot when you first take them out of the oil.[18]
- Fried kina tastes best when eaten immediately after you cook it. However, you can store it in your refrigerator for one to two days if you have leftovers.


Preparing Kina in Other Ways
-
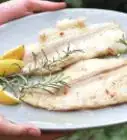
1Spread the kina on slices of buttered bread. One of the most common ways to eat kina is to eat them raw on slices of buttered bread. If you want to add a crunch, you can toast your bread.[19]
-
2Put the raw kina in a salad. Create a salad using lettuce, tomatoes, onions, and whatever other vegetables that you like. Put the raw kina in the salad and toss it.[20]
- Light vinaigrettes and slightly acidic dressings taste best with kina salads.
- Tomatoes, red onion, chiles, beans, and seaweed taste great with kina.
-
3


Things You'll Need
Shelling Kina
- Bowl
- Sharp knife or cooking scissors
- Spoon
Kina Pie
- Pie pan or dish
- Knife
Frying Kina
- Measuring cup
- Pot or deep fryer
- Slotted spoon or tongs


References
- ↑ http://teaohou.natlib.govt.nz/journals/teaohou/issue/Mao52TeA/c1.html
- ↑ http://onlinelibrary.wiley.com/doi/10.1111/j.1365-2621.2012.03133.x/epdf?r3_referer=wol&tracking_action=preview_click&show_checkout=1&purchase_referrer=onlinelibrary.wiley.com&purchase_site_license=LICENSE_DENIED_NO_CUSTOMER
- ↑ https://www.youtube.com/watch?v=GsVDVM-3Sa0&feature=youtu.be&t=1m7s
- ↑ https://www.youtube.com/watch?v=GsVDVM-3Sa0&feature=youtu.be&t=1m32s
- ↑ https://www.youtube.com/watch?v=KDYoq1AhDKI&feature=youtu.be&t=3m18s
- ↑ https://www.youtube.com/watch?v=KDYoq1AhDKI&feature=youtu.be&t=3m51s
- ↑ http://teaohou.natlib.govt.nz/journals/teaohou/issue/Mao52TeA/c1.html
- ↑ http://teaohou.natlib.govt.nz/journals/teaohou/issue/Mao52TeA/c1.html
- ↑ http://teaohou.natlib.govt.nz/journals/teaohou/issue/Mao52TeA/c1.html
- ↑ http://teaohou.natlib.govt.nz/journals/teaohou/issue/Mao52TeA/c1.html
- ↑ http://teaohou.natlib.govt.nz/journals/teaohou/issue/Mao52TeA/c1.html
- ↑ http://teaohou.natlib.govt.nz/journals/teaohou/issue/Mao52TeA/c1.html
- ↑ http://teaohou.natlib.govt.nz/journals/teaohou/issue/Mao52TeA/c1.html
- ↑ http://teaohou.natlib.govt.nz/journals/teaohou/issue/Mao52TeA/c1.html
- ↑ https://jonbarron.org/diet-and-nutrition/healthiest-cooking-oil-chart-smoke-points
- ↑ https://www.youtube.com/watch?v=XzoHLuYP-fI&feature=youtu.be&t=58s
- ↑ https://www.youtube.com/watch?v=XzoHLuYP-fI&feature=youtu.be&t=1m13s
- ↑ https://www.youtube.com/watch?v=XzoHLuYP-fI&feature=youtu.be&t=1m58s
- ↑ http://teaohou.natlib.govt.nz/journals/teaohou/issue/Mao52TeA/c1.html
- ↑ https://norecipes.com/sea-urchin-ceviche-recipe
About This Article