This article was co-authored by wikiHow staff writer, Travis Boylls. Travis Boylls is a Technology Writer and Editor for wikiHow. Travis has experience writing technology-related articles, providing software customer service, and in graphic design. He specializes in Windows, macOS, Android, iOS, and Linux platforms. He studied graphic design at Pikes Peak Community College.
This article has been viewed 66,984 times.
Learn more...
This tutorial will show you how to create a new layer in Adobe Illustrator. You can use layers in Illustrator to organize and separate different objects within your artwork. You can add a new layer using the Layers panel.
Steps
Using Adobe Illustrator on PC or Mac
-
1Open Illustrator. Illustrator has a yellow icon that says "Ai" in the middle. On PC, you can find Illustrator by clicking the Windows Start menu and then typing Illustrator. On Mac, click the magnifying glass icon in the upper-right corner and then type Illustrator in the Search bar.
-
2Click File. It's in the menu bar at the top of Illustrator. This displays a drop-down menu.Advertisement
-
3Click Open. It's in the File drop-down menu. This opens a file browser you can use to browse and open files in Illustrator.
-
4Select a project file and click Open. Use the file browser to locate an Illustrator file on your computer and click it to select it. Then click Open in the lower-right corner of the file browser. Illustrator files have a ".ai" extension.
-
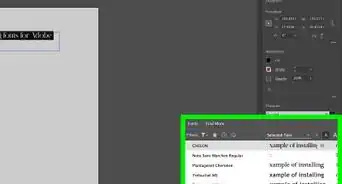
5Locate the Layers panel. It contains a list of Layers. All Illustrator documents have at least one layer. The Layer panel can usually be found in the Tabs menu on the right under the icon that resembles two squares on top of each other.
- If the Layers panel cannot be found anywhere on the screen, click Window in the menu bar at the top, and then click Layers in the Window drop-down menu.
-
6Click the New Layer icon. It's the icon that resembles a sheet of paper with a folded corner. It's at the bottom of the Layers panel. This creates a new layer. Use the following options to edit the layers in the Layers panel.
- Change your layer's name: Do this with by double-clicking a layer name. Then type a name for the layer in the pop-up window next to "Name" and click Ok.[1]
- Hide a layer: Click the icon that resembles an eyeball to the left of the layer to hide the layer. Hold Ctrl or ⌘ Command and click the eyeball icon to display an outline around the hidden layer parts.
- Lock a layer: Click the blank square to the left of a layer to lock it. A lock icon will appear in the blank box. This prevents you from accidentally editing the layer.
- Outline a layer: Click the circle to the right of a layer to display an outline of the layer.
- Create a sublayer: Click at the layer you want and then click on the Create New Sublayer icon. It's the icon that an arrow next to a sheet of paper.

Using Illustrator Draw on Mobile Devices
-
1Open Illustrator Draw on your iPhone or Android device. Illustrator Draw has an orange icon with an image that resembles the tip of a pen inside of a "V". You can download Illustrator Draw for free from the App Store or Google Play Store.
-
2Tap a project or create a new project. To open an existing project, tap one of the project groupings on the page. Then tap the project you want to open from within that group. To create a new project, tap the orange plus (+) icon in the lower-right corner of the app.
-
3Tap the plus icon (+) on the right side. The project layers are listed on the right side of the project. Tap the icon that resembles a circle with a plus sign (+) in the middle to add a new layer. It's above the layers.
-
4Tap Draw Layer or Image Layer. A Draw Layer allows you to draw on a separate layer. This allows you to edit the drawing without accidentally disturbing drawings in other layers. An Image Layer allows you to import a photo into your project.
- If asked if you want to allow Illustrator Draw to access your photos, tap Allow.
-
5Tap an image location (Image Layer only). If you are adding an image layer, tap a location to upload a photo from. Your options are as follows:
- On my iPhone/Gallery: This allows you to select a photo from your phone storage.
- Take a Photo: This allows you to take a new photo with your Camera app.
- My Files: This allows you to select an image uploaded to your Adobe Creative Cloud account.
- Adobe Stock: This allows you to select an Adobe Stock image. Adobe Stock images require you to purchase a license or they will have a watermark on them.
-
6Tap an image. This selects the image and adds it to your project as a new layer.
-
7Tap and drag the image (Image Layer only). You can reposition the image by tapping and dragging it.
- You can also rotate the image by tapping it with two fingers and rotating your fingers.
-
8Drag the corners to resize the image (Image Layer only). To change the size of the image, tap one of the dots in the corner of the image and drag it to change the size of the photo.
-
9


About This Article

1. Open an Illustrator file in Illustrator.
2. Locate the Layers panel or click Window followed by Layers.
3. Click the icon that resembles a sheet of paper with a folded corner in the Layers panel.