This article was co-authored by Alex Keller. Alex Keller has been playing The Sims for over six years, and has contributed extensively to wikiHow's Sims topics. He plays The Sims 1, The Sims 2, The Sims 3, and The Sims 4 on Windows 10 and macOS.
This article has been viewed 7,455 times.
Creating Sims is a favorite activity for many Sims players, but it can be a bit confusing if you're not used to playing Sims 2. This wikiHow will teach you how to create new Sims in The Sims 2.
Steps
-
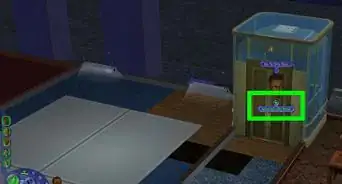
1Open Create-a-Sim. Create-a-Sim is right next to the Family Bin (where premade Sims are stored), and is the square button with three people on it.
- If you're playing with University installed and are playing in a University sub-neighborhood, Create-a-Sim will be called Create-a-Student and will be limited to Young Adult Sims.
- If you have Pets installed, there will be pets on the Create-a-Sim icon as well (unless you're in a university).
-
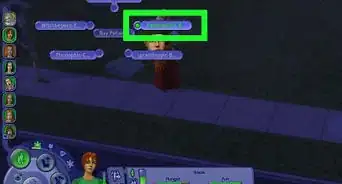
2Enter in the family's last name. Once you enter Create-a-Sim, a flashing box on the bottom of the screen will prompt you for the family's last name. Afterwards, click on the empty portrait box on the left-hand side and click "Create Sim".
- All Sims created alongside this Sim will have the same last name. (Changing this requires in-game marriage or a third-party hack or program, such as the SimBlender.)
- If you're in Create-a-Student in a University subhood, the box on the bottom is the household name. All students can have their own last names.
Advertisement -
3Change your Sim's basic information. You'll start off on Tab 1, where you can give your Sim a first name, and then change their sex, age, skin color, and weight. If you choose, you can also give them a biography (click on the icon of a pen and paper).
- You can pick a Sim template from the Sim Bin (the icon of six people), or randomize your Sim's appearance with the dice icon.
- Your Sim can change weight in-game, and you can edit their biography later on from the in-game Personality tab.
-
4Choose a facial template if you want. Tab 2 allows you to pick a preexisting facial template from a Sim already in the Sim Bin. However, you can skip this if you choose.
-
5Change your Sim's face and hair. Tab 3 prompts you to change your Sim's hairstyle and hair color, and allows you to adjust your Sim's facial structure using sliders.
- Hair color is changed via the Hair tab; eye color is changed on the Eyes tab.
- You may want to remove makeup or glasses before editing your Sim's face.
Tip: To make some wacky-looking Sims, drag any facial slider over to one side, then go to another tab and pick a preset option. When you return to the original slider, it will have reset itself, so you can drag it back over again and repeat this process!
-
6Add accessories. Tab 4 allows you to give your Sim accessories. You can skip these if you want, however. Accessories you can put on your Sim include:
- Makeup (including full-face makeup)
- Glasses
- Facial hair, for male Sims (both stubble and beards)
- Jewelry, if you have Bon Voyage
-
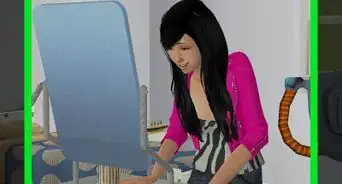
7Edit your Sim's clothing. Under button 5, you'll be able to alter what your Sim wears. Your Sim will have Everyday, Formal, Underwear, Sleepwear, Athletic clothing, and Swimwear to choose from, and if you have Seasons, you'll also be able to pick their Outerwear (which they wear during the colder seasons).
- Separate clothing pieces only exist for the Everyday category; all other categories are restricted to full-body outfits.
- You can't give your Sim multiple outfits for the same category (for example, they can't have two Everyday outfits).
-
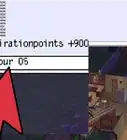
8Change your Sim's personality. Under Tab 6, you can pick your Sim's Aspiration and change their personality (and give them Turn-Ons and a Turn-Off, if you have Nightlife). You can adjust their personality by picking their star sign, or you can manually change your Sim's personality points using the mouse (though you're limited to 25 points across the board).
-
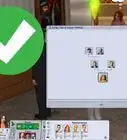
9Click the checkmark to complete your Sim. Your Sim will appear in front of a photography backdrop.
- If you want to change your Sim's last name, this is where you can do so. Just click on the text box for the last name and enter in the Sim's last name.
- If you want to edit your Sim again, click on their portrait on the left side of the screen and click "Edit Sim".
-
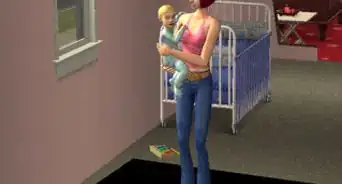
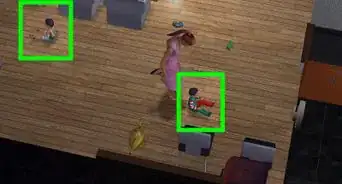
10Create other Sims, if desired. If you want more than one Sim in the household, you can click on the empty portrait above your Sim's portrait and create another Sim (or a cat or dog, if you have Pets). You can only make eight Sims per household.
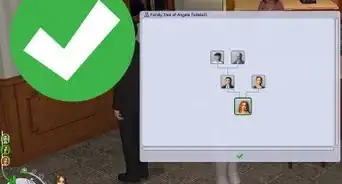
- If you want the Sims to be related in any manner, click on the family tree icon in the lower left and drag the portraits to create ties.
- Any Sims that are teens or younger will need to be related to an adult Sim.
- For obvious reasons, Sims cannot be related to pets.
Tip: If you have at least two adult Sims in Create-a-Sim, you can use the Play With Genetics option (the pacifier) to make another Sim with the adult Sims' genetics.
-
11Press the checkmark to confirm the household. The screen will flash and you'll be returned to the neighborhood view, where you can move the household into a lot.