This article was co-authored by Shun Pittman and by wikiHow staff writer, Hannah Madden. Shun Pittman is a Master Cosmetologist, Author, Owner, and Founder of Corps d’Elite Salon and Corps d’Elite Beauty. With over 25 years of international experience, she is dedicated to and specializes in providing luxury salon services to all hair types and textures and every skin tone and shade. Her services include hair conditioning treatments, cutting, coloring, styling, extensions, and makeup application. Shun has experience working with, coaching, training, and mentoring beauty professionals from multiple companies including L'Oréal, Wella, Matrix, Paul Mitchell, Redken, Big Sexy Hair, and Toni & Guy. She is also a host for national and local media outlets and her work has been featured in The Washingtonian, The Cheddar Network, and WJLA Good Morning Washington's Beauty and Fashion Police segments. Shun is the author of “50 Things Your Hairdresser Wants YOU to Know (and a few things we don’t...)".
There are 15 references cited in this article, which can be found at the bottom of the page.
This article has been viewed 8,719 times.
Whether you’re wearing your hair natural, have it relaxed, or anything in between, there may come a day where you’d like to add some voluminous curls to your hair. Whether you want big bouncy curls or small tight ones, you can create your ideal look with the curling iron of your choice. With a bit of preparation and care, you can curl your hair and keep it moisturized and healthy at the same time.
Steps
Prep
-
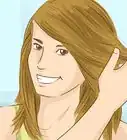
1Use a curling iron on completely dry hair. You don’t have to wash your hair before you curl it, but your curls might look shinier if your hair is clean. You can let your hair air dry or dry it with a hair dryer until it’s completely dry.[1] [2]
- Since you’re about to use heat on your hair, you may want to let it air dry to give it a bit of a break.
- Your hair is 80% protein and 20% moisture, with the protein acting as the building blocks of your hair. When you use a curling iron on damp hair, the curler actually boils the moisture away. At such a high temperature, that boiling actually breaks down the building blocks of your hair.[3]
- There are wet/dry curling irons out there, but these aren't good for your hair.[4]
-
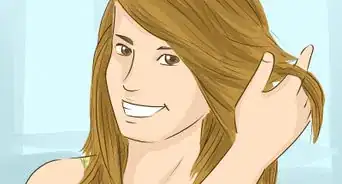
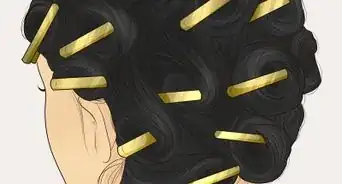
2Comb your hair out to remove knots. Start from the ends of your hair and work your way up with a wide-toothed comb. Focus on any areas that have knots or tangles so you have a smooth surface to work with.[5]
- If you want to enhance your natural curl pattern, don’t comb out your hair.
- If you have a steamer, you can use that to gently relax your hair and prepare it for getting combed. Hold it close to a small section of hair for a few seconds, then follow with a comb.
Advertisement -
3Spray a heat protectant all over your hair and wait for it to dry. You can use any heat protectant you’d like, as long as it promises to protect your hair from damage. Spray this product all over your hair, including the top, bottom, and ends, then wait 1 to 2 minutes for it to dry on your hair.[6]
- You can find heat protectant at most beauty supply stores.
-
4Rub hair lotion into your hair to add moisture. If your hair is naturally dry, grab a bottle of hair oil or hair lotion and squirt a dime-sized amount into your hands. Rub the product between your palms, then gently swipe the product into your hair, focusing on the ends. Keeping going until you’ve covered your entire head.[7]
- You can find products like these at most beauty supply stores.
- Make sure the bottle says “leave-in” on it. That way, it won’t be too heavy or weigh your hair down.
-
5Divide your hair into 4 sections. Start by parting your hair straight down the middle. Then, separate your 2 large sections of hair into 4 smaller sections. Clip each section with a hair clip to keep them up and out of the way as you work on one section at a time.[8]
- Smaller sections are always easier to work with than larger ones. If you have a lot of hair, go for 6 sections instead of 4.


Large Curls
-
1Use a curling iron with a barrel size of 1 in (2.5 cm) or larger. To make loose, voluminous curls, choose a large barrel. An iron with a 1 to 2 in (2.5 to 5.1 cm) barrel works well.[9]
- If you have a looser curl pattern, you can use a large curling iron to enhance your natural curls.
-
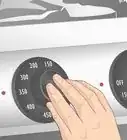
2Heat your curling iron up to 370 °F (188 °C). Any higher, and you could damage your hair. Keep your curling iron temperature low to protect your hair health as you curl it.[10]
-
3Grab a 1 in (2.5 cm) section of hair from the bottom of your head. You can start with one of the sections that is closest to your ear. Use your fingers to portion out a small section that will fit nicely on your curling iron.[11]
- You can use your fingers to give your hair one more little comb through before you start.
-
4Clasp the bottom of the hair in the curling iron. If you’re using a classic curling iron, snap the bottom of your hair in between the clip and the barrel to lock it in place. You can leave about 0.5 in (1.3 cm) of your hair out if you don’t want a super tight curl.[12]
- You can also curl your hair with a curling wand or a hair straightener.
-
5Roll the curling iron up until you’re about 1 in (2.5 cm) away from your scalp. Keeping the clip of the curling iron closed, roll the barrel up toward your scalp, stopping before you actually touch it. You can roll the curl toward your face or away from it to start.[13]
- If you need to use 2 hands to do this, hold onto the very top of the curling iron with your free hand. That spot doesn’t produce any heat, so you can safely grab onto it without burning yourself.
-
6Hold the curling iron for about 10 seconds. Curling irons get hot, so you don’t need to spend a long time on each curl. Keep it locked in place for about 10 seconds to curl your hair without making it too hot.[14]
- Try not to leave the curling iron on your hair for much longer than 10 seconds! The less heat you use at a time, the better your hair will feel.
- If you’re going for softer, looser curls, hold the curling iron for about 5 seconds instead.
-
7Release the hair and let it fall naturally. Roll the curling iron down and away from your head to let your curl fall. Unclip your hair from the barrel to create your first curl.[15]
- Your curl will probably look pretty tight and small right now, so don’t worry if that’s not the look you’re going for. You’ll be able to fluff out your curls when you’re done.
-
8Continue curling your hair section by section. Keep going section by section, taking about 1 in (2.5 cm) of hair every time. Do this all the way around the bottom portion of your hair until you’re done, then let down your top sections of hair, too.[16]
- If you’re having trouble seeing the back of your head, put one mirror in front of you and one behind you.
- For more natural-looking curls, vary the direction you roll your curling iron. Try rolling it in toward your scalp for one curl, then roll it away from you for the next curl.
-
9Roll the curling iron away from your face when you do the top section. Once you've curled the bottom layers, let the rest of your hair out of the clips. Use your fingers to comb through each 1 in (2.5 cm) section a little bit and make sure it’s tangle-free. Just like you did before, grab the bottom part of the hair and roll it up toward your scalp. Make sure you’re rolling the curling iron away from you to open up your face.[17]
- Hold the curling iron for 10 seconds, then let it go. When you’re done, unroll your hair and let the curl naturally fall off the curling iron.[18]


Small Curls
-
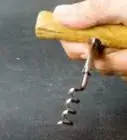
1Use a curling iron with a barrel smaller than 1 in (2.5 cm). If you want tight curls, use a small barrel size, like 5⁄8 inch (1.6 cm). The smaller the barrel, the smaller the curls![19]
-
2Heat your curling iron to 370 °F (188 °C). Curling irons can get super hot, and it’s important to think about your hair health. Heat your curling iron up to about 370 °F (188 °C) to avoid heat damage.[20]
- If you have a really tight curl pattern, you can use a small curling iron to enhance your natural curls.
-
3Grab a 0.5 in (1.3 cm) section of hair. Smaller curls will hold better if you work in smaller sections. With the top half of your hair up, grab a section that’s about 0.5 in (1.3 cm) wide to start.[21]
- You can also make small curls with a curling wand, but a tiny curling iron works just as well.
-
4Wrap the hair tightly around the curling iron. Keep the curling iron pointed down and away from your face. Use one hand to wrap the hair around the curling iron as tight as it will go, keeping the end in place with your hand.[22]
- Wrap your hair around the curling iron started at the top of your hair strands. Curling from the bottom could damage the ends of your hair, which are especially sensitive.
- If you’re worried about burning your hand, put on a heat resistant glove. These usually come with the curling iron, but you can find them at most beauty supply stores.
- Keeping the curling iron pointed away from your face will make your curl looser and more natural-looking.
-
5Hold the hair in place for 10 seconds. Curling irons get hot, so they don’t need a lot of time to curl your hair. Count to 10 to make sure you don’t hold your curl for too long.[23]
- Holding your hair for too long around the wand can lead to unnecessary damage.
- If you want more dimension in your curls, rotate the barrel in toward your scalp as you hold the curl.
-
6Slide your hair off the curling iron and pinch it in between your fingers. Gently pull the wand up and out of your curl. Use your free hand to cup the curl in between your fingers and hold it shut to lock the curl in place.[24]
- Careful! Your curl is going to be hot. Keep your heat-resistant glove on, if you have one.
- Your curl might look a little too curly at this point, but that’s okay. You can fix it later if it’s too tight for your liking.
-
7Curl away from yourself when you reach your face. Grab a small section and wrap it around the wand, making sure to wrap it away from yourself. Hold the hair for 10 seconds, then release it and pinch the curl tight.[25]
- This will open up your face more and make your curls look natural.


Style and Protection
-
1Smooth a hair serum onto your curls to make them shiny. Squirt a pea-sized dab of hair serum onto your palms and rub it between your hands. Gently smooth the serum onto each curl, focusing on the ends, to make them look smooth and shiny.[26]
- Hair serum is optional, but it will give your curls a bouncier, healthier appearance.
-
2Run your fingers through your hair for extra volume. If you’re going for beachy waves instead of pin tight curls, use your fingers to gently brush through your hair and fluff them out. You can do this as much or as little as you’d like, as long as your curls look good to you![27]
- If you’re going for super beachy waves, use a wide-tooth comb to brush out your curls.
-
3Add a layer of hairspray to keep your curls in place all day. Hold a can of hairspray about 6 inches (15 cm) away from your head. Spray a light layer all over to give your curls some hold and keep them in their shape.[28]
- If you want to sleep in your curls and wear them again, you can touch them up the next morning with your curling iron if you need to.


Things You’ll Need
Prep
- Wide-toothed comb
- Heat protectant spray
- Hair lotion
- Clip
Large Curls
- Curling iron
Small Curls
- Curling iron
Style and Protection
- Hair serum
- Hairspray
-Step-12-Version-4.webp)


References
- ↑ https://www.naturalhairrules.com/curl-wand-tutorial/
- ↑ Shun Pittman. Master Cosmetologist, Global Salon Educator & Author. Expert Interview. 3 August 2021.
- ↑ Shun Pittman. Master Cosmetologist, Global Salon Educator & Author. Expert Interview. 3 August 2021.
- ↑ Shun Pittman. Master Cosmetologist, Global Salon Educator & Author. Expert Interview. 3 August 2021.
- ↑ https://www.naturalhairrules.com/curl-wand-tutorial/
- ↑ https://www.youtube.com/watch?v=U2dtMl-2SBY&feature=youtu.be&t=201
- ↑ https://fablore.com/how-to-curl-black-hair/
- ↑ https://www.youtube.com/watch?v=8gF6-P8iI7A&feature=youtu.be&t=22
- ↑ https://thirstyroots.com/curling-iron-curl-sizes.html
- ↑ https://www.naturalhairrules.com/curl-wand-tutorial/
- ↑ https://www.youtube.com/watch?v=qHtYef40n84&feature=youtu.be&t=165
- ↑ https://www.youtube.com/watch?v=769Hf2flDI0&feature=youtu.be&t=102
- ↑ https://www.youtube.com/watch?v=769Hf2flDI0&feature=youtu.be&t=105
- ↑ https://www.youtube.com/watch?v=qHtYef40n84&feature=youtu.be&t=238
- ↑ https://fablore.com/how-to-curl-black-hair/
- ↑ https://fablore.com/how-to-curl-black-hair/
- ↑ https://www.youtube.com/watch?v=769Hf2flDI0&feature=youtu.be&t=182
- ↑ https://www.youtube.com/watch?v=769Hf2flDI0&feature=youtu.be&t=198
- ↑ https://thirstyroots.com/curling-iron-curl-sizes.html
- ↑ https://www.naturalhairrules.com/curl-wand-tutorial/
- ↑ https://www.youtube.com/watch?v=U2dtMl-2SBY&feature=youtu.be&t=338
- ↑ https://fablore.com/how-to-curl-black-hair/
- ↑ https://www.youtube.com/watch?v=U2dtMl-2SBY&feature=youtu.be&t=265
- ↑ https://www.naturalhairrules.com/curl-wand-tutorial/
- ↑ https://www.youtube.com/watch?v=769Hf2flDI0&feature=youtu.be&t=182
- ↑ https://www.naturalhairrules.com/curl-wand-tutorial/
- ↑ https://www.youtube.com/watch?v=qHtYef40n84&feature=youtu.be&t=681
- ↑ https://fablore.com/how-to-curl-black-hair/
About This Article

-Step-12-Version-4.webp)