This article was co-authored by Anjuli Yera, MD. Dr. Anjuli Yera is a Certified Professional Makeup Artist based out of West Palm Beach, FL. With over 15 years of experience, she specializes in makeup artistry, airbrush application, and bridal and wedding party makeup. Her work has been featured in St. Louis Bride, STL Today as well as the Miami Times. She has received the WeddingWire Couples’ Choice Award, Best of The Knot Award, and Top Pro Status on Thumbtack. Additionally, Anjuli has been invited to KSDK’s, 'Show Me St. Louis,' to cover Makeup Trends of the year. Anjuli is a self-taught professional makeup artist who received further training from the Artistry Makeup Academy.
There are 10 references cited in this article, which can be found at the bottom of the page.
This article has been viewed 14,052 times.
Sometimes, finding that perfect pair of false lashes can be as difficult as finding a needle in a haystack. If they are the right style, they may not be full enough for the look you want. If they have glitter, just like you always wanted, the glitter may be the wrong color. They are often much more expensive than plain lashes. Luckily, it is easy to customize lashes, whether you simply want to make them fuller, or if you want to add some glitter or glam to them. Best of all, you can customize them to your liking!
Steps
Adding Volume with Individual Lashes
-
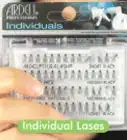
1Get a pair of false lashes. It would be best to keep the lashes in their original tray. If the lash strip is very long, however, you might want to measure it against your eyelid, and trim off any excess; always trim from the outer corner.[1]
-
2Apply eyelash glue to just below the strip.[2] For best results, use a high-quality eyelash glue.[3] If your eyelash glue comes with an applicator, you should use that. If your eyelash glue came in a tube, apply it using a thin brush.Advertisement
-
3Carefully place the individual lashes into the glue, making sure that they bump up against the lash strip. You can do this using your fingers or a pair of tweezers.[4]
-
4Wait for the glue to dry, then use the lashes. If you apply the lashes too soon, the individual lashes may fall off.


Adding Volume by Stacking Lashes
-
1
-
2Spread the hairs out on the outer corner of the first pair of lashes. Take the pair of lashes with the thick-and-thin sections. Use your tweezers to slide the hairs about on the lash strip so that they are more evenly spaced. This will help make your false lashes appear fuller at the outer corner.[7]
-
3Place your altered lashes back on their tray. If there is still some of adhesive left on the strip, use that to stick the lashes to the tray. This will make it easier to stack and glue the lashes together.
-
4Draw a thin line of eyelash glue right under the lash strip. Use a good-quality eyelash glue for this. If your glue came with an applicator, use that to apply the glue. If the glue didn't, use a thin brush to apply the glue.[8]
-
5Place the second pair of lashed on top. Take the false lashes with the evenly-spaced hairs. Carefully place it on top of the first pair with the glue on it. You can do this with a pair of tweezers or your fingers. Use the end of a brush or pencil to help push down the corners.
- If you want a tapered look to the lashes, off-set the second pair by a little, so that they extend over the outer corners of the first pair. This way, there are fewer, thinner hairs towards the inner corners.
-
6Wait for the glue to dry before using the lashes. If you off-set the lashes, be sure to snip off the excess at the outer corner.[9] If the lash strip is still too long, then trim it down further.


Adding Glitter
-
1Pour a small amount of cosmetic-grade glitter into a small dish, jar, or tray. This will make it easier to pick up. Do not use regular glitter from the arts and crafts store—even the finest, scrapbooking glitter is not safe for the eyes.
-
2Apply clear eyelash glue to the false lashes using the applicator that came with it, or a thin, pointed brush. You can put the glue wherever your want the glitter. One of the most popular areas is just below the lash strip, but you can also apply it to the lashes themselves. Avoid applying the glue directly onto the lash strip. This will put the glitter too close to your eyes, which can result in irritation.
- If you do decide to apply the glue to the lashes themselves, plan on doing the underside as well, once everything dries. This way, the glitter will be visible when your eyes are both open and closed.
- If the glue causes the lashes to clump together, use a straight pin to separate them.[10]
-
3Apply the glitter to the lashes. There are lots of ways in which you can do this. You can gently pat the glitter on using a soft, fluffy eyeshadow brush. You can also sprinkle the glitter on using your fingertips. Finally, you can always dip the lashes into the glitter itself.[11] [12]
- Do not wait for the glue to get tacky. The sooner you apply the glitter, the better.
-
4Wait at least 10 minutes for the glue to dry. If you used a lot of glue, especially along the lash line, you may have to wait longer than 10 minutes. If you don't wait until the glue is completely dry, then the glitter may peel off.
-
5Tap off any excess glitter. You can also gently brush it off using a very soft eyeshadow brush. If you notice any gaps, simply repeat the process: apply some glue, pat on some glitter, let it dry, then tap it off.


Adding Rhinestones
-
1Get a pair of dramatic lashes. The best type of false lashes for this method are the type that are long, thick, and full. Avoid thin or wispy lashes for this method, as they won't be able to hold the weight of the rhinestones.
- If the lash strip is very long, measure the lashes against your eyelid, and snip off any excess from the outer corner.
-
2Get some tiny rhinestones. The rhinestones need to be the smallest you can fine. You will be essentially wearing these on your lashes, so anything too big will be too heavy. White rhinestones will give you a classy look, but colored rhinestones are great for events, holidays, and other special occasions.
- You can also use small sequins or confetti for this.[13]
-
3Apply a line of eyelash glue to just below the lash strip.[14] You can also apply a small dot of glue to one of the outer lashes instead.[15] Use the applicator that came with your eyelash glue, or a very thin brush, to do this.
- Some people find it easier to make a puddle of glue on a tray, and then dipping their rhinestone, sequin, or confetti into the glue with a pair of tweezers.
- Do not apply the glue directly to the lash strip, or the rhinestones will get in the way. They may also irritate your eyes.
-
4Use tweezers to pick up a tiny rhinestone, and press it into the glue. If the rhinestone doesn't land exactly where you want it, use the tip of your tweezers to gently nudge it into place. Do this for all of the rhinestones.
-
5Wait for the glue to dry. You are using more glue than you normally would to attach the lashes to your lids, so the glue may take a while to completely dry. Rhinestones are also heavy, in terms of lashes, so the glue needs to be perfectly dry. If you don't wait long enough, the rhinestones may slide around or fall off.


Adding Feathers
-
1Get some dramatic lashes. This method works best with lashes that are already thick and full. Avoid wispy or natural style lashes; the contrast between them and the feathers will be too stark.
- If the lash strip is long, measure the lashes against your eyelid, then trim them down from the outer corner to fit.
-
2Get some feathers. You can use lots of different types of feathers, including flat, wing feathers, soft and fluffy feathers, thin and wispy feathers, and peacock feathers. You will need to prepare the feathers differently, however.
-
3Take the feathers apart, if needed. If you are using thin, wispy feathers, you don't need to do this. Other types of feathers, however, will need to be taken apart so that they'd look more proportionate against the false lashes. Here are the recommended ways to take apart each type of feather:
- If you are using a flat, wing feather, peel a strip off of the stem. Next, separate the strips down to thinner sections.
- If you are using soft and fluffy feathers, peel off all the soft strands until you get to the stiffer strands at the tip.[16]
- If you are using a peacock feather, simply pluck a few of the green-blue strands off of the stem; you will be using these for your lashes.
-
4Trim the feathers down. Even if you are using a thin wispy feather or a peacock feather strand, you still need to cut it down. Place the feather where you want it to go, and see how much you need to cut off. The feather should be no more than twice the length of the longest lash. Once you have figured out the length, trim the feather down starting at the base using a pair of scissors.
- If you are using the flat, duck type feathers, you can even trim the tip into a point, curve, or angle.
- If you are using a soft, fluffy feather that you "shaved" down, trim the tip down so that it's smaller.[17]
- If you are using more than one feather, play around with different lengths to create a tapering effect.
-
5Draw a thick, line of eyelash glue where you want the feather to go. Put the glue along the lash strip as well as just below it.
-
6Wait for the glue to get tacky, then start placing the feathers. Make sure that the base of each feather bumps up against the lash strip. Avoid placing the feather onto the actual strip, or it will poke your eyelid. You can tell if the glue is tacky when it starts to turn clear.
- You can place the feathers with your fingers or with a pair of tweezers.
-
7Wait for the glue to dry. This may take up to 2 hours. If you move onto the next step too soon, the feathers will fall off.
-
8Curl the lashes using an eyelash curler. This will help the feathers blend in better with the lashes. After this, the lashes are ready to use.


Community Q&A
-
QuestionCan you stack fake eyelashes?
 Anjuli Yera, MDDr. Anjuli Yera is a Certified Professional Makeup Artist based out of West Palm Beach, FL. With over 15 years of experience, she specializes in makeup artistry, airbrush application, and bridal and wedding party makeup. Her work has been featured in St. Louis Bride, STL Today as well as the Miami Times. She has received the WeddingWire Couples’ Choice Award, Best of The Knot Award, and Top Pro Status on Thumbtack. Additionally, Anjuli has been invited to KSDK’s, 'Show Me St. Louis,' to cover Makeup Trends of the year. Anjuli is a self-taught professional makeup artist who received further training from the Artistry Makeup Academy.
Certified Professional Makeup ArtistAbsolutely! Gluing 2 pairs of lashes together is a great way to add some extra dimension and sass to your look. -
QuestionHow do you cut fake eyelashes that are too wide?Anjuli Yera, MDDr. Anjuli Yera is a Certified Professional Makeup Artist based out of West Palm Beach, FL. With over 15 years of experience, she specializes in makeup artistry, airbrush application, and bridal and wedding party makeup. Her work has been featured in St. Louis Bride, STL Today as well as the Miami Times. She has received the WeddingWire Couples’ Choice Award, Best of The Knot Award, and Top Pro Status on Thumbtack. Additionally, Anjuli has been invited to KSDK’s, 'Show Me St. Louis,' to cover Makeup Trends of the year. Anjuli is a self-taught professional makeup artist who received further training from the Artistry Makeup Academy.
Certified Professional Makeup ArtistPlace the false lashes on your natural lash line to compare the widths. Then, carefully cut off any excess fake lash that goes outside the width of your natural lash line. -
QuestionHow do I thin out false lashes that are too thick?
 Community AnswerThere are many tutorials on YouTube to thin out or otherwise make falsies your own, but a technique I know is "feathering." It's like when cutting bangs for real hair, make small, quick, precise cuts into and perpendicular to the lashes. Do this until you feel they have the correct thickness.
Warnings
- If the decorations start to fall off, stop wearing the lashes. Getting a piece of glitter or even rhinestone stuck in your eye is the last thing you'd want.⧼thumbs_response⧽
- False lashes need to be replaced after 5 to 8 wears.[19] Anything longer than that, and the lashes start to fall apart. You also have a higher chance of getting an infection.⧼thumbs_response⧽
- After you are done wearing your false lashes, carefully peel off any old glue from the strip, and put them back into their case.[20] This keeps them sanitary.⧼thumbs_response⧽
- Be careful when cleaning the lashes, or the glue holding the decorations in place may dissolve.⧼thumbs_response⧽
Things You'll Need
Adding Volume with Individual Lashes
- False lashes
- Tweezers
- Individual lashes
- High-quality, clear eyelash glue
- Thin brush (optional)
Adding Volume by Stacking Lashes
- 2 sets of false lashes
- High-quality, clear eyelash glue
Adding Glitter
- False lashes
- High-quality, clear eyelash glue
- Thin brush (optional)
- Cosmetic-grade glitter
- Eyeshadow brush (optional)
- Straight pin (optional)
- Small jar, dish, or tray
Adding Rhinestones
- False lashes
- Tweezers
- Tiny rhinestones
- High-quality, clear eyelash glue
- Thin brush (optional)
Adding Feathers
- False lashes
- Tweezers
- Scissors
- Feathers
- High-quality, clear eyelash glue
- Eyelash curler


References
- ↑ Anjuli Yera, MD. Certified Professional Makeup Artist. Expert Interview. 29 September 2021.
- ↑ Anjuli Yera, MD. Certified Professional Makeup Artist. Expert Interview. 29 September 2021.
- ↑ https://www.youtube.com/watch?v=iMXgDchD-jI
- ↑ https://www.youtube.com/watch?v=iMXgDchD-jI
- ↑ Anjuli Yera, MD. Certified Professional Makeup Artist. Expert Interview. 29 September 2021.
- ↑ https://www.youtube.com/watch?v=rQiLMLY-YYM
- ↑ https://www.youtube.com/watch?v=rQiLMLY-YYM
- ↑ Anjuli Yera, MD. Certified Professional Makeup Artist. Expert Interview. 29 September 2021.
- ↑ https://www.youtube.com/watch?v=rQiLMLY-YYM
- ↑ http://www.realsimple.com/beauty-fashion/hair/dramatic-makeup/glitter-dipped-lashes
- ↑ https://www.theconfettibar.com/diy-confetti-lashes/
- ↑ http://www.realsimple.com/beauty-fashion/hair/dramatic-makeup/glitter-dipped-lashes
- ↑ https://www.theconfettibar.com/diy-confetti-lashes/
- ↑ https://www.youtube.com/watch?v=GXLXQmMikC4
- ↑ http://www.xovain.com/how-to/diy-rhinestone-eyelashes
- ↑ https://www.youtube.com/watch?v=3A4h4JZXeiA
- ↑ https://www.youtube.com/watch?v=3A4h4JZXeiA
- ↑ http://www.cosmopolitan.co.uk/beauty-hair/how-to/a35697/apply-false-eyelashes/
- ↑ https://houseoflashes.com/pages/faq
- ↑ https://houseoflashes.com/pages/faq
About This Article