X
wikiHow is a “wiki,” similar to Wikipedia, which means that many of our articles are co-written by multiple authors. To create this article, 9 people, some anonymous, worked to edit and improve it over time.
This article has been viewed 45,088 times.
Learn more...
This is a quick guide on how to Disk Fragment a Hard Drive on a Windows 8.1 Pro Operating System follow the following steps to learn how to do so. This guide will also include a handy guide on how to add the following Icons to the Desktop:- My Computer (aka Computer)- User Files - Network- Recycle Bin- Control Panel.
Steps
-
1Navigate to your "Desktop" once that is done, anywhere on the Desktop (not on an icon) right click and on the drop down menu select "Personalise".
-
2Observe the box open called "Personalisation". In this box is a title called "Change Desktop Icons", which can be found towards the top left hand side of the box. Click on it.Advertisement
-
3Click on this title. A box called "Desktop Icon Settings" will have opened. At the top of this box you will find five check boxes. Make sure all of them are checked and click apply at the bottom of the box. You can now close that Box and the Personalisation box as well.
-
4See the Icons that you just checked appear on your desktop. These are a handy addition to the navigation of Windows 8, which most users find hard to do.
-
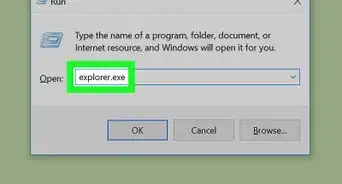
5Look for the "Computer / My Computer / This PC" Icon. Double click on it and open it. You are now faced with the Windows 8 file explorer in a desktop environment. You want to right click on your primary Hard Drive that the Operating System is running off, which will most likely be the (C:) Drive. Once you have right clicked on the (C:) Drive scroll down to the "Properties" option at the bottom of the drop down menu and Click on it.
-
6Look for the box to open called "Windows 8.1 Pro (C:) Properties" (or whatever you called that drive. You will also notice six tabs across the top of the screen as well as an option to the bottom right of the pie chat.
-
7Click on the Disk Clean up button found to the bottom right of the pie chart first. Once this is done, it will start calculating what can be deleted. This is not the de-frag but is an option to clean up some of the files that are casing un-necessary space on the Hard Drive. Once it has finished calculating a box will appear with a few check boxes, make sure all of them are checked and click "OK".And then "Delete Files".
-
8Click on the "Tools" tab at the top of the box. Once this has been done, you will see the option called "Optimise and Defragment Drive" With a button called Optimise, click on that.
-
9Observe a box called "Optimise Drives" will have opened. In this window, you will see a list of all the drives currently connected to the computer and its status on the far right alongside its media type and last run.
-
10Select the Hard Drive you want to de-frag by clicking on it and highlighting it so that it has a blue highlight and click optimise found next to the Analyse button. This had a blue and yellow shield next to it which indicates that Administrator permissions will be required and it will prompt you continue the operation.
-a-Hard-Drive-on-Windows-8.1-Pro-Step-1.jpg)
-a-Hard-Drive-on-Windows-8.1-Pro-Step-2.jpg)
-a-Hard-Drive-on-Windows-8.1-Pro-Step-3.jpg)
-a-Hard-Drive-on-Windows-8.1-Pro-Step-4.jpg)
-a-Hard-Drive-on-Windows-8.1-Pro-Step-5.jpg)
-a-Hard-Drive-on-Windows-8.1-Pro-Step-6.jpg)
-a-Hard-Drive-on-Windows-8.1-Pro-Step-7.jpg)
-a-Hard-Drive-on-Windows-8.1-Pro-Step-8.jpg)
-a-Hard-Drive-on-Windows-8.1-Pro-Step-9.jpg)
-a-Hard-Drive-on-Windows-8.1-Pro-Step-10.jpg)
Advertisement
Community Q&A
-
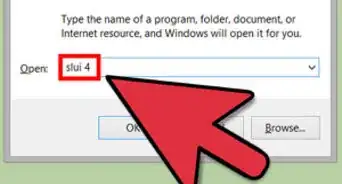
QuestionOn Dell Inspiron 1525, running 7 (upgraded from Vista), how can I increase the speed? Also, can I successfully upgrade same laptop to OS 8.1?
 Community AnswerAdd more RAM, block startup programs and disable the Aero theme. Upgrading to windows 8.1 can help a lot, and so can installing classic shell.
Advertisement


About This Article
Advertisement