This article was co-authored by wikiHow Staff. Our trained team of editors and researchers validate articles for accuracy and comprehensiveness. wikiHow's Content Management Team carefully monitors the work from our editorial staff to ensure that each article is backed by trusted research and meets our high quality standards.
This article has been viewed 20,622 times.
Learn more...
Resist printing is a popular technique for printing color on fabric, where a resist paste or material is imprinted on the fabric and then dyed. You may decide to try resist printing at home on a piece of clothing or fabric. You can do resist printing with glue, wax, or printing blocks. Each method will yield different results and are a fun way to get into resist printing at home.
Steps
Doing Resist Printing With Glue
-
1Pick the fabric. You may choose a fabric like cotton or muslin for the resist printing. Avoid heavy fabrics like wool or slick fabrics like silk. Go for a fabric that is white or very light in color so the print stands out more.
-
2Lay the wax paper underneath the fabric. Take your chosen fabric and place wax paper underneath it to protect the surface you are working on. Lay the wax paper and the fabric down on a flat, high surface, such as a table. Make sure the wax paper lines the fabric so no glue or paint gets on the surface you are working on.Advertisement
-
3Create a design on the fabric with the liquid glue. Use clear glue that is washable. Hold the glue steady as you draw out designs on the fabric. You may do a pattern with lines, circles, spirals, or shapes. Or you may try a chevron or floral pattern. The design you make with the glue will be the design that is resist printed onto the fabric.
- Do not let the glue get too thick on the fabric. Try not to use too much glue on the fabric, as this can lead to a blurry design.
-
4Let the glue dry overnight. Once you have created the designs on the fabric with the glue, let the glue set overnight. Place the fabric in a safe spot where it will not be touched so it can dry.
- If you are using clear glue, it should appear clear when it dries.
-
5Paint the fabric. Lay out the fabric with the glue designs and put out craft paints and paint brushes. Pick out colors that you think will look good with the designs. Then, brush the paint right over the glue, onto the fabric. Cover the entire piece of fabric with paint, creating a background color for the glue designs. Blend colors if you’d like or use just one color. Get creative and paint the designs as you see fit.
- Use acrylic or water based paints for the designs. Avoid using oil based paints, as they will not dry well.
- Try not to layer on the paint too thickly over the glue, as this can distort the design. Stick with one to two light coats of paint on the fabric.
-
6Allow the paint to dry. Giving the paint time to dry will make it easier for you to rinse off the glue later. Determine the drying time based on how you want the colors to appear. If you want the paint colors to appear darker on the fabric, you should let the fabric dry for longer.
- If you want the paint colors to appear more subdued, let them dry until they are damp to the touch. Then, rinse them off while they are still slightly wet.
-
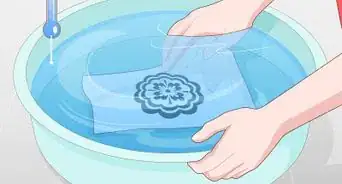
7Rinse off the glue with warm water. Once the paint has dried to your liking, place the fabric under warm running water and gently rinse off the glue. It may feel a bit slimy but that’s okay, that is to be expected. Rinse until the glue slides off the fabric.
- Do not rub or scrub at the fabric, as this can damage it. Instead, let the glue melt and slide off on its own.
-
8Let the resist print dry overnight. Leave your prints out overnight to dry on a flat surface.
- You can frame the prints and hang them as wall art. Or you may use the prints to make pillowcases for your couch. You can also use the prints as dish towels or placemats.


Doing Resist Printing with Wax
-
1Wash and iron the fabric. Start with fabric that has been pre-washed and ironed so it is easy to work with. It will also absorb dyes better if it has been pre-washed. Select fabric that is white or very light in color.[1]
- Use fabrics made with natural fibers like cotton, muslin, hemp, or rayon. Avoid fabrics like wool or silk, as they can be difficult to print on with the wax method.
-
2Secure the fabric. To make the resist printing process easier, put newspaper or wax paper down on a flat surface, like a table. Then, secure the fabric over the table with tape, pins, or staples. Make sure the fabric is taut over the table so it does not move around when you apply the wax.[2]
- If you do not want to get wax or dye on your hands, you can put on medical gloves at this point.
-
3Melt the wax in the metal pot. Batik wax is made especially for resist printing. You can find Batik wax online or in craft stores. Regular wax should work fine too as long as it contains no dyes. Melt the wax in the metal pot until it is a liquid.[3]
- Stir the wax as it melts so it does not get too hot or burn. Leave the wax on low so it does not come to room temperature and get hard again while you are resist printing.
-
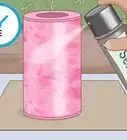
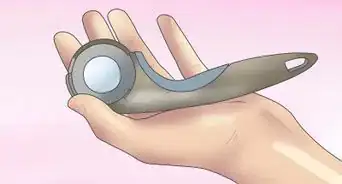
4Apply the wax with a brush or other tool. Once the wax has melted, take the paintbrush and dip it into the wax. Then, apply it to the fabric in whatever designs you would like. Make dots, circles, lines, spirals, or shapes on the fabric to create a pattern. Do not put too much wax onto the fabric. Apply one to two layers of wax at a time.[4]
- You can also make fun shapes or patterns on the wax with tools like a potato masher, a chopstick, or any other object with an interesting texture.
- Make sure the wax appears clear on the fabric and has penetrated the other side of the fabric. If the wax appears yellow and sits at the top of the fabric or spreads out on the fabric, the wax is not the right temperature. It should not be too hot or too cool.
-
5Let the wax dry. Once you have made as many patterns and designs on the fabric as you’d like, let the wax dry overnight on the fabric. Put the fabric is a safe spot so the wax can set.[5]
-
6Dye the fabric. When the wax has dried, dye the fabric in the colors of your choice. You can use a bucket or your sink to dye the fabric using natural dyes. You can also use the washing machine to dye the fabric.[6]
- Start with the lightest or brightest color first for the pattern. Then, choose a darker color that will mix well with the first color. The lightest color will show up on the waxed areas and the darker color will be the main color on the fabric.
- For example, you may start with yellow dye as the first dye bath. Then, you may use turquoise as the next dye bath. This will mix with the yellow to make a green background color on the fabric.
-
7Rinse and dry the fabric. After you have dyed the fabric, rinse out the fabric and hand wash it in lukewarm water. The lukewarm water will ensure the wax does not melt. Then, air dry the fabric.
-
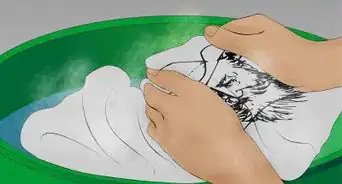
8Boil off the wax. To remove the wax, fill a large pot with water and a few drops of liquid detergent. Bring the water to a simmer and put in the fabric. Weigh the fabric down with something heavy, such as a rock or a kitchen tool. Then, let the water come to a boil.[7]
- The wax will then slide off the fabric and float to the top of the water. When all the wax floats to the surface, remove the fabric from the pot.
-
9Wash and dry the fabric. Wash the fabric one more time in the washing machine to remove any residual dye. Dry the fabric in the dryer or hang it to air dry.[8]


Using Printing Blocks
-
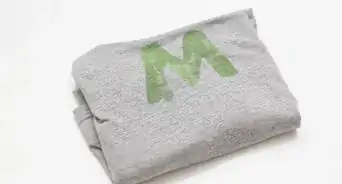
1Iron the fabric. To do block printing, it is important that you start with fabric that is very flat and has no creases or marks. Iron the fabric you are using for the resist printing. You may use cotton or muslin fabric for this project.
- Avoid using thick fabrics like wool and acrylic as well as slick fabrics like nylon and silk. Block prints do not usually show up well on these types of fabrics.
- Pick white fabric or fabric in a light color so the block prints show up better. If you are using lighter coloured dyes, you may be fine to use a darker coloured fabric.
-
2Secure the fabric on a table. When doing block printing on fabric, it is very important that you secure the fabric on a flat surface. This way, the fabric will not move around or shift while you are printing. You can use a wooden table to stretch the fabric over and secure it with tape or staples. Make sure the fabric is taut over the table and does not move around.
- For more support under the fabric, you can layer carpet or foam over the table and then place the fabric over these layers. Secure the fabric well with tape, staples, or pins.
-
3Soak the sponge in the fabric paint or dye. Squeeze the fabric paint or dye into a bowl. Then, soak the sponge in it so the dye covers one side of the sponge. Make sure one side of the sponge is covered with the paint or dye.
- If you are using natural dyes that can stain your fingers, wear gloves to prevent this.
- Another option is to take a paint brush and paint the dye over the sponge to cover it.
-
4Press the printing block into the sponge. Make sure the color covers the entire printing block. Press the sponge onto the block as many times as needed to get dye on the printing block.
- You can buy printing blocks online or in craft stores. Look for printing blocks made of wood or rubber.
-
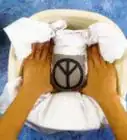
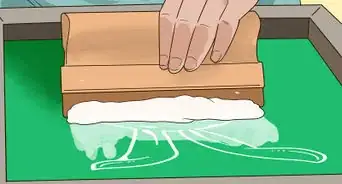
5Apply the printing block to the fabric. Hold the printing block with your fingertips and press it firmly onto the fabric. Use your palm or your fingers to apply even pressure. Hold the block on the fabric for a few seconds and then carefully remove it.
- Sponge dye onto the same printing block and press it on a new spot on the fabric to create a pattern. Or use a different colored dye on the same printing block. Make sure you wash the printing block between colors so the dyes do not mix.
- You can also apply different print blocks on the same piece of fabric. Get creative and make up your own patterns or designs.
-
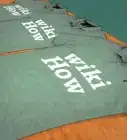
6Let the fabric dry. Once you have done as many print blocks as you’d like, let the fabric dry overnight. Put it in a safe flat area where it will not be touched.
-
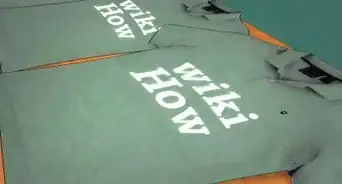
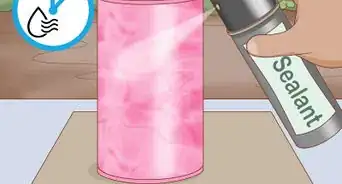
7Iron or rinse the fabric to set it. If you used textile paints to do the block printing, iron the fabric on the reverse side to set the print. If you used natural dyes for the block printing, iron on the reverse side and rinse the fabric in warm and then cold water with detergent.


Things You’ll Need
Doing Resist Printing With Glue
- Liquid glue, washable
- Fabric
- Acrylic or craft paint
- Paint brushes
- Wax paper
Doing Resist Printing with Wax
- Batik wax
- Fabric
- Natural dyes
- A metal pot
- A clean paint brush
- Newspaper or wax paper
Using Printing Blocks
- Printing blocks
- Fabric
- Textile paints or natural dyes
- Carpet or foam
- Sponges
- A bowl


References
- ↑ http://www.dharmatrading.com/techniques/batik-instructions.html
- ↑ http://www.dharmatrading.com/techniques/batik-instructions.html
- ↑ http://www.dharmatrading.com/techniques/batik-instructions.html
- ↑ http://www.dharmatrading.com/techniques/batik-instructions.html
- ↑ http://www.dharmatrading.com/techniques/batik-instructions.html
- ↑ http://www.dharmatrading.com/techniques/batik-instructions.html
- ↑ http://www.dharmatrading.com/techniques/batik-instructions.html
- ↑ http://www.dharmatrading.com/techniques/batik-instructions.html
About This Article