X
wikiHow is a “wiki,” similar to Wikipedia, which means that many of our articles are co-written by multiple authors. To create this article, volunteer authors worked to edit and improve it over time.
This article has been viewed 13,607 times.
Learn more...
Lock wiring is a secondary safety practice that involves mechanically restraining bolts to prevent them from vibrating loose during machine operation. This method is a requirement the aerospace industry and has been adapted in the racing community. Lock wiring is usually accomplished by using specially designed fasteners, however, these fasteners are costly and difficult to find. This tutorial will address the modification of a standard bolt for this process.
Steps
-
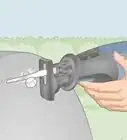
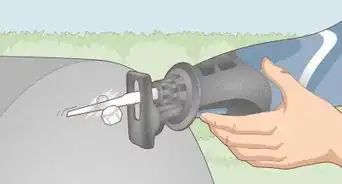
1Determine which bolts need to be lock wired. Bolts that meet this criteria are usually fasteners that will cause machine failure if they are to loosen during operation. Or they are bolts that will pose a safety threat to the operator if failure occurs.
-
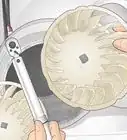
2Torque bolts needed for lock wiring. Follow the American Society of Mechanical Engineers (ASME) specifications for the correct amount of torque to apply to the bolt. Fasteners of different sizes require different amounts of torque.Advertisement
-
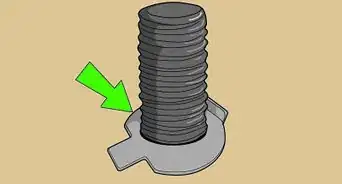
3Create a plan. Since the bolts are now in the position they will be in during operation you can determine which direction the holes will need to be drilled in the bolt. Once determined you will want to mark the direction on to the head of the bolt. A paint stick if the most effective however, any type of marking will be sufficient as long as it does not compromise the structural integrity of the bolt.
-
4Remove the bolts; For this step it is recommended to keep the bolts organized as they are removed. Later the bolts will be installed back to their original location; keeping track of which bolt came out of what hole will aid in this process.
-
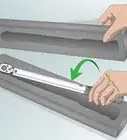
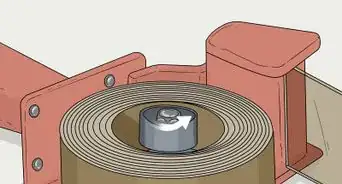
5Add a nut to the end of the bolt and secure to vice. By adding a nut on to the bolt will create a level surface on the side of the bolt head. Keeping the bolt head level and perpendicular to the drill will greatly aid in the drilling process.
-
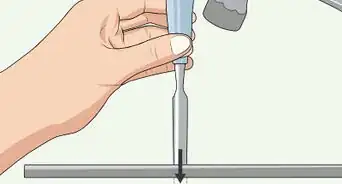
6Use a center-punch to mark the location of the hole. The use of the center-punch will keep the drill bit from “walking around” on the drilling surface.
-
7Adjust the drill press speed. Most drill presses have a set of pulleys located on top. Follow the drill press manufactures’ procedural guidelines when performing this step. Hardened bolts will require a slower drilling speed. A drill speed greater than 1100 revolutions per minute (rpm) is NOT recommended.
-
8Install 1/8” drill bit in to drill chuck. A higher quality drill bit is recommended. Bolts are usually made from hardened steel; this material can be extremely difficult to drill through. Using bits made from Cobalt or a High Speed Steel (HSS) Titanium coated material are strongly advised.
-
9Align the center-punch mark and drill bit. Correct alignment is critical be sure to be as accurate as possible during this step.
-
10Start the drill press and gently start to drill. Light drill pressure is all that is required for a successful hole. Resist the temptation to apply large amounts of pressure; as this could lead to over heating the cutting surfaces or lead to catastrophic failure of the drill bit.
-
11Apply cutting oil to drill bit and drilling surface. Squirt cutting oil on to hole every 30 seconds. Proper lubrication is essential for the drilling process. The lubrication reduces heat and friction between the material being drilled and the cutting surfaces of the drill bit. A petroleum based cutting/ drilling oil is recommended.
-
12Back out drill and clean hole. After 45 seconds to 60 seconds of drilling back the drill bit out of the hole and remove the shavings that have formed during the drilling process. This step will ensure that the flutes of the drill bit do not clog with shavings. Figure 12-A depicts when this step is necessary.
-
13Continue steps 11-12 until hole is drilled all the way through the bolt head.
-
14Use a lager diameter drill to chamfer drilled edges. This is a recommended “trick of the trade.” Install a drill bit in to the drill press that is two times the diameter of the hole and start to drill the hole slightly. This process will create a chamfer on the end of the hole. This chamfer will reduce stress risers in the bolt and will create a softer surface for the lock wire.
-
15Remove any sharp edges with file. A single bastard straight file will work the best. However, any type of file will work fine.
-
16Follow correct lock wiring procedure. Lock wiring or sometimes referred to as safety wiring is a skill that requires training and practice to be done CORRECTLY. Due to the complexity of this process we will not discuss this procedure any further. Click here for lock wiring instructions.


Advertisement
Warnings
- Follow all manufacturers warnings when operating equipment.⧼thumbs_response⧽
- Secure any loose clothing when operating any equipment.⧼thumbs_response⧽
- Lock wire can have sharp edges; always wear gloves.⧼thumbs_response⧽
Advertisement
Things You'll Need
- Safety glasses
- Mechanics gloves
- Drill press
- Center punch
- Vice for drill press
- Single bastard flat file
- Torque wrench
- Paint marker
- Wire pliers
- Lock wire
- 3lb hammer


About This Article
Advertisement