X
wikiHow is a “wiki,” similar to Wikipedia, which means that many of our articles are co-written by multiple authors. To create this article, 12 people, some anonymous, worked to edit and improve it over time.
This article has been viewed 38,117 times.
Learn more...
Monograms are designs that combine two or more letters, usually a person's initials, in order to represent a person or an organization. Generally, monograms are embroidered on fabric in order to mark a person's property in a beautiful and decorative way. Use one of these methods to embroider your monogram onto a plush towel or handy tote bag, anything that could use a bit of decorative flair.
Steps
Method 1
Method 1 of 2:
Embroidering a Monogram by Hand
-
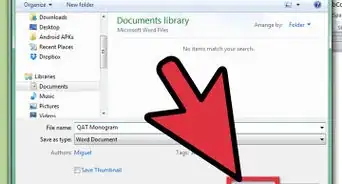
1Make a simple sketch of the monogram you want to embroider. A monogram can consist of one, two, or three letters, although three is the most common. Allow yourself to play with different combinations of upper and lowercase letters, as well as different fonts, to make sure your design flows naturally and beautifully.
- Remember that the size of your sketch should be the same size as the monogram you would like to embroider.
- You can also find various designs for monograms on the internet or in embroidery design books. Select a monogram of your choice and adjust it to make sure it is the right size to embroider on your fabric.
-
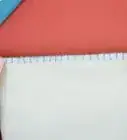
2Decide where to place the monogram. Once you have decided on the monogram design and the piece of fabric you will use, you need to decide where you want the monogram to be placed. Mark the area in which you are going to place the monogram with tailor's chalk or any fabric marking tool.
- It's a good idea to at least make a horizontal line on the fabric, which will serve as the bottom point for all your letters, assuring they are not crooked. This will allow you to better visualize how it will look when finished and will help you transfer your design to the fabric.
- When hand embroidering, you will need enough room around the design to attach an embroidery hoop. Make sure that you have at least two inches of fabric around the outside of every edge of your design. It would make embroidering very difficult if you did not attach an embroidery hoop around the area you are working on, as an embroidery hoop keeps the fabric taut while you are sewing on it.
Advertisement -
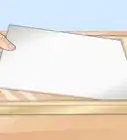
3Transfer the monogram design onto the fabric. Place a piece of carbon paper under the paper on which you have sketched your monogram. Then place both pieces of paper onto the fabric. Use a pencil to trace over the lines of the motif, this will transfer your sketch to the fabric via the carbon paper. Once the tracing is done, remove the carbon paper and the motif paper off the fabric. Your monogram should be clearly transferred on to your fabric.
- Make sure your fabric is placed on a firm surface and that the pieces of paper are in the correct position (you may need to lift up the edges of both papers to make sure your design is aligned with the lines you drew on the fabric).
- When your tracing is done, be careful while removing the carbon paper such that it does not leave any extra marks on the fabric.
-
4Attach your embroidery hoop and start embroidering the letters. Secure a wooden or a plastic embroidery hoop around your design area. Choose the color thread you would like to use, making sure that it goes well with the color of the fabric you are embroidering on. Start embroidering on one edge of your design and work your way across.
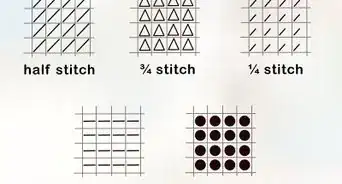
- Monograms are traditionally outlined with a back or split stitch and then filled in with a satin stitch.[1] Complete the outlines of your letters first, then follow by filling in the letters. If you don't know how to do these stitches, you may want to visit How to Backstitch and How to Satin Stitch to learn how.
-
5Remove your embroidery hoop and enjoy your finished monogram. Remember to trim any loose or long threads that remain. The finished monogram should add a delightful design element to whatever you have affixed it to.


Advertisement
Method 2
Method 2 of 2:
Embroidering a Monogram With a Sewing or Embroidery Machine
-
1Set up your sewing or embroidery machine. Plug in your machine and place it somewhere that will allow you to enough space to move your project around freely. Program your machine so that it will produce the size and shape monogram you want.
- In order to create a monogram with a sewing machine, it will need to be one that has an embroidery function. Many modern sewing machines have integrated advanced electronics that allow you to embroider preset designs, most of which include monogram motifs.
- Follow your machines instructions on how to choose which design you will use and how big it will be.
- Don't forget to thread your sewing machine with the color thread that you would like to use. The color should go nicely with the color of the fabric you are monogramming.
-
2Decide where to place the monogram. Mark the center point of where your monogram will go with tailor's chalk or any fabric marking tool. It is best to make a vertical line and a horizontal line coming out of the center point of where your design will go. This will allow you to line up your embroidery hoop in the correct position.
- Remember that you will need enough room around your design so that your machine's embroidery hoop will fit around it, with your design in the center. If you are worried about space, measure your hoop or place it on the fabric when deciding where your design will go. In many cases, the position of the design will be determined by where the hoop will fit.
-
3Place your machine's embroidery hoop onto your fabric. Make sure the center lines you drew on your fabric are lined up with the center marks on your machine's embroidery hoop. This will make sure that the machine embroiders your monogram in the right spot.
- You will need to place a piece of stabilizer under your fabric inside the hoop. The piece should be a bit larger than the hoop, so that it covers the whole underside of your fabric. Stabilizer supports your fabric while being sew by your machine, making it sturdy enough to withstand machine embroidery.[2] Don't worry, once your monogram in sewn the stabilizer can easily be cut, washed, or torn away (depending on the type of stabilizer you use)!
-
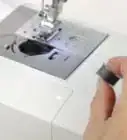
4Set your hoop in place and start your machine. Your machine's embroidery hoop should snap in place, so that it will move freely as the machine moves it during embroidering. Be sure to follow your machine's instructions when attaching the hoop to the machine. Once the hoop is secured in place, start your embroidery program and watch your machine do all the work!
- Make sure that your hands and any other items are away from the machine while it is operating! The hoop, with your fabric attached, needs to be clear of obstacles so that it can all move freely.
-
5Detach the hoop from the machine and take your fabric out. Trim away any excess thread left by the machine. All you need to do now is remove any excess stabilizer from the back of your fabric. Follow the instructions that came with the stabilizer, whether it be to cut any excess off, rip the excess off, or wash the excess off. Now your monogram is finished!


Advertisement
Community Q&A
-
QuestionIs it possible to monogram on a Brother CS-8800PRW sewing machine?
 Community AnswerYes, it is.
Advertisement


References
About This Article
Advertisement