This article was co-authored by wikiHow staff writer, Hannah Madden. Hannah Madden is a writer, editor, and artist currently living in Portland, Oregon. In 2018, she graduated from Portland State University with a B.S. in Environmental Studies. Hannah enjoys writing articles about conservation, sustainability, and eco-friendly products. When she isn’t writing, you can find Hannah working on hand embroidery projects and listening to music.
This article has been viewed 30,569 times.
Learn more...
Whenever you use Google on a web browser or an app, it automatically saves what you searched, where you are, and what websites you’re visiting. Your Google history is a list of all the websites and searches you’ve visited, while your Google activity is what Google saves behind the scenes, like your location. You can erase both of them by using your computer or your mobile device, and you can even adjust your settings to automatically delete your activity for you.
Steps
Clearing Your Google Activity on a Computer
-
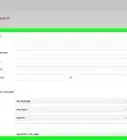
1Go to https://myaccount.google.com. This is your Google account page, which is where you'll find all of your privacy, security, and personalization options.[1]
- If you're not already signed in to your Google account, follow the on-screen instructions to sign in now.
-
2Click Data and Personalization. It’s on the top left hand side of the screen.[2]Advertisement
-
3Click My Activity. It’s under the “Activity and Timeline” header.[3]
-
4Click the “More” button. It’s at the top right hand corner of the screen. On your computer, it looks like 3 dots stacked on top of each other.[4]
-
5Select Delete activity by. This will take you to a new page.[5]
-
6Click All Time, then Delete. This will clear your Google activity, including your web and app activity, your YouTube activity, and your location history.[6]
- You can also manually select what activity to delete by clicking the boxes one by one.


Clearing Your Google History on a Computer
-
1Go to https://myaccount.google.com. This is your Google account page, which is where you'll find all of your privacy, security, and personalization options.[7]
- If you're not already signed in to your Google account, follow the on-screen instructions to sign in now.
-
2Click More. It’s on the upper right hand side, and it looks like 3 dots stacked on top of each other. This will open a dropdown menu with a few different options.[8]
-
3Select History, then click on History again. From the dropdown menu, click on the “History” option to open up a second dropdown menu. At the top of the new dropdown menu, select History again.[9]
- You can also press Ctrl + H.
-
4Click Clear Browsing Data. It’s on the left side of the screen. When you click this, a box will show up on your screen.[10]
-
5Select All Time to clear all of your history. Or, you can go through your history and manually select what you’d like to delete by checking the boxes one by one.[11]
-
6Click Clear Data. This will erase your search history from your browser.[12]


Automatically Clearing Your Google History
-
1Go to https://myaccount.google.com in a web browser. Although Google logs your searches and other activities automatically, you can set up your account so this info is deleted after a certain period of time.[13]
- Google gives you a little bit of power when it comes to what data and information they save about you, like your location history, your web and app activity, and your YouTube history.
-
2Click Data & personalization. It's in the left menu. If you're using a phone or tablet, you may have to tap the menu icon at the top-left corner to find it.[14]
-
3Click Manage your activity controls. It's the blue link at the bottom of the "Activity controls" section.[15]
-
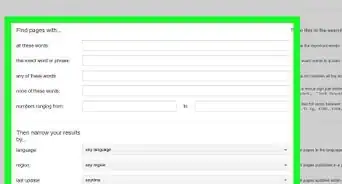
4Review the type of activity tracked by Google. You'll find 3 sections in your activity controls:[16]
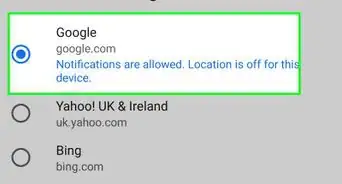
- Web & App Activity: This is where Google saves your searches (everywhere from the Google search engine to Google Maps and Google Play), IP addresses, ads you click, voice recordings, and the things you do on your Android.
- Location History: This is where you'll find a log of where you've been, as well as recommendations based on places you've visited.
- YouTube History: Google/YouTube keeps track of videos you've watched and what you've searched for.
-
5Turn off automatic history/activity logging (optional). If you don't want Google to save your history from any of these categories, slide its corresponding switch to the Off (gray) position, review the warning message, and then click Pause.[17]
- This does not delete any of your past data, so you’ll have to do that manually.
-
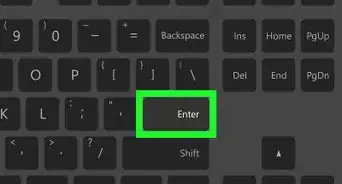
6Set up automatic deletion (optional). If you are okay with Google logging your history but want to make sure it's automatically deleted after a certain period of time:[18]
- Click Auto-delete (Off) next to any of the three categories.
- Select a time period and tap Next.
- Review the data that will be deleted if you choose to continue.
- Click Confirm.
- Repeat for any other category you want to set up for automatic deletion.


Clearing Google History on Your iPhone
-
1Open the Google Chrome app. It’s a rainbow-colored circle on a white background.[19]
- If you don’t have the Chrome app, you can find it on the App Store.
-
2Tap More, then History. The “More” button is in the top right hand side of the screen, and it looks like 3 dots in a horizontal line. Open this menu, then select History.[20]
- Now you can take a look at your browser history on the app.
-
3Tap Clear Browsing Data. It’s near the bottom of the screen.[21]
-
4Check Browsing History. It might be checked by default. If there are any items you don’t want to delete, uncheck them before moving on.[22]
-
5Tap Clear Browsing Data again. This will clear everything you have checked.[23]
-
6Click Done. It’s in the top right corner of the screen. This will take you back to the homepage of Google Chrome.[24]


References
- ↑ https://support.google.com/chrome/answer/95589?co=GENIE.Platform%3DDesktop&hl=en&oco=0
- ↑ https://support.google.com/websearch/answer/465?co=GENIE.Platform%3DDesktop&hl=en&oco=0
- ↑ https://support.google.com/websearch/answer/465?co=GENIE.Platform%3DDesktop&hl=en&oco=0
- ↑ https://support.google.com/websearch/answer/465?co=GENIE.Platform%3DDesktop&hl=en&oco=0
- ↑ https://support.google.com/websearch/answer/465?co=GENIE.Platform%3DDesktop&hl=en&oco=0
- ↑ https://support.google.com/websearch/answer/465?co=GENIE.Platform%3DDesktop&hl=en&oco=0
- ↑ https://support.google.com/chrome/answer/95589?co=GENIE.Platform%3DDesktop&hl=en&oco=0
- ↑ https://support.google.com/chrome/answer/95589?co=GENIE.Platform%3DDesktop&hl=en&oco=0
- ↑ https://support.google.com/chrome/answer/95589?co=GENIE.Platform%3DDesktop&hl=en&oco=0
- ↑ https://support.google.com/chrome/answer/95589?co=GENIE.Platform%3DDesktop&hl=en&oco=0
- ↑ https://support.google.com/chrome/answer/95589?co=GENIE.Platform%3DDesktop&hl=en&oco=0
- ↑ https://support.google.com/chrome/answer/95589?co=GENIE.Platform%3DDesktop&hl=en&oco=0
- ↑ https://support.google.com/websearch/answer/465?co=GENIE.Platform%3DDesktop&hl=en
- ↑ https://support.google.com/websearch/answer/465?co=GENIE.Platform%3DDesktop&hl=en
- ↑ https://support.google.com/websearch/answer/465?co=GENIE.Platform%3DDesktop&hl=en
- ↑ https://support.google.com/websearch/answer/465?co=GENIE.Platform%3DDesktop&hl=en
- ↑ https://support.google.com/websearch/answer/465?co=GENIE.Platform%3DDesktop&hl=en
- ↑ https://support.google.com/websearch/answer/465?co=GENIE.Platform%3DDesktop&hl=en
- ↑ https://support.google.com/chrome/answer/95589?co=GENIE.Platform%3DiOS&hl=en&oco=0
- ↑ https://support.google.com/chrome/answer/95589?co=GENIE.Platform%3DiOS&hl=en&oco=0
- ↑ https://support.google.com/chrome/answer/95589?co=GENIE.Platform%3DiOS&hl=en&oco=0
- ↑ https://support.google.com/chrome/answer/95589?co=GENIE.Platform%3DiOS&hl=en&oco=0
- ↑ https://support.google.com/chrome/answer/95589?co=GENIE.Platform%3DiOS&hl=en&oco=0
- ↑ https://support.google.com/chrome/answer/95589?co=GENIE.Platform%3DiOS&hl=en&oco=0
About This Article

1. Go to https://myaccount.google.com.
2. Click Data & personalization.
3. Click My activity.
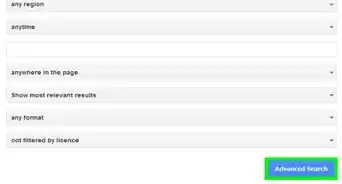
4. Click + Filter by date & product.
5. Select products and a date range.
6. Click Apply.
7. Click the three vertical dots and select Delete Results.
8. Click Delete.