This article was co-authored by wikiHow staff writer, Nicole Levine, MFA. Nicole Levine is a Technology Writer and Editor for wikiHow. She has more than 20 years of experience creating technical documentation and leading support teams at major web hosting and software companies. Nicole also holds an MFA in Creative Writing from Portland State University and teaches composition, fiction-writing, and zine-making at various institutions.
There are 8 references cited in this article, which can be found at the bottom of the page.
This article has been viewed 16,591 times.
Learn more...
The Raspberry Pi is a tiny computer created for teaching computer science in schools and developing nations. However, the Pi's small size, Linux-based operating system, and small price tag have made it popular with DIYers and coders worldwide. New models with better specs and easier installation tools are making the Raspberry Pi more appealing to the masses. This wikiHow teaches you how to shop for and set up your first Rasbperry Pi.
Steps
Picking Your Pi
-
1Decided what you'll do with your Raspberry Pi. Will you be using your Raspberry Pi as a desktop computer with a mouse, keyboard, and monitor? As a web server? A video game emulator? Are you building a robot? Will you need USB 3.0? What are the RAM requirements? Will it need Wi-Fi? Before you start shopping for your Raspberry Pi, research the kind of specs your project requires so you'll know which Pi will work for you.
-
2Check out the latest Raspberry Pi hardware at https://www.raspberrypi.org/products. Unless you know exactly which Raspberry Pi model you need, stick to the latest and greatest versions. This way you can ensure that you have the most up-to-date hardware and all the capabilities it offers. If you decide to make a purchase, click Buy Now on the product to find retailers who sell it.
- As of August 2020, the latest version of the Raspberry Pi is the Pi 4 model B. This Pi supports 2 full-HD displays, has built-in Wi-Fi and ethernet and four USB ports (plus one USB-C port for power), and comes in 2 GB, 4 GB, or 8 GB RAM configurations.[1] You'll also find earlier Pi models on this page, as well as required (and optional) accessories.
- You can buy your Pi anywhere you'd like, but it's a good idea to get familiar with the products on the official product website.
Advertisement -
3Gather the accessories you'll need. When you buy a Raspberry Pi on its own, you're just getting the motherboard and built-in components. Everything else—power cord, chassis, keyboard, mouse, and cables—are purchased separately. Many retailers offer Raspberry Pi starter kits that include a power cable and peripherals.[2] These kits are usually not too expensive and include everything you need (except the monitor) to get started. You can also buy any of the following accessories separately:
- Power cord: All models have either a USB-C (Raspberry Pi 4) or micro USB (older models) port for power. You can use an AC adapter with a USB-C or micro USB connector to power your Pi—it'll need to be at least 3 amps for the Pi 4, or 2.5 amps for Pi 3 and earlier.[3]
- A micro SD card: Instead of having a hard drive, the Raspberry Pi requires an SD card for file and operating system storage. The SD card must be at least 8 GB. Some retailers sell SD cards with the Raspberry Pi operating system already installed.
- Keyboard and mouse: You can use any USB keyboard and/or mouse with your Raspberry Pi. Once you set up the Pi you can switch to Bluetooth if you prefer.
- Monitor: Your monitor just needs to support HDMI to connect to your Raspberry Pi's HDMI port. If your monitor only supports DVI or VGA, you can use an HDMI adapter. The Pi 4 has 2 micro HDMI ports (for dual monitor use), while the Pi 1, 2, and 3 each have a single full-size HDMI port.
- A case: The Raspberry Pi just looks like a motherboard. To keep it safe, you'll want a Raspberry Pi case. Cases are generally available anywhere Raspberry Pi accessories are sold.


Installing Raspberry Pi OS
-
1Insert your SD card into your desktop or laptop computer. If you bought an SD card that already has the Raspberry Pi operating system installed, you can skip this method. If not, you'll need to download the operating system and flash it to the SD card. Most computers have built-in SD card ports.
- If the card has any files on it, back them up before you continue. They'll be deleted when you install the Raspberry Pi OS.[4]
-
2Download the Raspberry Pi Imager tool from https://www.raspberrypi.org/downloads. To do this, click the Raspberry Pi Imager link for your operating system near the top of the page.
-
3Install the Imager on your computer. Double-click the downloaded file—it's called imager_1.4.exe (Windows) or imager_1.4.dmg (macOS)—and follow the on-screen instructions to install and launch the application.
-
4Click CHOOSE OS to select the operating system. If you just want to stick to the standard Raspberry Pi OS, select Raspberry Pi OS (32-bit). Otherwise, click the desired operating system on the menu.
-
5Click CHOOSE SD Card to select your SD card. Since you probably only have one SD card in the computer this should be pretty easy.
-
6Click the WRITE button. This formats the SD card and installs the operating system.
-
7Click CONTINUE when the installation is complete. Now that you have an SD card with the operating system, you can eject it and continue to Setting Up the Raspberry Pi.


Setting Up the Raspberry Pi
-
1Insert the micro SD card into the Raspberry Pi. The micro SD port is on the underside of the Pi. The card will slide into place securely.
- If you have a case for your Raspberry Pi, follow the instructions that came with the case to insert your Raspberry Pi.
-
2Connect the mouse and keyboard to 2 USB ports. It doesn't matter which USB port you use.[5]
-
3Connect the monitor to the HDMI port. You can use an adapter if your monitor doesn't have an HDMI cable. If you're using a Raspberry Pi 4, connect it to the first HDMI port, which is labeled "HDMI0." Turn on the monitor so it's ready to go.
-
4Connect speakers or headphones (optional). If you want to hear sound and the monitor doesn't have speakers, you can plug headphones or speakers into the standard audio jack on the Raspberry Pi.
-
5Connect an ethernet cable to your router (optional). If you want to use wired internet over wired, insert one end of an ethernet cable into the port that looks like a large phone jack, and the other end into your router.
-
6Plug your Raspberry Pi into a power source. Since there's no on/off button on you Raspberry Pi, it'll turn on as soon as it's plugged in. Some raspberries will appear on the screen as the Pi boots up. The desktop and a welcome screen will appear when booting is complete.
-
7Follow the on-screen instructions to go through the initial setup. Click Next to get started, and then move through the following screens:
- Select your country, language, and time zone and click Next.
- Create a password for the user "pi," which is the default user. Enter the new password twice and click Next.
- Select your Wi-Fi network, enter the password (if applicable), and then click Next.
- Click Next to check for updates, and follow the on-screen instructions.
- Click Done or Reboot (if there's an update) to finish the setup.


Learning Your Way Around
-
1Click the Raspberry button to open the menu. It's at the top-left corner of the desktop. This is where you'll find the menu containing your apps, accessories, settings, and preferences.[6]
- When you want to shut down your Raspberry Pi, you can click the Shutdown link at the bottom of the menu.
-
2Browse the app list. To open an app, hover the mouse cursor over the app group, and then click the app's name. As you install more apps, they'll be added to this menu.
- The Accessories app group is where you'll find useful apps like a text editor, terminal, a file manager, and the calculator.
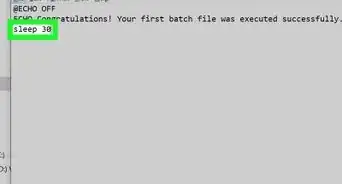
- The Terminal app will bring you to a standard Linux command prompt.
-
3Click Preferences on the Raspberry menu. This is where you'll find settings you can tweak, including appearance settings, mouse and keyboard preferences, audio settings, and more.
- The Raspberry Pi Configuration option in this menu is where you can change your system settings, such as how it boots.
-
4Install software on your Raspberry Pi. The easiest way to do this is to click the Raspberry menu, select Preferences, and then click Recommended Software. Browse the applications by category, check the box(es) next to the one(s) you want to install, and then click OK. Verify your password to complete the installation.
- You can also install a wider variety of applications in the Raspberry menu > Preferences > Add / Remove Software. Here you can also search for software by name or function.
- Add / Remove Software is also where you can update the software on your Pi.[7] Click the Options menu and select Refresh Package Lists to update the software list. Then, return to the Options menu and select Check for Updates. If updates are available, click Install Updates.
-
5Connect to Wi-Fi. The Wi-Fi icon is at the top-right corner of the screen near the clock. When you're connected, it looks like several curved lines arranged into a cone. When there is no connection, it'll be two red X's.[8] Click the icon to bring up available Wi-Fi networks, select the one you want to join, and verify the password.
-
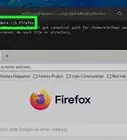
6Click the globe icon to open a web browser. It's near the top-left corner of the screen. The basic browser that comes with Raspberry Pi OS is a Chromium-powered browser like Google Chrome and Microsoft Edge, so it should be good for basic use. You can install a different browser if you'd like.
-
7Click the folder icon to browse your files. It's near the top-left corner of the screen. This displays all of the files and folders on your SD card. If you insert a USB drive at any point, its files will also be accessible here.


References
- ↑ https://www.raspberrypi.org/products/raspberry-pi-4-model-b
- ↑ https://www.raspberrypi.org/products/raspberry-pi-4-desktop-kit
- ↑ https://projects.raspberrypi.org/en/projects/raspberry-pi-setting-up/1
- ↑ https://projects.raspberrypi.org/en/projects/raspberry-pi-setting-up/2
- ↑ https://projects.raspberrypi.org/en/projects/raspberry-pi-setting-up/3
- ↑ https://projects.raspberrypi.org/en/projects/raspberry-pi-using/1
- ↑ https://projects.raspberrypi.org/en/projects/raspberry-pi-using/6
- ↑ https://projects.raspberrypi.org/en/projects/raspberry-pi-using/3
About This Article

1. Purchase a Raspberry Pi.
2. Get a power cord, monitor, keyboard, mouse, and SD card.
3. Install Raspberry Pi Imager on your PC or Mac.
4. Insert the SD card and install the Raspberry PI OS image.
5. Assemble your Raspberry Pi and insert the SD card.
6. Plug the Raspberry Pi in to turn it on.
7. Follow the on-screen instructions to set up your new Raspberry Pi.