This article was co-authored by wikiHow staff writer, Jack Lloyd. Jack Lloyd is a Technology Writer and Editor for wikiHow. He has over two years of experience writing and editing technology-related articles. He is technology enthusiast and an English teacher.
The wikiHow Tech Team also followed the article's instructions and verified that they work.
This article has been viewed 1,020,853 times.
Learn more...
This wikiHow teaches you how to sign up for a Google Voice phone number. You can sign up for a Google Voice phone number for free if you have a Google Account. You can also delete your current Google Voice number and select a different one, though you'll have to wait for 90 days between deleting the number and selecting a new number.
Steps
Signing up for Google Voice
-
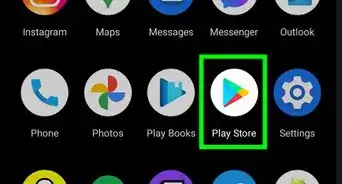
1Open Google Voice. Go to https://voice.google.com in your computer's web browser. This will open the Google Voice setup page if you're logged into a Google account.
- If you aren't logged into a Google account, enter your email address and password before proceeding.
-
2Search for a location. Click the text box in the middle of the page, then type in a city name or a ZIP code (e.g., 96703). As you type, a drop-down menu with phone number options will appear below the text box.Advertisement
-
3Select a phone number. Click the blue SELECT button to the right of the phone number that you want to use.
- You may first have to select a city in the drop-down menu below the search bar.
-
4Click VERIFY. This blue button is in the middle of the page. Doing so will take you to a page where you can verify your actual phone number.
-
5Enter your actual phone number. In the text field that appears in the middle of the page, type in a phone number for a phone that you can access.
-
6Click SEND CODE. It's in the bottom-right corner of the phone number window. Google Voice will send a verification text to your phone.
-
7Retrieve your code. Open your phone's texting app, open the text from Google (usually a five-digit number), and review the six-digit code in the body of the text.
- Google's text will say something like "123456 is your Google Voice verification code."
-
8Enter the code. Type the six-digit code into the text field in the middle of the Google Voice page.
-
9Click VERIFY. It's in the bottom-right corner of the code verification window.
-
10Click CLAIM when prompted. This will confirm that you want to use the associated phone number with your Google Voice account.
- You might not see this option depending on your phone number. If so, skip to the next step.
-
11Click FINISH when prompted. Doing so will confirm your phone number and take you to your Google Voice page.
- Any outgoing messages or phone calls from this page will use your Google Voice number.


Getting a New Phone Number
-
1Open Google Voice. Go to https://voice.google.com/ in your web browser. This will open the Google Voice page that's associated with your email address if you're logged in.
- If you aren't logged into a Google Account, enter your email address and password before proceeding.
-
2Click the gear icon (upper-right corner) to open the Settings menu.
-
3Click the Phone numbers tab. You'll find this option near the top-middle section of the Settings menu.
-
4Click DELETE. It's below and to the right of your current Google Voice phone number, which is near the top of the page. Doing so opens the Legacy page.
-
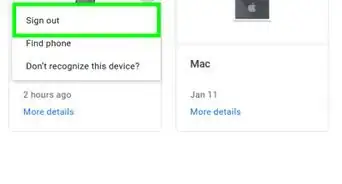
5Click the Delete link. This link is next to your Google Voice number on the Legacy page.
- Do not click the grey Delete button that's near your email address.
-
6Click Proceed when prompted. Doing this will delete your Google Voice number from your Google Account.
-
7Wait for 90 days. You won't be able to sign up for a new Google Voice number on this account for a 90-day period after deleting your previous Google Voice number.[1]
- If you want to restore your old number within the 90-day period, you can click ☰ on your Google Voice account page, click Legacy Google Voice at the bottom of the pop-out menu, and click your Google Voice number in the lower-left side of the page.
-
8Sign up for a new number. Once 90 days have passed, you can open your Google Voice account again, click ☰, click Phone number, and click CHOOSE to the right of the "Phone number" section. You'll then follow the prompts to create a new phone number.


Community Q&A
-
QuestionCan I have more than one active number per email?
 Community AnswerNo. If you already have one then you must use that number or have different accounts.
 -
QuestionCan a Google voice number be decoded to see the name of the owner?
 Community AnswerYes, if the caller logs into the email account used to open the Google voice number.
 -
QuestionHow do I record my message on a Google voice number?
 Community AnswerThere are several things you can do for this. Google Audacity and Snag That, then google how to record audio from PC to Audacity.
Warnings
- You can only have one Google Voice phone number per actual phone number.⧼thumbs_response⧽


About This Article
1. Go to https://voice.google.com.
2. Search for a location.
3. Select a phone number.
4. Verify the phone number.
5. Click Finish when prompted.