This article was co-authored by Maggie Moran. Maggie Moran is a Professional Gardener in Pennsylvania.
This article has been viewed 5,879 times.
Biennial vegetables are plants that produce vegetables every 2 years, like beets, brussels sprouts, cabbage, carrots, cauliflower, celery, kale, onion, parsley, rutabagas, and turnips. They’re easy and fun to grow even for novice gardeners, and require very little extra attention once planted. With a little planning and work, you can plant your own garden of biennial vegetables this spring or summer!
Steps
Planting the Vegetables
-
1Wait to plant until after the final frost to prevent seeding in the first year. Biennials should be planted in the late spring or early summer to avoid early flowering from exposure to cold temperatures. If the plants flower during the first year, it is likely because they were exposed to frost.[1]
- While waiting to plant, store the vegetable seeds in bags in a warm, dry location.
- In colder climates, you can get a head start by planting the seeds indoors, and then moving them outside when the weather improves.
- Check a grower’s almanac to find out when the last frost typically occurs in your region.
-
2Pick a location that receives full sun for most of the day. Like most vegetables, biennials tend to grow best in sunny areas because they store solar energy in their leaves. If you live a very warm climate, look for partially shaded areas to prevent the new growth from drying out.[2]
- If you aren’t sure what kind of sunlight your specific vegetables require, check the tag or the seed packaging. Most will say to plant in “full sun” or “partial sun” for best results.
Advertisement -
3Till the soil with compost to improve nutrient levels. Growing vegetables requires a lot of nutrients in the soil. Before you plant, use a rake or tiller to mix a 3 in (7.6 cm) layer of compost or manure into the soil to encourage root growth.[3]
- Some plants, like broccoli, require very rich soil, and can benefit from extra compost in the garden.
-
4Plant the vegetables with enough space to grow without touching each other. In the garden, use a spade to dig small holes about 6–18 inches (15–46 cm) apart, depending on the type of vegetable. Then, drop 4-6 seeds in each hole, and cover them with soil.[4]
- You should begin to see growth within a few weeks. Generally, growth speed will depend on the type of vegetable, but if you don’t see growth within a month of planting, you may have planted bad seeds.


Caring for Biennials
-
1Water the vegetables whenever the soil is dry. In general, biennial plants don’t require a lot of attention to grow. Spray water over the plants when the soil becomes dry to the touch. If you live in a rainy climate, you may need to water less often, but be sure to check that all of the seedlings are getting enough water.[5]
- For new growth, use a light mist nozzle, but as the plants begin to grow and become hardier, use a stronger nozzle to spray bugs and dirt off of the leaves.
- It’s best to water your plants with distilled water.
-
2Fertilize vegetables every 6-8 weeks throughout the summer and fall. Vegetables require plenty of nutrients to grow, even if they’re planted in rich soil. Apply a general 20-20-20 liquid or water-soluble fertilizer around the base of the plant to soak into the root system.[6]
- In general, proper fertilization will depend on the plant. If you’re unsure of how much fertilizer your plant needs, check the tag or seed package. In some cases, you may not need any fertilizer in the first year.
-
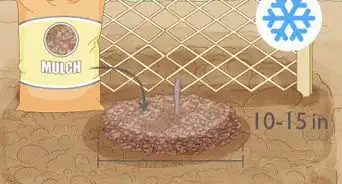
3Cover the soil with a thick layer of mulch in fall to trap warmth. Since biennials take 2 years to mature, they continue to grow over the winter. Spread a 2–3 in (5.1–7.6 cm) layer of mulch around the base of each plant before the first freeze of the season.[7]
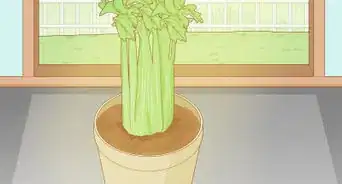
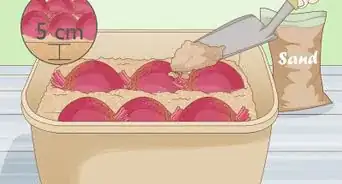
- If necessary, you can also dig up the plants in the late fall and store them in a cool, dry area for the winter. Place them in pots and keep the soil moist, but not saturated until replanting in the spring.
-
4Keep the crown of the plant uncovered to prevent rot. One of the most common diseases that affects biennial plants is crown rot. If dirt, mulch, or other materials are covering the top of the plant, it will become too moist and cause the plant to rot. Especially in the first year, make sure the top of each plant is clean.[8]
- You can keep the plants clean by brushing them with your hand or spraying them with a light mist of water on a sunny day. This will remove dirt and mulch, and the water will evaporate.
- If you have a rotting plant, dig it up and remove it from the garden immediately to protect the other plants.


Harvesting the Plants
-
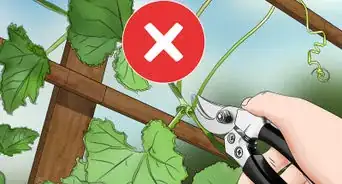
1Harvest the vegetables before they flower during the second spring. Early in the spring of the second year after planting, biennial vegetables will become ready for harvest. Use pruners, shovels, or clippers to remove the leaves, dig up underground vegetables, or cut the stalks.[9]
- If you want to gather seeds later in the year for replanting, don’t harvest all of your vegetables. Leave 3-4 plants untouched, and let them flower.
-
2Gather herbs by trimming leaves off of the base of the plant as needed. If you’ve planted biennial herbs, they will likely be ready for using by mid-summer. Be sure to clip the leaves from the bottom of the plant when you use them.[10]
- If you don’t end up using many clippings from your herbs, they can become very large and bushy. In the fall, trim all of the bottom leaves, and freeze them for use over the winter before the plant dies.
-
3Collect seeds from flowered plants in the mid-summer. Once the flowers have bloomed and have begun to wilt, use a resealable bag to gather seeds from the stems of the plant. Depending on the type of vegetable, the seed location may vary. You can use these seeds to grow more vegetables the following year![11]
- If you bought hybrid or F1 seeds, you may not be able to replant them because they’re unpollinated. This means that they won’t grow. In that case, you’ll have to purchase new seeds for the next growing season.


Community Q&A
-
QuestionWhat is a biennial vegetable plant?
 Maggie MoranMaggie Moran is a Professional Gardener in Pennsylvania.
Home & Garden SpecialistSome common types are beets, cabbage, celery, kale, and onions, just to name a few. -
QuestionIs a carrot a biennial plant?Maggie MoranMaggie Moran is a Professional Gardener in Pennsylvania.
Home & Garden SpecialistCarrots are a biennial type of plant. In their second year, they sprout flowers on the top which produce seeds. -
QuestionWhat fruits and vegetables come back every year?Maggie MoranMaggie Moran is a Professional Gardener in Pennsylvania.
Home & Garden SpecialistSome of the well-known types are that of berry bushes. Garlic, rhubarb, and asparagus also come back every year, as do all the other types of perennial plants.


References
- ↑ http://learningstore.uwex.edu/assets/pdfs/a2801.pdf
- ↑ http://www.gardening.cornell.edu/homegardening/scene91d8.html
- ↑ https://bonnieplants.com/growing/growing-parsley/
- ↑ http://learningstore.uwex.edu/assets/pdfs/a2801.pdf
- ↑ https://www.nytimes.com/1990/07/01/nyregion/gardening-biennial-seeds-should-be-planted-now.html
- ↑ https://bonnieplants.com/growing/growing-parsley/
- ↑ https://laidbackgardener.blog/tag/biennial-vegetables/
- ↑ https://bonnieplants.com/growing/growing-parsley/
- ↑ https://www.sfchronicle.com/homeandgarden/article/Bloom-and-doom-in-the-biennial-garden-Why-you-12723178.php
About This Article

To grow biennial vegetables, start by picking a sunny location, and till the soil with compost to improve the nutrient levels. Then, plant the vegetables 6-18 inches apart, with 4-6 seeds per hole. Water the vegetables when the soil is dry, and fertilize them every 4-6 weeks with a liquid or water soluble fertilizer to encourage growth. Harvest the vegetables in the early spring of the second year, or collect the seeds in the summer to plant more vegetables. For more tips, including how to protect biennials in the winter, read on!