X
wikiHow is a “wiki,” similar to Wikipedia, which means that many of our articles are co-written by multiple authors. To create this article, 15 people, some anonymous, worked to edit and improve it over time.
This article has been viewed 723,967 times.
Learn more...
iTunes is great for managing your music library and your iOS device, but it can be a little tricky when trying to add video files to your iTunes library. Oftentimes you'll find that the file will simply not show up in iTunes, no matter how many times you try to add it. The problem typically lies in the video file's format; iTunes only works with a few different ones. Luckily, a free conversion program can help you import any video into iTunes.
Steps
Method 1
Method 1 of 2:
Preparing Videos
-
1Check the format of the video you want to add. iTunes only supports a few different video formats: .mov, .m4v, and .mp4. Beyond that, the files need to be able to play in QuickTime (not all .mp4 files will play in Quicktime, for example).
- Right-click on the video you want to check and select "Properties" (Windows) or "Get Info" (OS X).
- Look for the "Type of file" or "Kind" entry. If the file is an .mkv, .wmv, or .avi file, it will need to be converted.
- Test the file in QuickTime. If the file is a supported format, load it up in QuickTime to make sure it plays. If it doesn't play, you'll need to convert it. If it works, you can skip down to importing the video.
-
2Download and install Handbrake. This is a free, open-source video conversion program without any adware, available for Windows and OS X. It is also one of the easiest and quickest ways to convert video files to an iTunes-compatible format.
- You can download HandBrake from handbrake.fr.
- It is best to avoid websites that claim to convert videos for you online. They often have file size limits and uploading and downloading the video can take a significant amount of bandwidth.
Advertisement -
3Launch Handbrake. After installing, you should be able to find a shortcut on your desktop or in your Applications folder. It may look a little confusing, but you'll be ignoring most of the advanced options when performing quick conversions for iTunes.
-
4Click the "Source" button. This is located in the upper-right corner, and will prompt you to select a file to convert.
-
5Select how you want to add the file(s). If you have multiple files you want to convert, select the Folder option. All of the files will need to be located in the same folder. If you are converting a single video, select the File option and browse for the file.
-
6Click the .Browse button next to the Destination field. This will allow you to set a destination folder for the converted video. You will need to type a name for the file as well.
-
7Select the "Universal" preset in the right frame. If you don't see the Presets frame, click the Presets menu and select "Show Presets Panel".
- The "Universal" preset will convert any video into an .mp4 format that can be imported into iTunes.
-
8Click the "Start" button. HandBrake will begin converting the file into the new format. This will take a few minutes, and longer videos such as full-length movies may take up to half an hour or more.
-
9Test the converted video. Once the video has been converted, play it in QuickTime to ensure that the conversion went smoothly. In most cases, you should notice very little or no loss in quality.[1]


Advertisement
Method 2
Method 2 of 2:
Importing
-
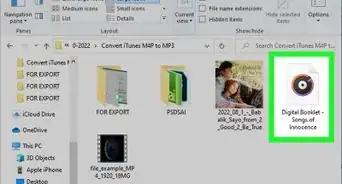
1Rename any video files with multiple periods in the name. Oftentimes videos downloaded from torrents will have multiple periods in the name to denote who ripped and encoded the video. Remove any of these extra periods, as they can cause problems when trying to import into iTunes.
- Right-click on the file and select "Rename" to edit the name.
-
2Launch iTunes. Make sure that you are running the latest version.
-
3Import the video. Click the File menu (Windows) or iTunes menu (OS X) and select "Add File to Library" (Windows) or "Add to Library" (OS X). Browse for the converted video and select it.
- If you are using Windows and don't see the File menu, press the Alt key.
- You will not receive any error or confirmation when adding a video file.
-
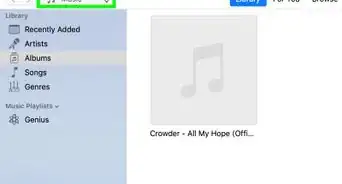
4Click the "Movies" button. This is located in the row of buttons along the top of the iTunes window, and looks like a film strip.
-
5Click the "Home Videos" tab. Any movie you import will be added as a "Home Video". If you don't see the video that you just imported, it wasn't properly converted to an iTunes-compatible format.
-
6Move the video to your "Movies" or "TV Shows" library. It can be difficult to find the video you want if they're all sorted into the "Home Video" library. Moving them to the proper spot will make it easier to watch or sync the videos later.
- Right-click the video and select "Get Info".
- Click the "Options" tab in the window that appears.
- Click "Home Video" next to "media kind" to select the library that you want to move it to.
- Click OK to save the changes. You will now be able to find the video in the proper library.
-
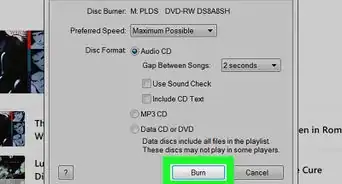
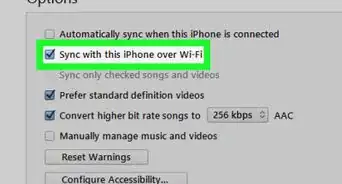
7Sync your movies to your iOS device. Now that the files are in iTunes, you can sync them to your iOS device. Click here for details on syncing.
- If the video does not sync to your device, you'll need to create a version in iTunes that your device supports. Click File and select "Create New Version". Select the device that you are syncing the video to, and then wait for the conversion to complete.


Advertisement
Community Q&A
-
QuestionI would like to import audio only to my music library so I can download to my iPod from concert DVDs. Is this possible?
 Community AnswerYou might have to convert the video to an mp3 file using an online converter. From then on, you can probably transfer it to your iPod using the method described in this article.
Advertisement


About This Article
Advertisement