This article was co-authored by Mike Katona. Mike Katona is a DIY Home Improvement Specialist and the Co-founder of ShabbyChicHouse. With experience dating back to the early 2000s, he specializes in building new homes, home design, and decor. Mike has been featured in publications such as Real Homes and MSN Lifestyle. He has also been named one of Feedspot's Top 100 Home Improvement Bloggers.
wikiHow marks an article as reader-approved once it receives enough positive feedback. In this case, 100% of readers who voted found the article helpful, earning it our reader-approved status.
This article has been viewed 66,899 times.
Natural stone and slate tile is a beautiful choice for home décor. While it is an investment, it is long lasting and easy to clean. You can install slate tile flooring yourself by laying the tile with mortar and grouting it. Take time to layout the floor before you start to achieve a professional finish.
Steps
Removing Flooring
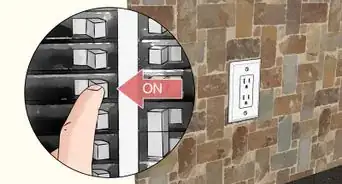
-
1Remove the baseboard trim around the area you want to cover with slate tile.[1] Depending upon the type of trim you have, you might be able to remove it with a hammer and screwdriver. Set the trim aside to reinstall after the slate tile is finished.
-
2Remove the carpet, laminate or other flooring that is over the area. Be sure to remove all the tacks and nails that stick out of the subflooring.Advertisement
-
3Check that your subfloor is level.[2] If you have a cement floor, use a leveling compound to improve the surface. If you have a wood floor, secure loose boards so that they will not squeak.[3]
- If your wood subfloor is thinner than one and one-fourth-inch (0.6-cm), install a second layer of five-eighths-inch (1.6-cm) plywood or cement board to ensure the slate has a stable foundation.
- Screw these sheets into the subfloor every eight inches (20.3 cm).
-
4Clean the floor as well as you can.[4] A cement floor can be cleaned with tri-sodium phosphate (TSP). A wooden floor can be vacuumed extensively.
-
5Paint a coat of polyurethane on top of plywood subfloor to prevent water damage. Paint an anti-fracture membrane onto cement subfloor. You can paint or roll it on.[5]


Calculating Materials
-
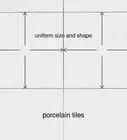
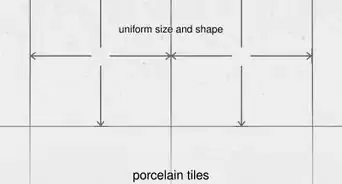
1Research and find the slate tile you want to use. Write down the length and width of the tile.
-
2Measure the length and width of each room you want to tile.[6]
-
3Use a construction calculator to find out how much tile you will need. You can find a construction calculator easily online.
-
4Order the tile. Ask how long shipment will take so that you can schedule a day to install it. In 2014, estimates for slate flooring for a 100 square foot (30.5 m) area were between $250 and $400.
-
5Purchase a large bag of quarter-inch (0.6-cm) spacers so that you can keep your slate tile evenly spaced and grouted. If you want very fine grout line, you can place your tiles side by side.
-
6Buy your grouting equipment and mortar. You will need a trowel with quarter-inch (0.6-cm) notches.[9]
-
7Remove all the tiles and check for surface damage before you get started. Reorder tile before you start your project, so that you can ensure you have enough tile to complete the flooring.
-
8Sort your tile according to color variation and thickness. Some tiles are thicker than others and surrounding tiles will need to be built up with adhesive to ensure a flat surface.


Laying Out Tiles
-
1Sketch a layout for the color scheme of the slate.[10] Since slate tiles can vary slightly in size, it is important to do a dry run with your tiles so you know where to adjust the surface level and position of your tiles.
-
2Measure lines through the width and length of the room. Draw an “x” through the room with chalk. When the lines cross they will create a 90-degree angle on which you can check for even spacing.
-
3Lay out your tile to figure out the best use of color. Use tile spacers during the dry run to ensure you have even spacing.
-
4Decide if you will need to cut tile at the edges of the room. If you do, you will want to reposition your layout, so that cut tiles of even width can be laid at either end. This will result in a symmetrical floor.
-
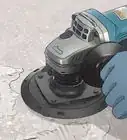
5Cut tiles to fit around the edges of the room.[11] Measure the tile to account for a one-eighth-inch (0.3-cm) grout space along the wall. You can cut slate tile with a diamond-blade wet saw, grinder or hacksaw with an abrasive blade.
-
6Mark tiles that require extra thinset on the back to create an even surface. Place a line of chalk on them during your dry run, so that you can make this important change when you lay your mortar.


Installing Slate Tile
-
1Remove a quarter of the room’s layout so that you can start installing the tile. Start with the section farthest from the door.
-
2Choose the mortar you want to use. You can use slate tile adhesive or thinset (Portland cement) mortar mixed with acrylic. Mix it well and set it nearby.
- Consider purchasing a mixing attachment to use with your power drill. It will mix the thinset more thoroughly than hand mixing.
-
3Ready a bucket of water and a sponge, so that you can remove excess mortar from the tiles when necessary.
-
4Apply your thinset or adhesive to a two by three foot (0.6 by 0.9 m) area. Place a generous amount of mortar down within a section of your chalk line. Smooth it out with the smooth edge of the trowel until it covers the area.[12]
-
5Run the grooved edge of the towel in a single direction across the three-foot (0.6-m) area. [13] Always groove the thinset in the same direction.
-
6Place the first tile down on the intersection of your chalk lines. You will move toward the wall. Setting spacers between the tiles at either end of the tile.
-
7Remember to build up thinner tiles with thicker coatings of mortar. This is called “back-buttering.”[14] Use a carpenter’s level to make sure each slate is level.
- Press down on the tiles with your hand to ensure it is properly adhered.
-
8Use your damp sponge to remove thinset that drops onto the tile before it dries. Scrape extra mortar from the edges with a margin trowel.
-
9Set nine tiles at a time and then move on to a new section. Remove the layout, mortar the area and set the tile. Take your time to create an evenly spaced, level floor.
-
10Leave the finished slate to set for 24 hours before you grout.


Grouting Slate Tile
-
1Remove the spacers tile-by-tile just before you grout your tiles.
-
2Purchase sanded grout. Spread one pint of grout over the tiles.
-
3
-
4Finish an area and remove excess grout with a damp sponge[17] . Change the water in your bucket frequently so that you can wipe the tile clean.
-
5Run a grouting tool over the joints to make them more even. Run the tool over all the lines using equal pressure.
-
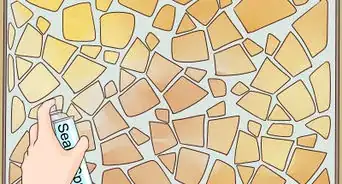
6Consider sealing your slate after 30 days of curing. Remove dust particles and apply water-based, low-sheen slate sealer with a paintbrush. Apply a second coat after it has dried.
- Wait 24 to 48 hours for the sealer to cure.
- If you don’t want to seal the slate tiles themselves, you can seal the grout with a tile sealant. Paint it on with a one-half inch (1.3-cm) paintbrush.


Things You'll Need
- Hammer
- Screwdriver
- Plywood/cement subfloor sheets
- Screws
- Anti-fracture membrane
- TSP
- Vacuum
- Measuring tape
- Slate tile
- Tile spacers
- Knee pads
- Mortar/thinset
- Power drill with mixing paddle bit
- 1/4 inch (0.6 cm) notched trowel
- Carpenter’s level
- Water bucket
- Sponge
- Sponge float
- Sanded grout
- Slate sealer
- Tile sealer
- Large paint brush
- 1/2 inch (1.3 cm) paint brush


References
- ↑ Mike Katona. DIY Home Improvement Specialist. Expert Interview. 25 August 2021.
- ↑ Mike Katona. DIY Home Improvement Specialist. Expert Interview. 25 August 2021.
- ↑ http://extremehowto.com/installing-slate-tile/
- ↑ Mike Katona. DIY Home Improvement Specialist. Expert Interview. 25 August 2021.
- ↑ http://www.thisoldhouse.com/toh/how-to/intro/0,,20670738,00.html
- ↑ Mike Katona. DIY Home Improvement Specialist. Expert Interview. 25 August 2021.
- ↑ https://www.homewyse.com/services/cost_to_install_slate_tile_flooring.html
- ↑ Mike Katona. DIY Home Improvement Specialist. Expert Interview. 25 August 2021.
- ↑ Mike Katona. DIY Home Improvement Specialist. Expert Interview. 25 August 2021.
- ↑ Mike Katona. DIY Home Improvement Specialist. Expert Interview. 25 August 2021.
- ↑ Mike Katona. DIY Home Improvement Specialist. Expert Interview. 25 August 2021.
- ↑ Mike Katona. DIY Home Improvement Specialist. Expert Interview. 25 August 2021.
- ↑ Mike Katona. DIY Home Improvement Specialist. Expert Interview. 25 August 2021.
- ↑ http://seejanedrill.com/how-to-lay-slate-tile/
- ↑ Mike Katona. DIY Home Improvement Specialist. Expert Interview. 25 August 2021.
- ↑ Mike Katona. DIY Home Improvement Specialist. Expert Interview. 25 August 2021.
- ↑ Mike Katona. DIY Home Improvement Specialist. Expert Interview. 25 August 2021.
About This Article