X
wikiHow is a “wiki,” similar to Wikipedia, which means that many of our articles are co-written by multiple authors. To create this article, volunteer authors worked to edit and improve it over time.
This article has been viewed 27,084 times.
Learn more...
Once the domain of expensive custom shelving, now almost every homeowner can afford sliding shelves. Installing sliding shelves and drawers into lower cabinets gives you easy access to the shelf’s contents.
Steps
Part 1
Part 1 of 3:
Ordering Shelving
-
1Measure the width and depth of the cabinet in which you would like to place sliding shelves.
-
2Compare those measurements to pre-made sliding shelves available online, at home improvement stores or through cabinet companies.Advertisement
-
3Order the sliding shelves that fit your cabinets. If you want to do several layers of shelves, it is best to start with bottom sliding shelves and move to the middle or top only when you know you will have space for several racks.
-
4Remove the shelves from the packaging. Check them to ensure they were not damaged.
-
5Lay the drawer, base mount screws and brackets on the kitchen floor by the cabinet.
-
6Remove the contents of the kitchen cabinet.
-
7Compare the mounting screws with your drill bits. Insert and lock in a Philips head or other drill bit that will fit into the screw heads.


Advertisement
Part 2
Part 2 of 3:
Aligning the Brackets
-
1Pick up the drawer slides. Check to see if they have brackets already attached to them. The brackets are the point at which you will screw the sliding shelf into the cabinet.
-
2Turn the pull out drawer so that the front is facing the ground. Check the correct sides for the drawer slides by sliding them onto either side of the pull out drawer.
-
3Place the drawer with slides into the kitchen cabinet to be sure it is the correct size. Align the drawer with the cabinet itself. Check the front, back and sides to ensure it’s straight and square with the opening.
-
4Close the door of the cabinet. Adjust the brackets, slides and shelf inside the cabinet if the door doesn’t close.


Advertisement
Part 3
Part 3 of 3:
Installing the Shelves
-
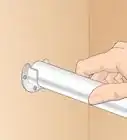
1Pull the drawer forward. Expose the brackets in the back. Make sure the brackets are flush with the bottom surface and facing down.
-
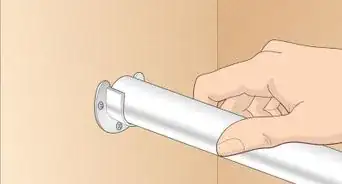
2Screw the brackets down using a mounting screw and your drill. Use one of the circular or oblong screw holes closest to the drawer slide.Advertisement
-
3Pull the drawer all the way forward. If possible, pull it all the way out to gain access to the front brackets.
-
4Screw the front brackets down with mounting screws and your power drill. Also, choose the holes closest to the drawer slide.
-
5Test the drawer again. If it is in the right place, screw a mounting screw into the center of each bracket. If it is not, remove the screws with the drill and reposition the brackets and drawer.
-
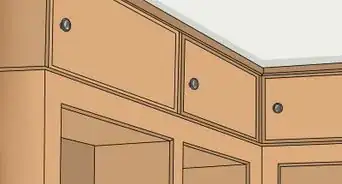
6Insert the drawer. Begin loading it and testing it again. It will be ready to hold dishes or supplies.[1]


Advertisement
Community Q&A
-
QuestionWhere can I buy brackets for sliding shelves?
 Community AnswerYou could find brackets for sliding shelves at Home Depot, or likely any home improvement store. They should every kind of bracket you could possibly need.
Advertisement
Things You'll Need
- Measuring tape
- Cordless drill
- Philips drill bit
- Pre-made sliding shelves
- Mounting screws


References
About This Article
Advertisement