This article was co-authored by wikiHow staff writer, Darlene Antonelli, MA. Darlene Antonelli is a Technology Writer and Editor for wikiHow. Darlene has experience teaching college courses, writing technology-related articles, and working hands-on in the technology field. She earned an MA in Writing from Rowan University in 2012 and wrote her thesis on online communities and the personalities curated in such communities.
This article has been viewed 410,638 times.
Learn more...
Ubuntu is gaining more and more ground in personal desktop use, but there are still a great number of programs that are only usable through Microsoft Windows. Fortunately, a program called Wine can run many of them from the comfort of your familiar Ubuntu desktop, and it's completely free and legal.
Steps
Installing Wine
-
1Open the Software Center. This shopping bag icon that you'll find in your Launcher or in your list of Applications is Ubuntu's app store, and is the easiest way to install the most stable version of Wine and other software for Ubuntu. You'll need an active internet connection to install it.[1]
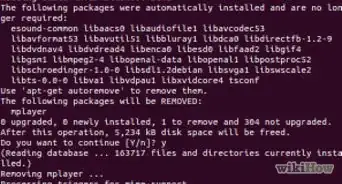
- It is possible to install the latest, unstable version from Wine's developers, but this is not recommended for most users as you may encounter serious issues with it.
-
2Search for wine in the Software Center. The Wine program should be the first or second in the list of results.Advertisement
-
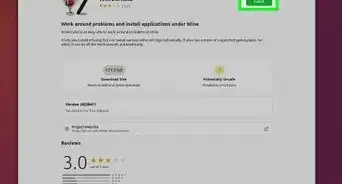
3Click Install to begin installing the Wine software. You'll see this button to the right of the application title. The installation may take a few minutes.
- When you see a message that the install is complete, you can close the Software Center by clicking the x in the top left corner of your screen.
-
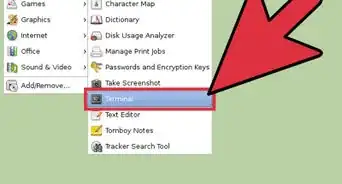
4Open a Terminal window. You will need to configure Wine before you can use it, which needs to be done through the Terminal.
- You can open the Terminal Applications> Accessories > Terminal, or by pressing Ctrl+Alt+T.
-
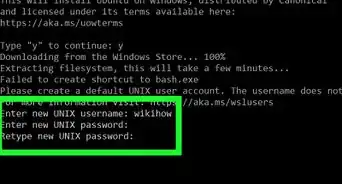
5Type
"winecfg"and press ↵ Enter. This will create a folder on your computer that will act as the Windows "C:" drive, which will allow you to install and run Windows-only programs.- This folder is labeled ".wine" and is hidden in your Home directory.
-
6Set your Windows emulation configuration options and click OK. After the "C:" drive is created, a configuration window will open, allowing you to adjust the settings for the emulated version of Windows. The different tabs allow you to adjust different settings.
- Applications - This allows you to set the Windows version for each of your installed applications. The "Default Settings" is the version of Windows that will be loaded for any application that does not have a specific operating system set.
- Libraries - This lets you adjust DLLs for the emulated version of Windows. Most users can leave this alone. You may need to make adjustments here to make some programs run correctly.
- Graphics - This allows you to adjust options like screen size, mouse capture, and resolution. This is linked to the "Applications" tab, so these changes can be application-specific.
- Drives - This allows you to map virtual drives for Wine using your own drives and folders. To find the Path for your disc drive, right-click the icon on your desktop. You can also click "Autodetect" to attempt to have Wine automatically detect your installed drives.
- Desktop Integration - This allows you to set the theme and appearance of your emulated applications.
- Audio - This adjusts the audio settings for Wine. Most users can leave them at default, and Wine will use your Linux settings.


Installing and Running Wine Applications
-
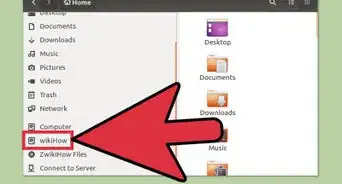
1Download the Windows application or insert the installation disc. You can install any Windows application as if you were using Windows. If you're downloading an installer, place it somewhere on your computer that's easily accessible.
-
2Open a Terminal window and navigate to the folder that contains the installer. If you are installing from a disc, skip to the next step.
- Navigate by using the
"cd"command.
- Navigate by using the
-
3Run the installer by typing
"wine ProgramName.extension". For instance, if you downloaded a file named "itunes_installer.exe", you would type"wine itunes_installer.exe"and press Enter. This will run the installation program as if you were using Windows.- If you want to install a program from a disc, make sure that the disc drive has a drive letter assigned in Wine and then type the following command:
"wine start 'D:\filename.exe'". Change the filename to whatever the actual filename is.
- If you want to install a program from a disc, make sure that the disc drive has a drive letter assigned in Wine and then type the following command:
-
4Follow any prompts to install the program. The installation will proceed just as if you were installing it in Windows. If you are asked for an installation location, select C:\Program Files.
-
5Look for the installed application in your Ubuntu Applications menu or on your desktop. Many Windows applications will create a shortcut much like they would in Windows, allowing you to easily start them by double-clicking.
-
6Run the installed application through the Terminal if you can't find a shortcut. If installing the program didn't create a shortcut, you can use the Terminal to start it up.[2]
- Navigate to the location of the program's executable file. For example: /home/user/.wine/drive_c/Program Files/Apple.
- Type
"wine ProgramName.extension"and press ↵ Enter to start the program. Replace "ProgramName.extension" with the name of the program file you want to run, which most likely ends with ".exe."
-
7Create a shortcut to a Wine program (if you want to avoid using a Terminal window). If you'd rather not type in the Wine command into the Terminal each time you want to start it, you can create a shortcut on your desktop.
- To create an icon shortcut, right-click on your desktop and select "Create launcher," then select an icon from the list or add your own. In the "Command" field, type
"wine progam-location/program.extension". The location is where the program's executable file is located. For instance, you'd have"wine /home/user/.wine/drive_c/Program Files/itunes.exe"to open iTunes. Finally, uncheck the "Run in terminal" box.
- To create an icon shortcut, right-click on your desktop and select "Create launcher," then select an icon from the list or add your own. In the "Command" field, type


Community Q&A
-
QuestionWhere is the software center?
 Community AnswerSearch for "Ubuntu Software" in the main menu. Open the first option with an icon of orange shopping bag with 'A' written on it. This should be the software center.
 -
QuestionCan we run Windows drivers on Ubuntu using Wine?
 Community AnswerYes, you can run Windows drivers.
 -
QuestionThe Wine in the Ubuntu software center keeps generating errors whenever I click install. I'm using Ubuntu 14 LTS. What do I do?
 SomoneCommunity AnswerUbuntu 14 is no longer supported, and thus the software is no longer available for that version. You will have to upgrade to the latest version of Ubuntu.


About This Article

1. Open Ubuntu Software Center.
2. Search for Wine.
3. Click Install.
4. Open a terminal window.
5. Type "wincfg" and press Enter.
6. Set your emulation options.
7. Install Windows apps in Wine.