X
wikiHow is a “wiki,” similar to Wikipedia, which means that many of our articles are co-written by multiple authors. To create this article, volunteer authors worked to edit and improve it over time.
This article has been viewed 16,719 times.
Learn more...
Installing an industrial ceiling fan is different than installing a household ceiling fan. Here is how to install an industrial ceiling fan.
Steps
-
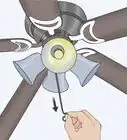
1If there is an existing light fixture in place, remove the glass shade or shades, light bulb or bulbs, and screws holding the light fixture to the ceiling. Remove the light fixture from the ceiling and disconnect the wires. Set the light fixture aside.
-
2An industrial ceiling fan weighs more than a household ceiling fan. In order to ensure that the new ceiling fan will stay in place, proper support is required. If your ceiling is already fitted with a box marked 'Suitable for Ceiling Fan Support', then you can skip these steps and proceed with the installation of the actual ceiling fan. If your ceiling fan box is NOT marked 'Suitable for Ceiling Fan Support', then you MUST replace the box with a suitable ceiling fan support brace.Advertisement
-
3To install a metal ceiling fan (octagonal) box, remove the old ceiling box off of the ceiling.
-
4Knock out a metal piece at the top of the ceiling fan box and pass the wires from the ceiling through the new ceiling fan box. Secure the new metal ceiling fan box to the ceiling joist with wood screws.
-
5After ensuring the new ceiling box is secure, you can proceed with the installation of the ceiling fan.
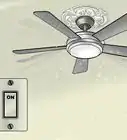
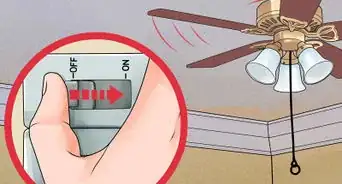
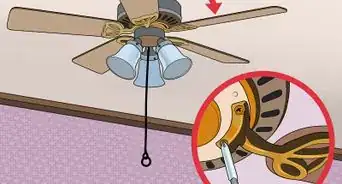
-
6Drill a hole in the ceiling joist for the J-hook bracket that came with your industrial ceiling fan to secure to. After you have drilled the hole that will hold the J-hook bracket into the ceiling joist, securely screw the J-hook bracket into the ceiling joist.
-
7Slide the drop rod over the wiring on the top of the fan motor and secure it with the included bolts.
-
8Slide the lower canopy over the drop rod so the flat part of the canopy is facing downwards, and secure it to the down rod with the included Philips-head screw.
-
9Slide the upper canopy over the drop rod so that the flat part of the canopy is facing upwards towards the ceiling. Do NOT secure the upper canopy to anything yet.
-
10Secure the U-shaped brackets on either side of the top of the drop rod with the included bolts.
-
11Set the roller ball into the U-shaped bracket. Hang the completed fan assembly onto the J-hook.
-
12If your ceiling fan came with a 110 volt AC 3-prong cord and plug, route it to a 110 volt AC outlet, but do NOT plug it into the outlet.
-
13If your ceiling fan came with wires, match the colors of the wires from the fan (bare ground to bare ground, black to black, and white to white) with the colors of the wires from the ceiling. Hold the wires together with fire-retardant vinyl electrical tape and plastic wire nuts.
-
14Slide the upper canopy up to the ceiling. Secure it to the down rod with the included Philips-head screw.
-
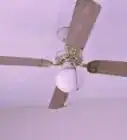
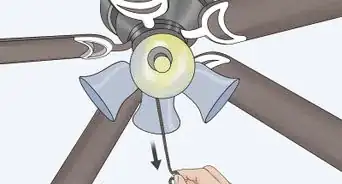
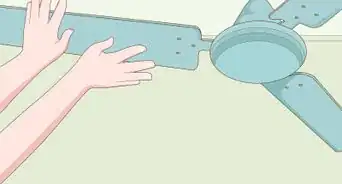
15Install the metal fan blades to the holes in the top of the fan motor with the included washers and bolts or screws. Ensure that the blades are fully secure.
-
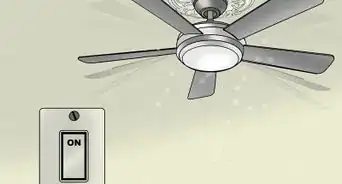
16If your ceiling fan came with a wall control unit, remove the old wall switch, disconnect its wires, and install the included wall control by connecting the bare ground wire from the wall control to the bare ground wire from the wall, the white wire from the wall control to the white wire from the wall, and the black wire from the wall control to the black wire from the wall. Secure each set of wires together with fire-retardant vinyl electrical tape and a plastic wire nut. Secure the wall control to the wall box with the included screws.
-
17If your ceiling fan has a 110 volt AC 3-prong cord and plug, plug this cord into a 110 volt AC outlet. The installation of your new industrial ceiling fan is complete! Enjoy your new industrial ceiling fan!


Advertisement
Community Q&A
-
QuestionWhat if the fan does not have a wall control included?
 Community AnswerYou could buy a kit from Lowe's, Home Depot, Amazon, or other home improvement stores. They usually cost around $25. They're easy to install if you read the directions carefully.
Advertisement
Warnings
- ALWAYS read the instruction manual or booklet that came with your ceiling fan BEFORE starting the installation.⧼thumbs_response⧽
- ALWAYS consult a qualified electrician if you do NOT want to install the ceiling fan at any time.⧼thumbs_response⧽
- ALWAYS shut off power (at the breaker box or fuse box) to the location you will be installing the ceiling fan BEFORE starting the installation of your ceiling fan.⧼thumbs_response⧽
Advertisement
Things You'll Need
- Industrial Ceiling Fan
- Instruction Booklet
- Many Wire Nuts (Plastic)
- Roll of Fire-Retardant Electrical Tape
- Allen Wrench w/ Bolt Kit
- Philips-Head Screwdriver
- Flathead Screwdriver
- Motorized Power Drill
- 110 Volt AC Outlet
- Ceiling Fan Box (Octagonal, Metal)


About This Article
Advertisement