wikiHow is a “wiki,” similar to Wikipedia, which means that many of our articles are co-written by multiple authors. To create this article, 10 people, some anonymous, worked to edit and improve it over time.
This article has been viewed 83,832 times.
Learn more...
A cathedral ceiling is a sloping and pointed ceiling which is usually high and open. Cathedral ceilings are a feature in many homes that add to value to the house because the high ceiling tends to make rooms look larger. It provides an open, airy look and feel to the room and they are often in demand among home buyers. While many people think they look nice, providing insulation can sometimes be a challenge due to the extra space between the ceiling and the floor. Insulate a cathedral ceiling by ensuring there is no opportunity for drafts to get into the room.
Steps
-
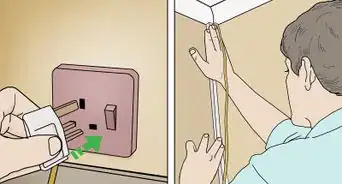
1Seal all ceiling openings. Stand on a ladder and using a caulk gun, seal any areas where there is visible wiring or plumbing. Check the joists and wall plates for any holes or openings. Be sure to seal around any PVC pipes as well. This will protect the room from air infiltration and will also suppress fires.
-
2Install baffles on vents. Also called vent chutes, the baffles will make sure there is enough air flowing for ventilation needs. Baffles are available in prefabricated models, built to fit the measurements of your ceiling joists.[1]
- Put the baffle between the joists, starting where they join at the exterior wall plate.
- Attach the baffles to the interior of the joists using a staple hammer and cover the wall plate area completely. There should be a 1 inch (2.54 cm) space beneath the plywood sheathing.
Advertisement -
3Continue installing baffles until baffles are attached to all the vents.
-
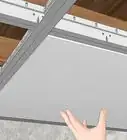
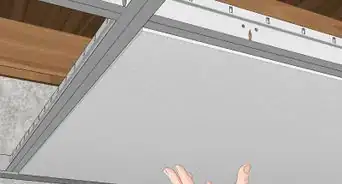
4Press the Kraft faced insulation batts between the joists. The side exposing the kraft paper must face downward. There must be at least 1 inch (2.54 cm) of space beneath the roof's plywood sheathing. This will ensure adequate airing.[2]
-
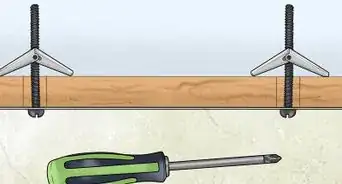
5Attach the paper flanges to the joists at the bottom by stapling them every 8 inches (20.32 cm). Keep the insulation at least 3 inches (7.62 cm) away from any sources of heat sources such as chimneys or recessed lights.[3]


Insulating With Unfaced Fiberglass Batts


Community Q&A
-
QuestionWhat are some companies that do this work?
 DvortygirlCommunity AnswerThat depends on where you live. Most areas have local, independent people. Check the phone directory for insulation and roofing services, or ask around to your neighbors to find out if any of them have had similar work performed recently.
Warnings
- Be sure to wear goggles, protective clothing and a dust mask when working with ceiling materials.⧼thumbs_response⧽
Things You'll Need
- Ladder
- Caulk gun
- Baffles
- Staple hammer
- Kraft faced or fiberglass batts
- Goggles
- Protective clothing
- Dust mask


References
- ↑ https://www.youtube.com/watch?v=wo-7q2J1mqo
- ↑ http://www.frugalhappy.org/blog/2018/3/11/insulation-ceiling
- ↑ https://www.youtube.com/watch?v=wo-7q2J1mqo
- ↑ http://www.applegateinsulation.com/Product-Info/Technical-Pages/249234.aspx
- ↑ https://www.youtube.com/watch?v=erQ53hibJNg
- https://www.energy.gov/energysaver/weatherize/insulation/where-insulate-home