wikiHow is a “wiki,” similar to Wikipedia, which means that many of our articles are co-written by multiple authors. To create this article, 13 people, some anonymous, worked to edit and improve it over time.
wikiHow marks an article as reader-approved once it receives enough positive feedback. This article received 14 testimonials and 90% of readers who voted found it helpful, earning it our reader-approved status.
This article has been viewed 565,026 times.
Learn more...
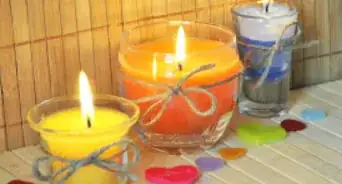
You can buy candle wicks to use in homemade candles, but you can just as easily make your own wicks. Borax-treated candle wicks are the most conventional, but you can also make wooden wicks or moveable wicks with a few basic materials.
Things You Should Know
- Soak twine in a Borax solution and dip it in wax several times to make a wick that burns brighter with less smoke and ash.
- Soak a balsa wood stick in olive oil and attach it to a wick tab.
- Create a movable candle wick by dipping a pipe cleaner in melted wax multiple times.
Steps
Making Borax Candle Wicks
-
1Heat the water. Heat 1 cup (250 ml) of water using a small saucepan or a tea kettle. Allow the water to reach a simmer, but not a full boil.[1]
-
2Dissolve the salt and Borax. Pour the hot water into a glass bowl. Add 1 Tbsp (15 ml) of salt and 3 Tbsp (45 ml) of Borax.[2] Stir to dissolve.
- You'll use this Borax solution to treat the base wick material. Treating wicks with Borax can make the candles burn brighter and longer. Moreover, it can also reduce the amount of ash and smoke produced by the burning process.
- Keep Borax away from children and pets since it can have a toxic effect when ingested or inhaled.
Advertisement -
3Soak the twine in the solution. Take a piece of heavy cotton butcher's twine and submerge it in the Borax solution. Allow the twine to soak for 24 hours.[3]
- Make sure that the length of twine used is longer than the height of the container you plan to use for your candle. If you don't know how tall the candle will be, you can soak up to 1 foot (30.5 cm) of twine and trim it down to size later.
- Butcher's twine is a great base material for candle wicks, but nearly any thick cotton cord should work well enough. You can use embroidery cotton, torn pieces of cotton cloth, or a clean shoelace with the plastic cap removed.[4]
- Soaking the twine for 24 hours will produce the best results. You can technically remove the twine after 20 minutes, but the results will not be as ideal.
-
4Dry the twine. Remove the twine from the Borax solution using tweezers. Hang the twine and let it dry for two or three days.
- The twine must be fully dry before you continue.
- Use a clothespin or similar clip to hang the treated twine in a warm, dry location. Place aluminum foil beneath the drying twine to catch any excess solution as it drips off.
-
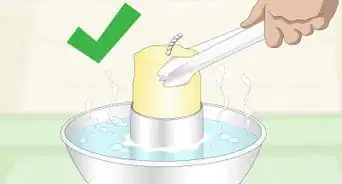
5Melt the wax. Break apart 1/4 to 1/2 cup (60 ml to 125 ml) of candle wax. Melt the wax using a double boiler setup.
- If you don't have a double boiler, you can use a clean metal can and a small saucepan.
- Heat 1 to 2 inches (2.5 to 5 cm) of water in the saucepan over your stove, letting it simmer and steam without boiling.
- Place the metal can inside the hot water. Wait another minute for the can to heat up before adding the wax.
- Melted wax can cause serious burns, so handle it very carefully throughout the rest of the procedure.
- If you don't have a double boiler, you can use a clean metal can and a small saucepan.
-
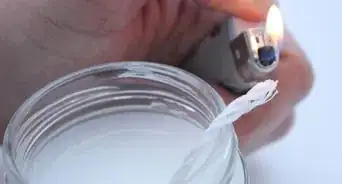
6Dip the treated twine. Carefully dunk the dry, Borax-treated twine in the melted wax. Coat as much of the twine as possible.
- Technically, you can use Borax-treated twine as it is without adding a wax coating. The wax makes the wick stiffer and easier to handle, however, and may also make it easier for the flame to catch on the end of the wick.
-
7Dry the twine. Hang the twine as before and let it dry long enough for the wax to harden. This should only take several minutes.
- As before, place a sheet of aluminum foil beneath the hanging twine to catch any excess wax dripping off.
-
8Repeat. Dip and dry the twine once or twice more to build up a thick coating of wax.
- Ideally, the twine should feel stiff while still retaining some flexibility.
- If you don't have enough wax to dip the string again, you can lay the string on a sheet of aluminum foil and carefully pour the remaining wax on top. Let the wick dry on the foil instead of hanging it again.
-
9Use the wick as needed. Once the fully-coated twine is dry, it's finished and ready to insert into a candle.


Creating Wooden Candle Wicks
-
1Trim down balsa wood sticks. Use scissors to trim down the length of the balsa wood so that it stands at least 1 inch (2.5 cm) taller than the container you plan to use for the candle.[5]
- Use the thin balsa wood strips you'd typically find at a craft store. These sticks should be 1/2 to 1-1/2 inches (1.25 to 3.75 cm) wide.
- If you don't have a container in mind and don't know how large the candle will be, trim the wood down to a length between 6 and 12 inches (15.25 and 30.5 cm). You can trim away any excess later, so it's better to have too much than too little.
-
2Soak the balsa wood in olive oil. Place the trimmed balsa wood into a shallow dish. Pour enough room temperature olive oil into the dish to completely cover the wood.
- While wood is flammable on its own, coating the wood in oil will allow the fire to catch quicker and burn more evenly. Olive oil burns cleanly, making it a great choice for candle-making projects.
- Let the wood soak up the oil for at least 20 minutes. You can wait up to one hour, if desired, so that the wood can absorb more oil and burn with an even brighter flame.
-
3Wipe away the excess oil. Remove the wooden sticks from the oil and use clean paper towels to wipe away any excess.
- Instead of rubbing the stick dry, you could place it on a plate covered with paper towels and allow it to air dry for several minutes.
- When ready, the wood should still feel damp and slightly oily to the touch, but it should no longer leave an oily residue on your hands when you handle it.
-
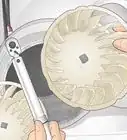
4Attach a wick tab to the base of the stick. Pry open a metal wick tab and carefully push one end of the treated wood into the opening.[6]
- Push the wick into the tab as far as possible. The wick tab will hold the wood firmly in place as it sits in the melted wax during the candle-making process.
-
5Use the wick as needed. The wooden wick should now be ready to use when you make your candle.
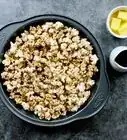
- Treated balsa wood is easy to handle and burns well. Using wooden wicks instead of cotton ones will add a wooded scent to the candle as it burns, and wooden wicks may also make the occasional crackling sound as the fire consumes them.


Fashioning Movable Candle Wicks
-
1Melt wax in a double boiler. Break apart 1/4 to 1/2 cup (60 to 125 ml) of candle wax or paraffin and place it into the top part of a double boiler. Heat the wax until it melts.
- You can use fresh wax or bits of old, recycled candles. Break it into small chunks so that it melts quicker.
- If you don't have a double boiler, insert a metal can or metal bowl into heavy saucepan and surround it with 1 to 2 inches (2.5 to 5 cm) of water. The water should only sit in saucepan, not in the inner dish.
- Bring the water to a simmer but do not allow it to boil. As the wax melts, continue onto the next part of the process.
-
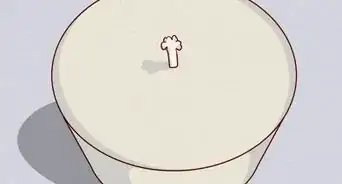
2Twist the pipe cleaner end. Wrap the end of an all-cotton pipe cleaner around the side of a pencil or pen. Once pipe cleaner meets itself and slightly overlaps, twist the remainder up so that it runs parallel to the side of the pencil.[7]
- After shaping the pipe cleaner, slide it off the pencil.
- Note that all-cotton pipe cleaners are strongly recommended. Pipe cleaners made with synthetic fibers may not burn as well or as safely.
-
3Trim the pipe cleaner. Use side cutter pliers to trim the long end of the pipe cleaner. The finished wick should only have approximately 1/2 inch (1.25 cm) standing above the circular base.[8]
- After cutting the pipe cleaner, use needle-nose pliers to carefully twist the upright portion of the wick toward the center of the circle. This portion should still remain upright, but it needs to be fairly centered.
- If the upright portion of the wick is too heavy or off-centered, the distribution of weight won't be balanced and the wick may topple over instead of standing straight.
-
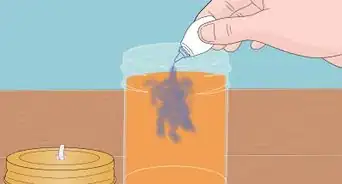
4Dip the wick into the melted wax. Grab the trimmed pipe cleaner wick using long-handled tweezers and carefully lower it into the melted wax. Let the wick soak in the wax for several seconds.
- Work very carefully. Melted wax can cause terrible burns if it splashes or drips onto your skin.
- Make sure that the entire wick gets submerged in the melted wax. Do not release it from your tweezers, though, since it will be difficult to fish out if you do let go of it.
-
5Dry the wick. Remove the wick from the wax and set it down on a sheet of aluminum foil. Wait several minutes for the wax to dry and harden.
- Stand the wick on its circular base as it dries.
- When ready, the wax on the wick should be hard and cool enough to touch.
-
6Repeat as desired. Repeat the dipping and drying procedure one to three times, letting the wax harden in between coats.
- You need to build a thick, consistent coating of wax on the outside of the wick. The wax will allow the wick to catch fire more quickly and burn for a longer period of time.
-
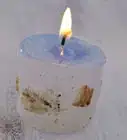
7Use the wick as needed. Once the wick is completely dry after the last coating of wax, it's done and ready to add to the top of a solid wick-less candle.
- When you light the wick, the flame should spread heat throughout the entire wick, sending it into the candle beneath it. The candle will begin to melt beneath the wick, and the wick will eventually end up floating on top of the melted wax.


Community Q&A
-
QuestionIs there an easier way to make candle wicks?
 Community AnswerYes. You can simply dip a string in melted wax and allow it to dry. Then you can make a candle without using borax or wood.
 -
QuestionCan I use hemp twine for a candle wick?
 Community AnswerYes, you can.
 -
QuestionCan I use coconut oil or avocado oil instead of olive oil for balsa sticks?
 Community AnswerYes, it will work the same, just follow the directions given in method two, substituting olive oil with avocado or coconut oil.
Things You'll Need
Borax Candle Wicks
- Water
- Kettle
- Table salt
- Borax
- Tweezers
- Cotton twine
- Clothespin or clip
- Aluminum foil
- Double boiler
- Candle wax
Wooden Candle Wicks
- Thin balsa wood strips, 1/2 to 1-1/2 inches (1.25 to 3.75 cm) wide
- Scissors
- Shallow container
- Olive oil
- Paper towels
- Metal wick tabs
Moveable Candle Wicks
- All-cotton pipe cleaners
- Pencil or pen
- Tweezers
- Side cutting pliers
- Needle-nose pliers
- Candle wax or paraffin
- Double boiler
- Aluminum foil


References
- ↑ http://www.redtedart.com/2012/02/03/how-to-make-a-candle-wick/
- ↑ https://www.youtube.com/watch?v=XrflifL2dH4
- ↑ https://www.youtube.com/watch?v=XrflifL2dH4
- ↑ http://readynutrition.com/resources/5-ways-to-make-candles-from-household-items_30052012/
- ↑ http://www.17apart.com/2015/03/over-on-ehow-cracking-code-on-how-to.html
- ↑ https://www.swoonworthy.co.uk/2018/02/diy-wood-wick-candles.html/
- ↑ https://www.survivalresources.com/diy-moveable-candle-wicks.html
- ↑ https://www.survivalresources.com/diy-moveable-candle-wicks.html
About This Article
To make candle wicks, start by purchasing balsa wood sticks from a craft shop or online. Then, use scissors to trim down a stick so it’s about 1 inch taller than the container you plan to use for the candle. Once you’ve trimmed the stick to the right length, place it in a shallow dish and soak it in olive oil for at least 20 minutes to help it burn. When you take the stick out, wipe away any excess oil with a paper towel or let it air dry for a few minutes. After your stick has dried, push 1 end into a metal wick tab to hold it in place when you make your candle. For more tips, including how to make candle wicks with Borax, read on!