This article was co-authored by wikiHow staff writer, Janice Tieperman. Janice is a professional and creative writer who has worked at wikiHow since 2019. With both a B.A. and M.A. in English from East Stroudsburg University, she has a passion for writing a wide variety of content for anyone and everyone. In her free time, you can find her working on a new crochet pattern, listening to true crime podcasts, or tackling a new creative writing project.
There are 19 references cited in this article, which can be found at the bottom of the page.
This article has been viewed 7,047 times.
Learn more...
Ceramic flowers are a beautiful way to decorate your home, and they don’t require a lot of time or effort to make. If you’d like to create a more elegant decoration, layer several flattened pieces of clay to form a rose. If you’d prefer to create a more generic flower, use a scoring knife and circular slab of ceramic clay to get the job done. Once you’re satisfied with your creations, use a kiln to harden your flowers into versatile decorations!
Steps
Creating a Ceramic Rose
-
1Form a grape-sized piece of clay into a teardrop shape. Arrange a mound of ceramic clay on a flat, clean workspace, so you have plenty of space to mold and form the material as you please. Pull off a small piece of clay with your fingers and roll it around in your palms to form an oval shape. Then, use the tips of your fingers to pinch 1 side of the clay and create a tapered point.[1]
- This piece of clay will serve as the center of the rose.
- If you use clay a lot, consider setting aside a separate workspace for your projects.
- You can purchase ceramic clay online, or in most art supply stores.
-
2Pinch and flatten 7-9 almond-sized balls of clay to make the base petals. Use your fingers to pinch and pull away small, almond-sized sections of clay from the larger mound. Roll the ceramic material into a ball, then use your fingers to pinch, press, and flatten the clay into a thin layer. Try to make these clay pieces only a few millimeters thick, so they resemble petals.[2]
- If you flatten the clay in the center of your palm, the petal will look naturally curved.[3]
Advertisement -
3Fold 1 base petal around the tapered tip of the teardrop. Hold the teardrop-shaped clay center in 1 hand, so it’s easier to assemble the rose. Use your opposite hand to fold the clay petal around the curved edge of the ceramic flower’s centerpiece. Next, press along the outside of the petal to secure it to the centerpiece, leaving a slight gap between the tapered tip and the edge of the clay petal.[4]
- This petal will cover about ½ or ⅔ of the center clay piece’s circumference.
- The gap between the petal and the tip of the centerpiece imitates the central section of a rose.
-
4Arrange a second clay petal around the first petal. On the opposite, uncovered side of the clay centerpiece, press another clay petal into place. Allow the edges of both petals to overlap, as this will make the rose look more realistic. As you did with the first petal, leave a gap between the tapered tip of the centerpiece and the edge of your second clay petal.[5]
- Both petals will form a “C” shape as they surround the rose’s centerpiece and overlap one another.
-
5Place another flattened piece of clay on the rose to form a third layer of petals. Next, take a third piece of flattened clay and arrange it around the base of the rose. Bend back the tip of the petal, so the rose looks more expansive and realistic. To check that the petal is securely attached, press along the length of the clay piece with your fingers.[6]
-
6Fold 2 more flattened pieces of clay to create another layer of petals. Repeat the same application process as you arrange 2 more clay petals around the base of the rose. Use your fingers to bend back the edge of the petals, which creates a bigger gap between the different layers of clay. Be sure to overlap the petals so the rose can look more lifelike![7]
- The tapered tip of the centerpiece as well as the inner layers of petals should still be visible.
-
7Overlap 4 more clay pieces around the rose to form the final layer of petals. Create a final outer layer for your rose by arranging and overlapping 4 pieces of clay around the base of the flower. Keep folding the edges of the petals back, so the rose looks fully bloomed.[8]
-
8Harden your clay permanently in a kiln. Check the label on your ceramic clay to see if it needs to be fired in a low or high temperature. If it’s a low-fire clay, set your kiln to no higher than 2,079 °F (1,137 °C). If you’re working with a porcelain clay, set your kiln around 2,232 °F (1,222 °C). Wait for the kiln’s cycle to finish, then remove your ceramic rose after the equipment cools down.[9]
- If you don’t have access to a kiln, ask a local community center or pottery business for assistance.
- See if your kiln manual has a recommended temperature guide.


Forming a Generic Flower
-
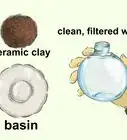
1Flatten a golf ball-sized piece of clay onto a smooth surface. Set aside a large mound of ceramic clay on your workspace, then pinch and pull away a large section of clay. Roll the section of clay in your hands to form a sphere. Next, use your palms to flatten the clay into a rounded, 5-10 millimeter-thick slab.[10]
- You can also use a rolling pin to flatten out your clay.[11]
-
2Sketch the design of the flower onto the clay with a sharp tool. Use a clay scorer or other sharp tool to etch a circle in the center of the slab, which represents the middle of your flower. Next, draw lines moving outward from this central circle to form the petals. To create a generic flower, try drawing about 5-6 petals on your flower.[12]
- You can find clay scorers and other similar tools at an art supply store.
-
3Cut out thin slivers of clay to separate the petals. Use the same scorer or sharp tool to slice into the slab. Cut along the etched lines with short swift motions, separating each clay petal as you go. Use the tool to remove a small, triangular section of clay from between each petal, so your flower can look more defined and realistic.[13]
- At this point, your flower will no longer look like a circular slab of flattened clay.
-
4Smooth out the edges of the petals with your fingers. Go around the flower in a circle and press along the outer edges of each petal to give your ceramic flower a more polished finish. First, work in a clockwise direction and focus on smoothing out the leftmost edges of each petal. Once you’ve completed this cycle, go around the clay flower in a counter-clockwise direction and smooth out the rightmost edges of the petals.[14]
-
5Pinch the ends of the petals to make them pointed. Hold your ceramic flower in 1 hand, then use your opposite pointer finger and thumb to pinch the end of each petal. Work each petal into a fine point, so the petals appear more defined and lifelike.[15]
- If the edges of your petals look cracked, dip your fingers into a bowl of water to smooth out any imperfections.
-
6Add a blueberry-sized ball of clay to the center of the flower. Pinch and pull away a small portion of clay from the mound. Arrange the piece of clay in between your palms, then roll your hands to create a more obvious circle or sphere. Check that this ball of clay fits in the center of your flower before continuing.[16]
- If the central piece of the flower is too big or too small, then your ceramic flower might not look as realistic.
-
7Score the base flower and the circular center to help them stick together. Use a clay scorer or other sharp tool to etch a series of thin, crosshatched lines along the middle of the flower. Repeat this same process on the clay centerpiece, adding multiple crosshatched lines along the bottom. Spread a dot of wet clay on the bottom of the centerpiece, then press the clay piece into place on the middle of the flower.[17]
- The crosshatched marks help the pieces to stick together more securely. If you don’t score your clay properly, then the components of your flower might not stick together as well.
-
8Bend the petals upward to make the flower more realistic. Press your finger beneath the tip of eat petal, allowing the clay to curve upwards. Repeat this process with each of the petals, so the flower looks uniform.[18]
- Don’t press the entire flower petal upwards—instead, just focus on the tips of the petals.
-
9Poke indentations in the flower center to add extra detail. Use the bottom end of a clay scorer or another blunt tool to create consistent, rugged bumps and marks along the centerpiece of your flower. Add these marks over the entire surface of the piece, so the flower looks more realistic.[19]
-
10Fire your flower in a kiln to harden it permanently. If you’re using a low fire ceramic clay, set your kiln up to 2,079 °F (1,137 °C). If you’re using a porcelain-based clay, you can set your machine around 2,232 °F (1,222 °C). Wait for the kiln to complete its cycle and cool down before removing your flower.[20]
- Contact a pottery business or community center if you don’t have access to a kiln.


Things You’ll Need
- Ceramic clay
- Water
- Bowl
- Clay cutting tool
- Kiln


References
- ↑ https://m.youtube.com/watch?v=2P8gVIU57UM&t=0m8s
- ↑ https://m.youtube.com/watch?v=IC9_Y7KapH0t=0m50s
- ↑ https://m.youtube.com/watch?v=2P8gVIU57UM&t=1m26s
- ↑ https://m.youtube.com/watch?v=IC9_Y7KapH0&t=0m57s
- ↑ https://m.youtube.com/watch?v=IC9_Y7KapH0&t=1m19s
- ↑ https://m.youtube.com/watch?v=IC9_Y7KapH0&t=1m38s
- ↑ https://m.youtube.com/watch?v=IC9_Y7KapH0&t=2m15s
- ↑ https://m.youtube.com/watch?v=IC9_Y7KapH0&t=3m38s
- ↑ https://www2.bellevuecollege.edu/artshum/materials/art/Husby/FiringTemperatures.pdf
- ↑ https://m.youtube.com/watch?v=N4lNw74kHts&t=0m11s
- ↑ https://m.youtube.com/watch?v=dzvkLx3iXGo&t=0m45s
- ↑ https://m.youtube.com/watch?v=N4lNw74kHts&t=0m39s
- ↑ https://m.youtube.com/watch?v=N4lNw74kHts&t=0m49s
- ↑ https://m.youtube.com/watch?v=N4lNw74kHts&t=1m59s
- ↑ https://m.youtube.com/watch?v=N4lNw74kHts&t=2m52s
- ↑ https://m.youtube.com/watch?v=N4lNw74kHts&t=3m38s
- ↑ https://m.youtube.com/watch?v=N4lNw74kHts&t=3m58s
- ↑ https://m.youtube.com/watch?v=N4lNw74kHts&t=5m34s
- ↑ https://m.youtube.com/watch?v=fsj6q5Z6fFc&t=5m14s
- ↑ https://www2.bellevuecollege.edu/artshum/materials/art/Husby/FiringTemperatures.pdf