X
This article was co-authored by wikiHow Staff. Our trained team of editors and researchers validate articles for accuracy and comprehensiveness. wikiHow's Content Management Team carefully monitors the work from our editorial staff to ensure that each article is backed by trusted research and meets our high quality standards.
This article has been viewed 363,551 times.
Learn more...
Glitter makes just about everything better, from makeup to frames to handbags. If your favorite pair of shoes are looking a little scuffed or shabby, don't toss them out! If they are still comfortable to wear, you can spruce them up with some glitter to make them fashionable chic again!
Steps
Part 1
Part 1 of 3:
Prepping the Shoes
-
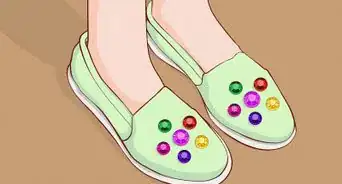
1Choose a pair of pumps to glitter. You can apply glitter to the entire shoe, or to just one part, such as the heel or the sole. Make sure that the pumps are smooth. Any textures or embellishments, such as bows or rhinestones, will make it difficult for the glitter to stick.
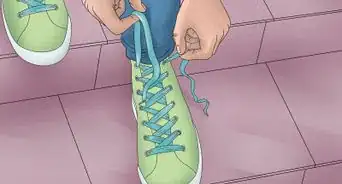
- If the pumps come with laces, bows, or any other decorations, remove these temporarily. You will put them back on in the end.
-
2Clean the shoes. Wipe the shoes down to remove any surface dirt. This is very important. Any surface dirt or oils will prevent the litter from sticking.[1] If you will be applying glitter to the underside of the sole, wipe it down with rubbing alcohol.Advertisement
-
3Stuff the shoes with newspaper. If you don't have any newspaper, you can also use crumpled up paper, tissue paper, or even a plastic bag. This will help keep the insides of the shoes clean and glitter free.
-
4Mask off the areas you don't want glittered with painter's tape. For example, if you are glittering the entire shoe, cover the sole with masking tape. If you are glittering the sole, wrap tape around the bottom edge of the shoe, right where the material meets the sole. This will help keep your lines neat and crisp.[2]


Advertisement
Part 2
Part 2 of 3:
Glittering the Shoes
-
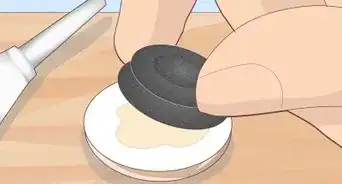
1Cover a small portion of the shoe with a thick layer of Mod Podge. It is best to work a small area at a time. If you cover the entire shoe with Mod Podge, parts of it may dry before you add the glitter. You can apply the Mod Podge using a paintbrush or a foam brush.[3]
- Be generous when applying the Mod Podge; don't skimp on it. You want it to appear white.[4]
-
2Shake on some glitter. You can use chunky glitter or ultra-fine glitter. The choice is up to you. If you need to, use your fingers to gently pat the glitter into place so that it lays flat.[5]
- Work over a sheet of paper. When you are done, you can fold the paper in half, and funnel the glitter back into its jar.
-
3Tap off the excess glitter. Chances are, the excess glitter already slid off of the shoe, but gently tap the shoe against your work surface just to be sure.[6] This will give you a smoother finish. Don't worry if the shoe appears patchy—you can always apply more layers later on!
-
4Continue painting the shoe and shaking on glitter. Once you have the entire portion covered with glitter, move onto the next patch. Apply more Mod Podge, then shake on more glitter. Keep doing this until the entire shoe is covered in glitter. When you are done, move onto the next shoe.
- If the shoe gets awkward to hold because of all the glitter, let the glitter dry for 1 hour, then continue working.[7]
-
5Allow the glitter to dry. Set the shoes down some place where they will not be bumped or disturbed. Make sure that no dust, lint, or pet hair gets on the shoes.
-
6Apply a second coat of glitter, if necessary. As the Mod Podge dries, you may notice the glitter layer becoming more translucent. Part of the shoe may even show through, especially if it is a different color. If this happens, you will need to apply another layer. Simply repeat the process: apply some Mod Podge, then shake on some glitter.[8]


Advertisement
Part 3
Part 3 of 3:
Finishing the Shoes
-
1Seal the glitter with an acrylic sealer. You can use the spray-on kind or the brush-on kind. You will need two coats. Let the first coat dry completely before applying the next one.
- If you can't find an acrylic sealer, you can use more Mod Podge instead.[9]
- Make sure that you use a sealer with a glossy finish. A matte finish will dull the glitter and give you a sandy finish instead.
-
2Remove the tape and newspaper. If there is any glitter stuck where you don't want it, wipe it away with a damp sponge or towel. Use a piece of tape to pick off any stubborn bits of glitter or Mod Podge.[10]
-
3Extend the sealer, if necessary. If you applied the glitter to only a small portion of your shoe, such as a heart shape, it might be a good idea to extend the sealer just a smidge beyond the glitter. Use a thin paintbrush and some more brush-on acrylic sealer (or Mod Podge), and paint just outside the design. This will help lock the design in and keep it from peeling away.
-
4Allow the shoes to dry completely before wearing them. In most cases, you will need to wait 24 hours.[11] Check the label on your Mod Podge and sealer just to be sure. Just because something feels dry to the touch does not necessarily mean that it is fully dry and ready to use.


Advertisement
Community Q&A
-
QuestionDoes it have to be high heels?
 Community AnswerNot at all. You can decorate whatever shoes you'd like.
 -
QuestionHow many layers of glitter do I use? What if it doesn't come out right?Community AnswerTwo layers should be enough, and if it doesn't come out, you will have to try again, add more layers.
-
QuestionWhat materials do I need in order to do this?
 Community AnswerThe materials are listed in the "Things You'll Need" section at the bottom of the page. Unfortunately, this website puts that section at the very end of its articles, which makes no sense.
Advertisement
Warnings
- Make sure shoes are completely dry before moving on to the next step. If you add more Modge Podge to wet shoes they could warp the glitter and make a mess.⧼thumbs_response⧽
- These shoes are not waterproof! Even if you seal these with an acrylic sealer, there is a chance that the glitter layer may bubble and warp if you step in a puddle.⧼thumbs_response⧽
Advertisement
Things You'll Need
- Pumps
- Mod Podge
- Glitter
- Painter's tape
- Newspaper
- Paintbrush or foam brush
- Acrylic sealer


References
- ↑ http://www.capitolromance.com/2014/11/19/diy-tutorial-how-to-make-diy-glitter-heels-for-shoes/
- ↑ http://www.capitolromance.com/2014/11/19/diy-tutorial-how-to-make-diy-glitter-heels-for-shoes/
- ↑ https://somethingturquoise.com/2013/10/04/diy-glitter-high-heels/
- ↑ https://somethingturquoise.com/2013/10/04/diy-glitter-high-heels/
- ↑ http://www.makelifelovely.com/2013/05/diy-glitter-heels.html
- ↑ http://www.makelifelovely.com/2013/05/diy-glitter-heels.html
- ↑ https://somethingturquoise.com/2013/10/04/diy-glitter-high-heels/
- ↑ http://www.makelifelovely.com/2013/05/diy-glitter-heels.html
- ↑ http://www.makelifelovely.com/2013/05/diy-glitter-heels.html
About This Article

wikiHow Staff
wikiHow Staff Writer
This article was co-authored by wikiHow Staff. Our trained team of editors and researchers validate articles for accuracy and comprehensiveness. wikiHow's Content Management Team carefully monitors the work from our editorial staff to ensure that each article is backed by trusted research and meets our high quality standards. This article has been viewed 363,551 times.
Co-authors: 43
Updated: September 2, 2022
Views: 363,551
Categories: Featured Articles | Shoe Decoration
Advertisement