This article was co-authored by wikiHow Staff. Our trained team of editors and researchers validate articles for accuracy and comprehensiveness. wikiHow's Content Management Team carefully monitors the work from our editorial staff to ensure that each article is backed by trusted research and meets our high quality standards.
The wikiHow Video Team also followed the article's instructions and verified that they work.
This article has been viewed 62,122 times.
Learn more...
Butterflies are a wonderful part of spring and summer. Tissue paper is perfect for making them, because of how light, bright, and fluttery it can be. There are lots of different ways of making them, from simple clothespin butterflies to colorful ones that look like stained glass. Whichever method you choose, you are bound to end up with lots of colorful butterflies to decorate your home with!
Steps
Making a Simple Butterfly
-
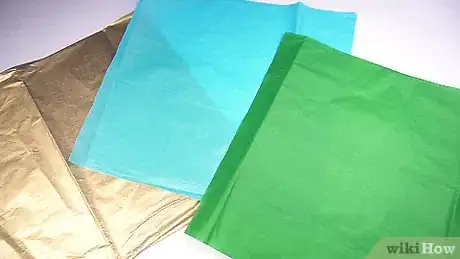
1Cut three 10-inch (25.4 centimeters) squares out of a sheet of tissue paper. For a more colorful butterfly, cut each square from a different color. This will make the wings.[1]
- To save time, stack the papers first, and then cut them all at once.
-
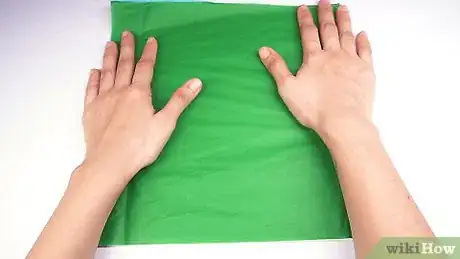
2Stack the papers, one on top of each other. Make sure that the corners and edges are aligned. If you are using more than one color, stack them in an order that you like.Advertisement
-
3Fold the paper, accordion style, until you have a 1-inch (2.54 centimeters) thick strip. Fold the bottom edge up by 1 inch (2.54 centimeters). Flip the paper over and fold it up by another inch (2.54 centimeters). Keep flipping and folding in this manner, until you get a fan or accordion.
- Keep the papers together while you are folding them. Treat them as one sheet of paper.
- Consider cutting a small notch or V-shape into each end of the folded fan/accordion. This will give your butterfly a more interesting design.
-
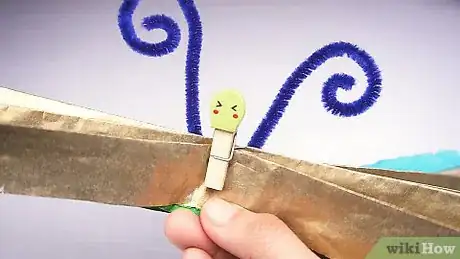
4Clip a wooden clothespin onto the center of the folded paper. Make sure that you are clipping the clothespin onto the folded edges of the folded paper, and not the top/flat part. The paper will scrunch up a little, but that is okay; when you open it up, you'll have beautiful wings.
-
5Open up the wings to either side of the clothes pin. The wings should be sticking out to either side of the clothespin, just like the wings of a butterfly. If they open up more like an umbrella instead, simply twist and rotate them until they are facing the right way
- If you'd like, you can gently fluff the wings up too.
-
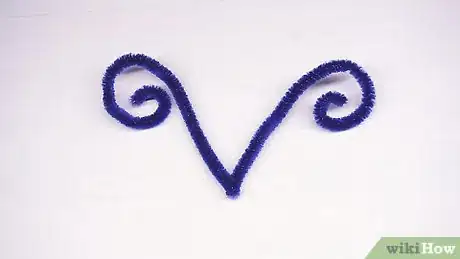
6Make the antenna out of a pipe cleaner. Fold a pipe cleaner in half into a V-shape. Curl each end into a small O-shape or a tight spiral.[2]
-
7Clip the antenna into the clothespin. Position it just above the folded tissue paper. Everything should be fitted snugly in the groove part of the clothespin.
-
8Decorate the clothespin body. You can color it with markers or with paints. You can even glue on tiny googly eyes or draw a silly face. To make an extra fancy butterfly, decorate the body with glitter glue and rhinestones.
Making a Stained Glass Butterfly
-
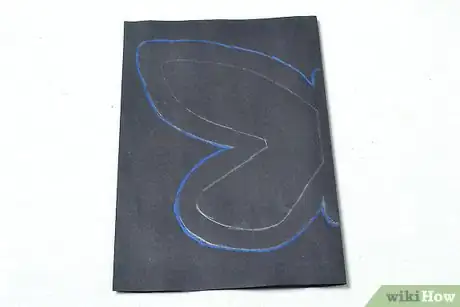
1Fold a sheet of black construction paper in half widthwise, and draw half of a butterfly.[3] Don't make the butterfly too small! It should be almost the same size as the paper. Also, make sure that the body of the butterfly is aligned with folded part of the paper. This makes the outer part of your frame.
- Use a white crayon or colored pencil so that you can see the line easily.
- You can make up your own butterfly, or find a template online to use.[4]
-
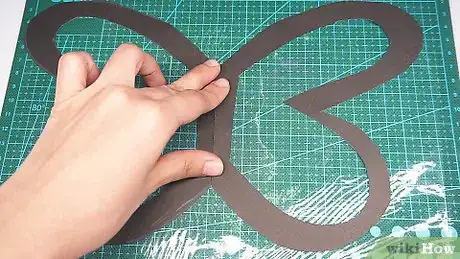
2Cut the butterfly out, following the lines that you drew. Keep the folded while you cut. This way, when you unfold your paper, your butterfly will look the same on both sides.
-
3Cut out the inside of the butterfly, ½ to 1 inch (1.27 to 2.54 centimeters) from the outline.[5] When you unfold your butterfly, you should have an outline of a butterfly. The wings should be hollow. This will make the inner part of the frame.
- If you'd like your butterfly to have a solid/black body, only cut out inside the wings. Don't extend the frame to the fold.
-
4Place the butterfly frame down on a sheet of clear contact paper. Cut a sheet of contact paper a little bit bigger than the butterfly. Peel off the backing, and set it down on the table, sticky-side-up. Place the butterfly frame down onto the contact paper.[6]
-
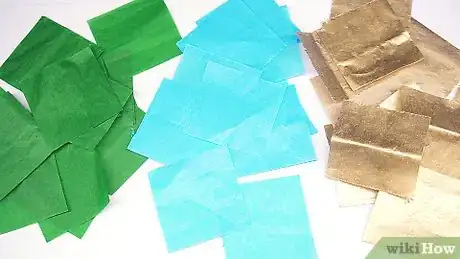
5Cut the tissue paper into squares. Make them between 1 to 2 inches (2.54 to 5.08 centimeters). Use lots of different colors to make your butterfly look more interesting. You can even cut some of the squares into rectangles inside.
-
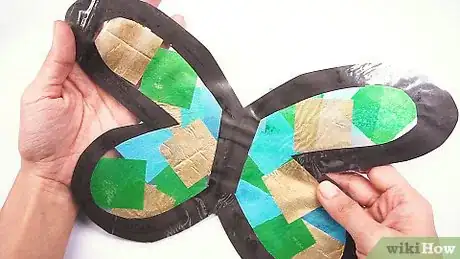
6Stick the tissue paper onto the wings. The tissue paper will stick to the contact paper, so you don't have to use any glue. This will create the stained glass effect.
- If you cut out a hollow body, stick the tissue paper onto there as well.
-
7Cover the butterfly with another sheet of contact paper. Make sure that the contact paper is large enough to cover the entire butterfly. Peel off the backing, and slowly place it over the butterfly, going from one side to the next. Smooth it down with your hands or a ruler to seal it.
-
8Cut around the butterfly. Leave a ¼ -inch (0.64 centimeters) boarder of contact paper around the butterfly to seal it in and keep it from coming apart.
-
9Hang your butterfly in a bright window. Punch a hole through one of the wings, and thread a piece of thread through it. Tie the thread into a loop, and hang it someplace where the light will shine through it.[7]
- You can also tape the butterfly to a window if you won't want to punch a hole through its wings.
- The side with the black outline is the front, and the tissue paper side is the back.
Making a Butterfly Garland
-
1Cut out your butterfly template out of a sheet of paper. Fold a sheet of paper in half. Sketch out half of a butterfly and then cut it out. This will make your template which you will be basing the rest of your butterflies on. It will make your garland more consistent.[8]
- Make the butterfly no more than 6 inches (15.24 centimeters) tall.
- You should only draw and cut the wings; don't worry about the body. You will be making it out of pipe cleaner later.
-
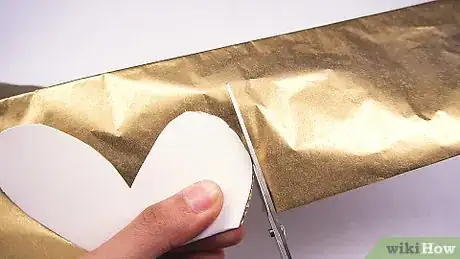
2Fold a stack of tissue paper in half and tuck it inside the folded butterfly, like a hot dog. Make sure that the folded part of the tissue paper is nestled against the folded part of the butterfly. You will be cutting the tissue paper one color at a time, then arranging and assembling the colors later on.
-
3Cut the tissue paper, using your template as a guide. Take the cut tissue paper butterflies out of the template and unfold them. Set them down in a neat pile, and move on to the next color. You will need three different colors.
-
4Make the bodies of the butterflies using pipe cleaners. Cut the pipe cleaners in half using a pair of pliers or wire cutters. Bend each cut pipe cleaner in half. You will get two butterflies out of one pipe cleaner. Cut and fold as many as you need.
-
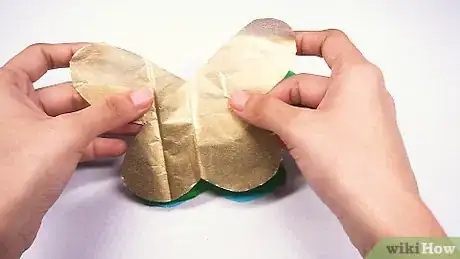
5Stack three tissue paper butterflies, one of top of each other. To save time, make all of your stacks now, so that they will be all ready for you. You can stack the colors in the same order, or alternate them. You can also make some butterflies all one color.
-
6Tuck the stack inside one of the bent pipe cleaners and twist it shut. Scrunch the middle of the butterfly slightly, then slide it into the bent pipe cleaner. Measure up about half way up the pipe cleaner, and twist it twice. This closes the body.[9]
- If you don't wish to use these butterflies on a garden, you are finished. Gently spread the antenna apart, and curl each end for that final touch.
-
7Gently fluff the wings up. This will give your butterflies are more fluttery appearance. Be careful so that you don't pull the wings out of the pipe cleaner body.
-
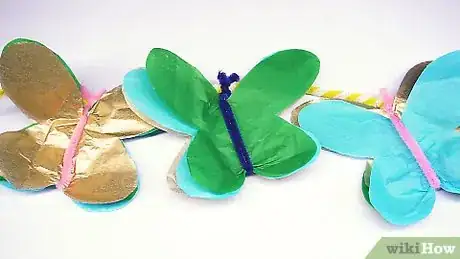
8Attach the butterflies to the garland. Measure out your twine, and slide it between the butterfly's antenna. Twist the antenna one to two more times, then spread them apart in a V-shape. If you'd like, you can curl the ends of the antenna at this point.[10]
-
9Keep assembling and attach your butterflies until you have as many as you like on your garland. When you are done, hang the garland wherever you like, such as across a doorway or window.
Warnings
- Don't get these butterflies wet. The tissue paper will bleed and fall apart. The contact paper butter flies can also come apart if they get wet.⧼thumbs_response⧽
Things You'll Need
Simple Butterfly
- Tissue paper (3 different colors recommended)
- Scissors
- Wooden clothespin
- Pipe cleaner
- Paints, markers, googly eyes, etc. (optional)
Stained Glass Butterfly
- Black construction paper
- White crayon or colored pencil
- Butterfly template (optional)
- Tissue paper, different colors
- Clear contact paper
- Scissors
- Thread
Butterfly Garland
- Tissue paper, 3 different colors
- Plain paper (for template)
- Pliers or wire cutters
- Scissors
- Pipe cleaners
- String
References
- ↑ http://www.myteenguide.com/paper-butterflies-easter-crafts-for-kids/
- ↑ http://www.myteenguide.com/paper-butterflies-easter-crafts-for-kids/
- ↑ http://www.playdoughtoplato.com/crafts-for-kids-butterflies/
- ↑ http://differentiatedkindergarten.com/rainy-day-tissue-paper-butterflies/
- ↑ http://trishsutton.com/stained-glass-butterfly/
- ↑ http://trishsutton.com/stained-glass-butterfly/
- ↑ http://trishsutton.com/stained-glass-butterfly/
- ↑ https://ninijeanie.wordpress.com/2009/09/08/butterfly-garland/
- ↑ https://ninijeanie.wordpress.com/2009/09/08/butterfly-garland/
About This Article
To make a tissue paper butterfly, start by cutting 3 10-inch squares of tissue paper and laying them on top of each another. Then, fold the stack of tissue paper, accordion style, using 1-inch pleats. Next, clip a wooden clothespin onto the center of the folded tissue paper, and spread the folds on each side to look like wings. After that, fold a pipe cleaner into a “V” shape, curl each end into a spiral, and put this antenna into the tip of the clothespin, just above the tissue paper. Finally, decorate the clothespin body with a silly face and googly eyes. To learn how to make a stained-glass butterfly, keep reading!
