X
wikiHow is a “wiki,” similar to Wikipedia, which means that many of our articles are co-written by multiple authors. To create this article, 16 people, some anonymous, worked to edit and improve it over time.
This article has been viewed 51,261 times.
Learn more...
Ever wanted to make your own customized photo mousepad that reflects your own unique interests? It's not too hard but you will need the right tools and the right supplies.
Steps
-
1Purchase some blank white 8x9x1/4 pads.
-
2Purchase some inkjet transfer paper.Advertisement
-
3Design your image in Paint Shop Pro, Adobe or any other image design software. For best results try to work with an image of at least 100K. A 25K image will print but it will not be as sharp and crisp when blown up to 8x11 as a high resolution image.
-
4Test your final image on a blank 8x10 piece of paper. Make sure it prints the image on the entire 8x11 sheet, not just on 1/4 of the page.
- Test on cheap (vs $2 transfer paper) blank white paper to make sure your image is correct and your printer is printing through all it's heads. Epsons especially are notorious for a few clogged heads in the middle of a print then the rest of the print has horizontal lines in it.
-
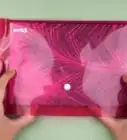
5You are now ready to insert the transfer paper if the test is good. Make sure you insert the paper with the printable side the correct way. If reversed there goes $2-$3. Once the paper is in the printer facing in the correct direction press print.
-
6Let sheet of transfer paper (with a 8x11 image on it) dry for 5 or 10 minutes and get your iron plugged in and ready, unless you have a commercial heat press. The iron will not give as much pressure to the transfer paper as a heat press would. The downward pressure from a heat press is what burns the image into the pad making for a pad that lasts for years and years. The iron will create the right heat but not as much pressure so your pad may have present or future issues with bits of it flaking off.
-
7Study the instructions included with your transfer paper. Note the temperature needed. Normally it's around 375 degrees but could vary with the manufacturer of your paper. Set the iron to that temp and let it heat up. Once heated up place your pad on a hard surface. An ironing board works well.
-
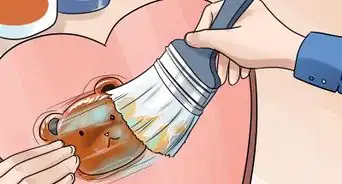
8Place your transfer paper image on the pad and begin to press the iron on the pad in back and forth motions. Try to bear down on the pad with some pressure. A limp wrist ironing job with light pressure will make for a poor pad. Consult your transfer paper instructions for the length of time needed to iron the paper. Most times it's around 3-4 minutes.
-
9Peel the paper away starting at one corner, - Note that transfer papers vary in whether you should peel when they are hot or cold. Follow instructions for the type you purchased.
- Note:Once you begin to peel the paper away do not stop halfway through! It will leave a line on your pad. Try to pull off the paper in one steady evenly spaced movement. Normally you should peel paper off in about 3 seconds. One long even movement of peeling the paper across the pad.
-
10Finished.


Advertisement
Warnings
- Do not leave the iron in one spot. Keep it moving around the pad continuously for the recommended time. If using an Epson, print using the higher photo qualities. If you print at the lower qualities such as text and images it's much easier for the printer to leave tiny horizontal lines every half inch on your paper. :(⧼thumbs_response⧽
Advertisement
Things You'll Need
- iron
- inkjet printer
- blank mousepads
- transfer paper
- image editing program
- patience


About This Article
Advertisement