wikiHow is a “wiki,” similar to Wikipedia, which means that many of our articles are co-written by multiple authors. To create this article, volunteer authors worked to edit and improve it over time.
This article has been viewed 102,716 times.
Learn more...
Polar fleece is a synthetic fabric. It is light, soft, durable and it does not fray. While it is often used by companies to create hats, scarves, gloves, coats, jacket liners and other clothing, it can also be used for crafts at home. You can create hats, gloves and scarves for the family with minimal sewing. A fleece scarf is both warm and easy to personalize. For extra style, you can create a layered fleece scarf covered in fringe. You can craft this warm accessory with a trip to the fabric store and an hour or less of crafting time. Learn how to make a fringed fleece scarf.
Steps
-
1Buy 3 types of fleece at the craft store or online. If the fleece is 60" wide, you will only need 1⁄3 yard (0.3 m) of each color, as long as the store clerk cuts straight, since each piece will be the exact cut of your scarf. You should choose fleece that has a similar thickness and pile. Each of the colors will show when the fringe is complete, so make sure they are complimentary colors. Buy complimentary thread for your sewing machine.
-
2If you bought more than the minimum amount of fleece, cut 3 pieces of fleece with fabric scissors or a rotary cutter and a self-healing mat. They should be 5 feet (1.5 m) (1.5 m) long and 1 foot (0.30 m) (0.3 m) wide.
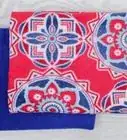
- You can easily make a themed scarf by using red, white and blue for the fourth of July or red, green and white for Christmas.
Advertisement -
3Align the 3 pieces of fabric exactly. Pin them in place.
-
4Place the top, middle section of the fleece beneath the presser foot. With a close stitch, sew down all 5 feet (1.5 m) (1.5 m) of fleece. Take care to sew straight and evenly, with a back stitch on both ends.
-
5Lay the fleece strip on a craft table. Cut a slit in the side of the fleece every 1 inch (2.5 cm). Make sure to stop just before the center line.
-
6Cut slits on the opposite side. Again, be careful to cut short of the sewed center line.
-
7Fluff the fringes of the scarf so that all 3 layers show. It should become more full and ready to wear.


Things You'll Need
- Fleece
- Fabric scissors
- Ruler/straight edge
- Sewing machine
- Pins
- Needle (optional)
- Thread
- Rotary cutter (optional)
- Self-healing mat (optional)