This article was co-authored by wikiHow staff writer, Jessica Gibson. Jessica Gibson is a Writer and Editor who's been with wikiHow since 2014. After completing a year of art studies at the Emily Carr University in Vancouver, she graduated from Columbia College with a BA in History. Jessica also completed an MA in History from The University of Oregon in 2013.
There are 11 references cited in this article, which can be found at the bottom of the page.
The wikiHow Video Team also followed the article's instructions and verified that they work.
This article has been viewed 4,317 times.
Learn more...
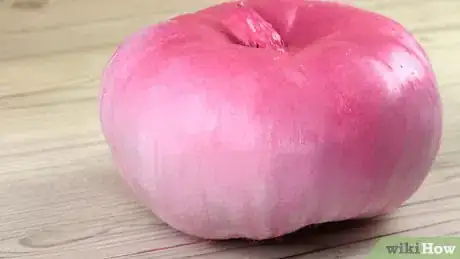
If you love using pumpkins as decorations but want a unique or modern look, paint them pink! Start with a clean pumpkin and apply a primer or your pink acrylic paint. Go for a light shade of pink with a gold stem, for instance, or create a bold look by adding polka dots or glitter to your painted pumpkin. You'll find that painting is a lot easier than carving and you have tons of design choices you can make.
Steps
Painting the Entire Pumpkin Pink
-
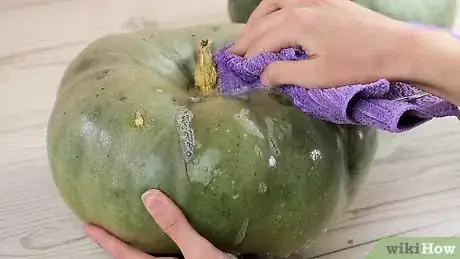
1Wash a pumpkin with soapy water and dry it thoroughly. Rinse your pumpkin with cool water and use a washcloth dipped in soapy water to wipe over the surface of the pumpkin. Wash off the soapy water to remove dirt. Then, dry the pumpkin with a clean cloth.[1]
- Try to choose a heavy pumpkin that doesn't have blemishes or soft spots, which are difficult to paint over.
- You can also paint a plastic pumpkin if you don't want to buy a real one.
-
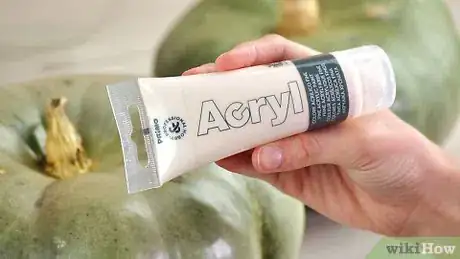
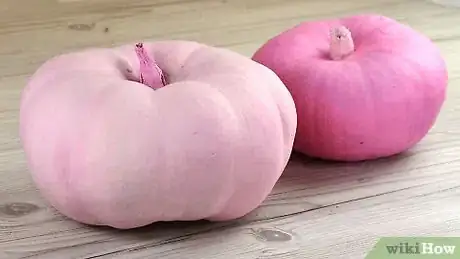
2Buy acrylic paint in any shade of pink you like. You can purchase a small container of acrylic paint from home improvement or craft supply stores. For a dramatic pumpkin, consider using a bright, bold shade of pink. To give your pumpkin a softer look, choose a pale pastel pink.[2]
- If you're having a hard time choosing a shade and you have several pumpkins to paint, you could paint each one in a different shade.
Advertisement -
3Apply a coat of primer or white paint and let it dry completely. Dip a 2 in (5.1 cm) paintbrush or foam brush into acrylic primer or white acrylic paint. Spread an even layer across the entire surface of the pumpkin and let it dry completely. This should take 20 to 30 minutes.[3]
- If you're painting a huge pumpkin, use a larger paintbrush so you can prime it faster. To paint a mini-pumpkin, switch to a small hobby or craft paintbrush.
- You can skip this step if you're painting a white plastic pumpkin or if you're going to paint the pumpkin a bright shade of pink.
-
4Brush pink paint over the entire surface of the pumpkin. Pour your pink acrylic paint into a paint tray or disposable bowl and dip the paintbrush or foam brush into it to load it with paint. Apply an even coat of paint over the exterior of the pumpkin so you completely cover the primer or white paint.[4]
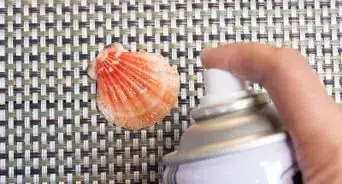
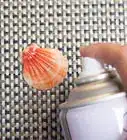
Variation: If you don't want to use a paintbrush, set your pumpkin on several newspapers or an old cloth and spray the entire pumpkin with pink acrylic spray paint. Work in a well-ventilated space so you don't breathe in the paint fumes.
-
5Paint the stem any color you like. For a modern look, dip a small hobby or craft paintbrush in gold, silver, white or matte black acrylic paint and brush it over the stem. If you prefer, paint the stem in a matching shade of pink or just leave it its natural color. Try to get paint into all of the twisted crannies of the stem.[5]
- Use a paintbrush with bristles since a foam brush might snag of the rough stem.
-
6Let the pink pumpkin dry for at least 30 minutes. If you plan on adding embellishments or trying variations, you don't want the paint to smear. Leave the pumpkin to sit at room temperature until it's thoroughly dried before you display it or add another coat of pink paint.
Decorating Your Pink Pumpkin
-
1Place a stencil over the pumpkin if you want to paint an intricate design. To make beautiful, complex designs, tape a stencil over the surface of the pumpkin. Then, brush any shade of pink paint over the stencil to fill in the cut-out portions. Carefully remove the stencil so you don't smudge the paint.[6]
- Stencils are great if you want to paint words on the pumpkin or would like to make a geometric design. For example, stencil your house number on the pumpkin if you plan on setting it on your front step.
-
2Layer different shades of pink for a pink ombre pumpkin. Instead of painting the entire pumpkin pink, paint the pumpkin white and let it dry. Then, apply a bright or dark pink paint in a ring around the top quarter of the pumpkin. Choose a slightly lighter shade of pink and paint another ring that's an equal size below the top ring. Do another 1 or 2 layers of pink, making each shade lighter as you work toward the bottom of the pumpkin.[7]
- Leave the layers distinctive or take a foam brush and gently use it to blend the lines between each layer while the paint is still wet. This blurs the different shades of pink so they appear to gradually lighten.
- You may need a few coats of white paint if you're starting with a bright orange pumpkin.
-
3Pour streaks of pink paint down the sides of the pumpkin for a drip effect. If you don't feel like painting the entire pumpkin pink or you're short on time, slowly pour enough pink paint on the top of the pumpkin until it drips down the side. Once the streak is as long as you want, stop pouring and begin making another streak next to the one you just made. Keep pouring to create pink streaks around the entire pumpkin.[8]
- You can use pink nail polish if you don't have craft paint.
-
4Wrap tulle around the pink pumpkin for a misty effect. Get out about 3 feet (1.0 yd) of pink tulle and spread it out flat on your work surface. Set your pink painted pumpkin in the center of the tulle and bring the tulle up up the sides of the pumpkin. Gather the tulle and use a rubber band to secure it tightly to the stem.
- For an extra-fun decoration, glue or tie a bow or ribbon to the stem.[9]
- If you have a lot of tulle coming from the top of the stem, trim off the excess.
-
5Use a circular sponge if you want to apply pink polka dots to the pumpkin. Buy a round foam brush that's attached to a handle. Dip the foam into your pink acrylic paint and press it onto your pumpkin to create a cute polka dot. Play around with making polka dots of different sizes or shades of pink paint.[10]
- If you don't want to buy a special foam brush, cut a standard sponge into a circle. You can cut the circle to any size you like or make a completely unique shape.
-
6Sprinkle glitter over the pumpkin for a shimmery look. Dip a foam brush into craft glue and brush it over the areas of the pumpkin that you want to be glittery. Then, shake pink glitter over the glue and set it aside to dry completely.[11]
- You can use ultra-fine glitter for a delicate shiny look or work with large glitter for a brighter, bolder effect.
Tip: If you can't find pink glitter, choose a different color that will complement the pink paint on your pumpkin. Try using gold, silver, or purple glitter, for instance.
Things You'll Need
- Acrylic primer
- Acrylic pink paint
- Paintbrushes or foam brushes
Trying Variations
- Pink paint
- Stencil
- Paint brushes
- Foam brushes
- Pink tulle
- Rubber band
- Craft glue
- Glitter
References
- ↑ https://www.kbtx.com/content/news/?article=495946611
- ↑ https://youtu.be/B2C72PgZn_E?t=220
- ↑ https://youtu.be/B2C72PgZn_E?t=83
- ↑ https://youtu.be/B2C72PgZn_E?t=270
- ↑ https://youtu.be/H-YxLx1-v6o?t=286
- ↑ https://youtu.be/REr6o59axfA?t=190
- ↑ https://www.southernliving.com/halloween/pumpkins/cute-pink-pumpkins?slide=66741f64-8953-44ec-be25-80de31584bbd#66741f64-8953-44ec-be25-80de31584bbd
- ↑ https://www.hometalk.com/5383884/halloween-crafts-pink-pumpkins?expand_all_questions=1
- ↑ https://abc30.com/hobbies/how-to-decorate-jack-o-lantern-pumpkins-without-carving/362611/
- ↑ https://www.hometalk.com/5383884/halloween-crafts-pink-pumpkins?expand_all_questions=1
- ↑ https://abcnews.go.com/GMA/Living/halloween-easy-diy-pumpkins-glam-front-porch/story?id=58584923
- ↑ https://www.thefencepost.com/news/porcelain-doll-pumpkin-variety-is-bringing-used-to-fund-benefit-breast-cancer-research/


-Step-11.webp)



-Step-11.webp)


