This article was co-authored by Lauren Kurtz and by wikiHow staff writer, Amber Crain. Lauren Kurtz is a Naturalist and Horticultural Specialist. Lauren has worked for Aurora, Colorado managing the Water-Wise Garden at Aurora Municipal Center for the Water Conservation Department. She earned a BA in Environmental and Sustainability Studies from Western Michigan University in 2014.
There are 7 references cited in this article, which can be found at the bottom of the page.
This article has been viewed 17,892 times.
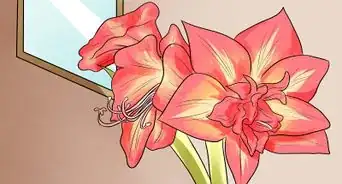
Narcissus bulbs in bloom are a sure sign of spring. Daffodils, paperwhites, jonquils, and other varieties are easy to grow and require little maintenance. They thrive in a variety of climate conditions, blooming consistently for years. Be sure to plant your bulbs in the fall so you'll get blooms in the spring. Choose a planting area that gets full sun and good soil drainage for best results!
Steps
Choosing a Planting Location
-
1Plant your bulbs in the fall. Narcissus bulbs bloom in spring and therefore should be planted in the fall. Anytime from August to November is an ideal time for planting, as long as you do so before the first freeze.[1]
-
2Choose a location that gets full sun. Narcissus bulbs love the sun. Full sun means 6 hours of sunlight per day. Choose the sunniest space in your yard or garden for your bulbs, as long as the soil in this space is also rich and fertile.[2]
- Most varieties can tolerate a slightly shaded area if full sun isn’t available.
Advertisement -
3Check the soil for a neutral pH between 6 and 7. Narcissus bulbs favor neutral to slightly acidic soil, so pick up a pH test at your local nursery and test yours. Something between the range of 6 and 7 is optimal for growing Narcissi.[3]
- You can lower your soil's pH by adding sphagnum peat, elemental sulfur, or organic mulches.
- You can raise your soil's pH by adding limestone to it.
-
4Test the soil's nutrients. Buy a soil nutrient test at a local nursery to check your soil's composition. Narcissi aren't too fussy, but they do prefer rich soil with low nitrogen levels and higher potassium levels.[4]
- If you need to amend your soil's nutrients, purchase organic fertilizer that addresses your needs. You can also add an aged compost to the soil to boost the nutrients.
-
5Test your soil to make sure it drains well. Dig a hole that is 12 inches (30 cm) by 12 inches (30 cm) deep, then fill it with water. If the water drains in 10 minutes or less, you have good drainage. If the water takes an hour or more to drain, you have poor drainage.
- If you need to improve drainage, try building raised beds or adding organic matter like well-rotted manure, compost, or peat moss to the soil.[5]
- Planting in soil that is not well-drained could cause your bulbs to rot.


Planting Your Narcissus Bulbs
-
1Choose bulbs that are big, firm, and free of mold. When buying your narcissus bulbs, inspect them closely to make sure they are large, fairly firm, and mold-free. The better the quality of your bulb, the better chance of producing beautiful flowers it will have.[6]
- If you can’t plant your bulbs right away, store them in a dark place for up to six weeks.
-
2Dig a hole three times deeper than the height of the bulb. Using a shovel or garden trowel, dig a hole that is at least three times deeper than the height of your bulb.[7] If you need help visualizing, stack three bulbs on top of each other so you can see the appropriate depth.
- All bulbs, regardless of size, should be covered with a minimum of 3 inches (7.6 cm) of soil.
-
3Place organic bulb fertilizer directly into the planting holes. Choosing an organic bulb fertilizer like kelp meal that is high in potassium and phosphorus to put into your planting holes is a great way to give your bulbs a little added boost.[8]
- Follow the instructions on your fertilizer to know how much to put in each hole.
- Avoid fertilizers that are high in nitrogen.
-
4Plant bulbs with the pointy end facing up. Your narcissus bulb should have a pointy, skinny end and an end with roots on it. Point the bulbs in their holes with the pointy end facing up.[9]
- If you can’t tell which end should go up, you can plant the bulb on its side.
-
5Plant bulbs in clusters of three to create a natural look. If you want to create a natural look for your garden, try planting your narcissus bulbs in clusters of three. Dig a hole the appropriate depth and widen it until you can fit three bulbs in it, spacing them 3–6 inches (7.6–15.2 cm) apart.[10]
-
6Fill in the planting holes with soil. Once each bulb is in its hole, pointy end up, it’s time to fill the hole back in with loose soil. Be sure the entire hole is filled in and then lightly pack the soil down with your hands.
-
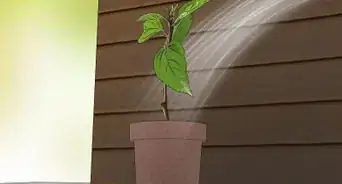
7Water the bulbs right after you plant them. Use a garden hose on a gentle setting to water your just-planted bulbs until the water begins to pool on top the soil. After the initial watering, you probably won't need to water your bulbs at all until spring.
- If you’re in a dry climate, continue to water your bulbs every other day in this manner until winter sets in.


Caring for Your Bulbs
-
1Mulch your bulbs. Mulching is a great way to make sure your bulbs survive a particularly cold winter, or to help the soil retain water in a dry climate. Mulch the bulbs right after planting to protect them during the winter months.[11]
- Wood chips, leaves, or garden mulch are great options to work with.
-
2Give your bulbs 1 inch (2.5 cm) of water per week while they’re blooming. While your bulbs are actively growing and blooming in the spring, usually March through May, water them with about 1 inch (2.5 cm) of water per week.
- Bulbs do not need to be watered during winter. They can survive with little water even in summer.
-
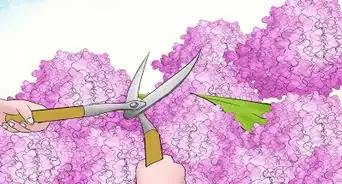
3Deadhead your plants after they’ve flowered. Cutting off the dead flower heads from your plant will encourage the next year’s growth. Simply snip the dead flowers off of each stem with a pair of sharp garden shears.[12]
- Leaving the flowers on the plant will cause the plant to use its nutrients to form seeds. Deadheading directs that energy back toward flower production, which generates more blooms.
-
4Remove browning foliage when all the color is gone. Give your bulbs some time after they’ve flowered before you remove the dead foliage. Once the plant has been completely brown for six weeks, cut it back to a few inches above its base.[13]
- This will happen during the summer.
- The plant needs time to store energy for next year’s growth.
-
5Watch for pests and diseases. When they’re growing, expect your plants weekly for pests or diseases. Examine the stems, undersides of leaves, and flowers for small bugs or fungal spots. Depending on the severity of what you find, you may need to apply a pesticide or fungicide or remove the infected plant completely.


Community Q&A
-
QuestionCan you dig up the bulbs after they finish blooming to plant in a different area next fall?
 IdabelleCommunity AnswerYou certainly can dig up the bulbs after they finish blooming to replant them somewhere else. However, it is best to do so in late summer.
Things You’ll Need
- Narcissus bulbs
- Shovel or trowel
- Bulb fertilizer
- Mulch
- Garden hose
- Garden shears or clippers


References
- ↑ https://www.theflowerexpert.com/content/mostpopularflowers/narcissus
- ↑ https://www.theflowerexpert.com/content/mostpopularflowers/narcissus
- ↑ https://www.almanac.com/plant/daffodils
- ↑ http://www.plantsrescue.com/narcissus-tazetta/
- ↑ https://www.treepeople.org/sites/default/files/pdf/resources/How-to%20Test%20Soil%20Drainage.pdf
- ↑ https://www.sarahraven.com/articles/how_to_plant_narcissus_bulbs.htm
- ↑ https://www.theflowerexpert.com/content/mostpopularflowers/narcissus
- ↑ https://www.dpi.nsw.gov.au/agriculture/soils/improvement/plant-nutrients
- ↑ https://www.sarahraven.com/articles/how_to_plant_narcissus_bulbs.htm
About This Article