This article was co-authored by Geraldine Grace Johns. Geraldine Grace Johns is a Professional Ballerina and the Owner of Grace Ballet in New York and Los Angeles. Geraldine toured through New Zealand, Australia, Japan, and Korea as Jammes in Ken Hill's Original Phantom of the Opera. She has studied with the Royal Academy of Dance in London and taught for the Kudo School of Ballet in Yokohama. Geraldine also ran her own Royal Academy of Dance School in New Zealand before studying at the Neighborhood Playhouse School of the Theatre in New York City. Geraldine was a guest coach and Master Class teacher in Toronto for the Canadian Royal Academy of Dance's "Dance Challenge" in 2018, 2019, and 2020. She was also a guest coach and Master Class teacher for the USA Royal Academy of Dance Challenge in Long Beach, California in 2019 and 2020.
This article has been viewed 111,387 times.
In the ballet world, getting your pointe shoes is a major milestone. You’re probably eager to lace them up and start dancing, but you'll need to prepare them first. After attaching your ribbons and elastic, you can start breaking in your shoes to achieve the right combination of sturdiness, flexibility, and snugness for your feet. As you get more experience wearing pointe shoes, you’ll develop your own process for preparing them. After all, every dancer’s feet are unique. Don’t forget to ask your teacher and more experienced ballerinas for advice!
Steps
Sewing on Elastic
-
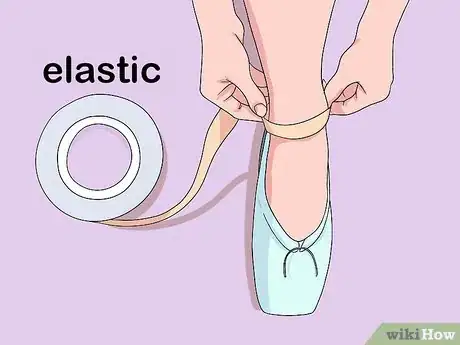
1Measure the elastic. The elastic should be long enough to attach at the back of the heel, run over your ankle, and then reattach at the back of the heel on the other side.
-
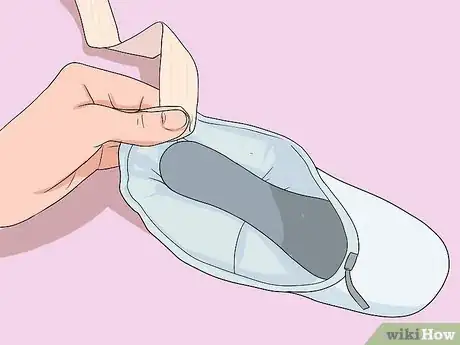
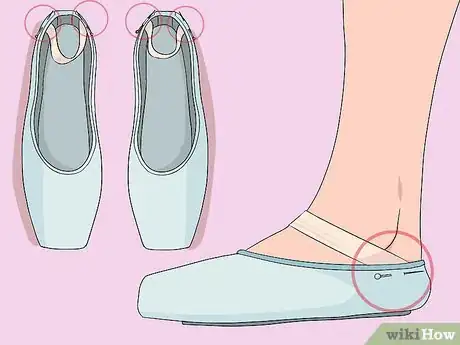
2Position the elastic. The ends of the elastic should attach one finger’s width away from the back heel seam on either side.
- You can position the elastic on the inside or outside of the shoe. If you want to attach your elastic to the outside of your shoe, position it low, near where the heel meets the floor. Elastics sewn on the inside should be positioned all the way down in the shoe.
- Keep in mind that elastic sewn on the inside of the shoe may irritate your skin.
Advertisement -
3Pin and test your elastic. Once you have positioned your elastic, pin it in place and slip your foot into the shoe to make sure it fits properly. Be careful not to poke your foot!
- The elastic should be snug, but not so tight that it cuts off your circulation.
- The elastic should be tilted slightly forward so that it lies flat against your ankle.
-
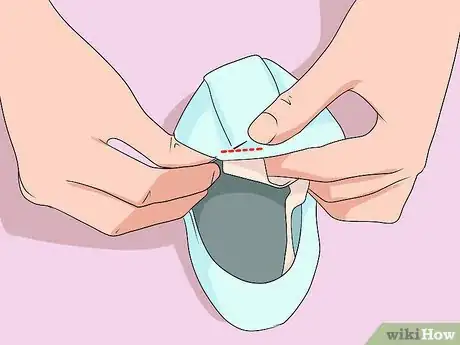
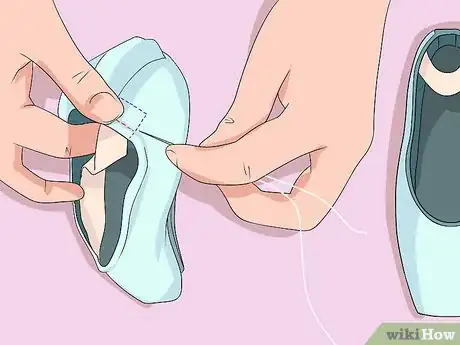
4Sew the elastic ends onto the shoe. Sew each end of your elastic onto the shoe using dental floss or reinforced thread. Start your stitching near the top of the shoe, just under the drawstring. Continue stitching along each side of the elastic end, so that your stitching forms a box.
- Be sure that you don’t stitch over the drawstring.
- Only stitch through the canvas lining of the shoe. You don’t want the stitches to show on the silk outer layer!
-
5Repeat the process on your other shoe. You’ll need your shoes to be even, of course! Sew elastic onto your other shoe following the steps outlined above.
Sewing on Ribbons
-
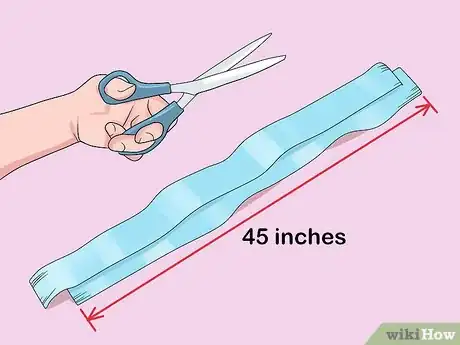
1Cut your ribbon into two equal parts. Purchase pointe shoe ribbon from your local dance supply store. When cut in half, each piece should measure about 45 inches (114 cm).
-
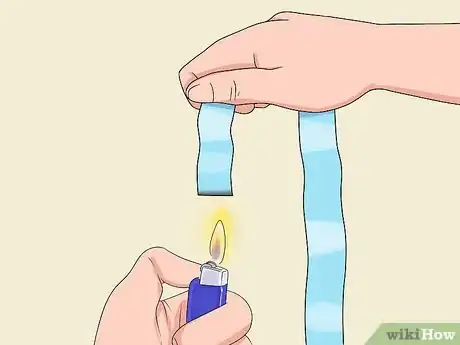
2Run a flame along the cut edges. This will prevent fraying. Use a lighter, and ask an adult to help you out if you are a child.
-
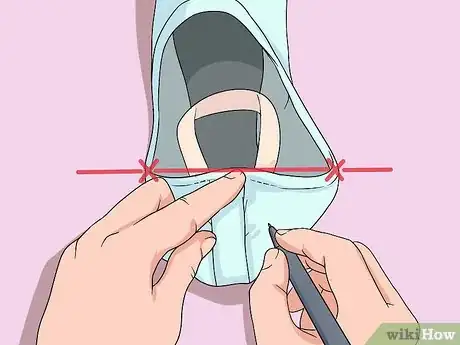
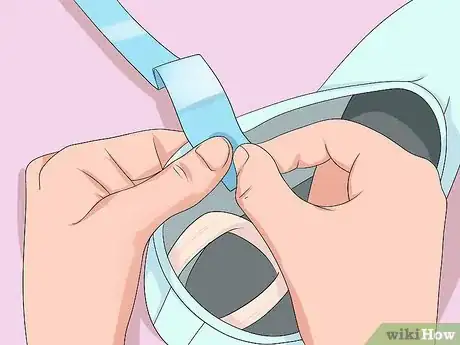
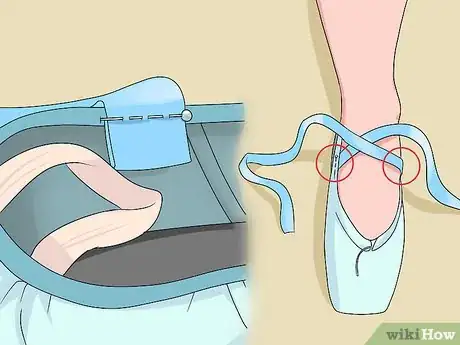
3Mark the area where you will attach the ribbons. Fold the heel inward towards the toe of the shoe. Using a pencil, mark where each side of the heel touches the drawstring on the inside of the shoe. This is where you will attach the ends of your ribbons.
- Alternatively, put on your shoes and mark the highest point of your arch on the either side of the shoe. Again, be sure you are marking the inside of the shoe, not the outside.
-
4Position the ribbons. The ribbons should attach on the inside of the shoe. Take the end of a ribbon, fold about one inch under, and place it at one of the marks you made. Make sure you position it all the way down in the shoe. Repeat the process with the second ribbon on the other side of the shoe.
- Make sure the shiny side is facing outwards.
-
5Pin and test your ribbons. Pin your ribbons in place, then slip your foot into the shoe to assess their placement. When tied, the ribbons should be flat against your instep.
- If your ribbons feel uncomfortable or don’t lie flat, adjust them.
-
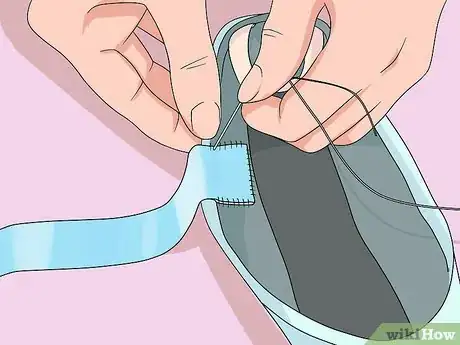
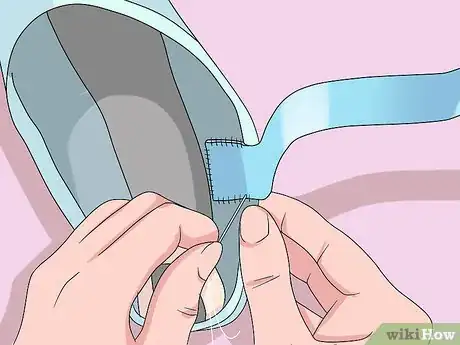
6Sew the ribbons onto the shoe. Sew the ends of your ribbons onto the shoe using reinforced thread or dental floss, using the same process as when you sewed on your elastic. Start your stitching near the top of the shoe, just under the drawstring. Continue stitching along each side of the ribbon end, making a box with your stitching.
- Again, only stitch through the canvas layer, and avoid sewing through the drawstring.
-
7Repeat the process for your other shoe. Follow the same steps to sew the ribbon onto your other shoe.
Tying Your Ribbons
-
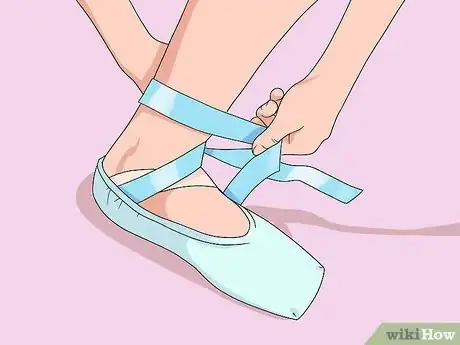
1Wrap the ribbons around your ankle. Put on your pointe shoe and position your foot flat on the ground. Start by wrapping the ribbon positioned on the inside of your foot over the top of your foot and around the back of your ankle. Repeat the process in the reverse direction with the outside ribbon.
- Make sure the ribbons are positioned right above the ankle bone.
-
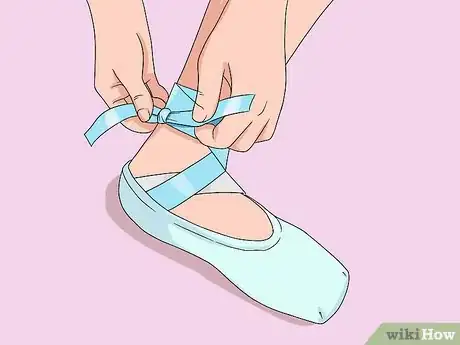
2Tie the ribbons. Tie the ends of the ribbons into a small knot on the inside of your ankle. Your ribbons should be tight enough that they hold your shoe in place, but not so tight that they cause discomfort.
- Avoid tying the ribbons over your Achilles tendon on the back of your ankle, as this can be uncomfortable.
-
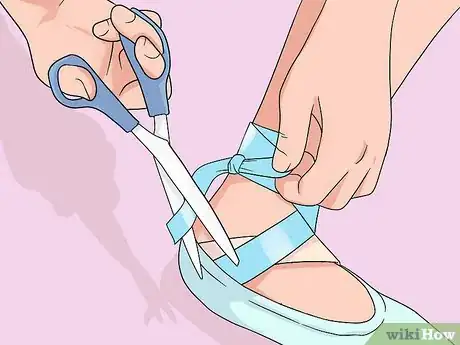
3Trim the ribbons. If this is the first time you are tying your ribbons, you’ll need to trim them. Trim the ribbon ends about two inches from the knot. Run a flame over the ends so they won’t fray, and then tuck them under so they can’t be seen.
- If the ends make an unsightly bulge, trim them a little more.[1]
Breaking in Your Shoes
-
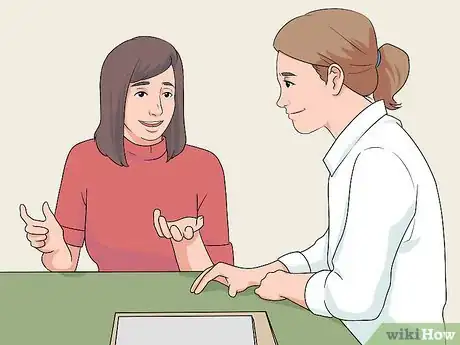
1Talk to your teacher. You teacher might have recommendations or guidelines for breaking in your shoes, so check with them before you begin the process. Your teacher knows your feet, and has probably worked with tons of different foot types. Remember, breaking in pointe shoes is a highly personal process, and every dancer will do it differently.[2]
- Ask your teacher if they have a specific process for breaking in pointe shoes. Especially for beginners, teachers often rely more on dancing to break in shoes, rather than manual manipulation.
- Before you follow any of the steps below, get your teacher’s approval.
- Some teachers prefer that students avoid the rougher forms of breaking in shoes, like cutting the shank or removing the toe satin.
-
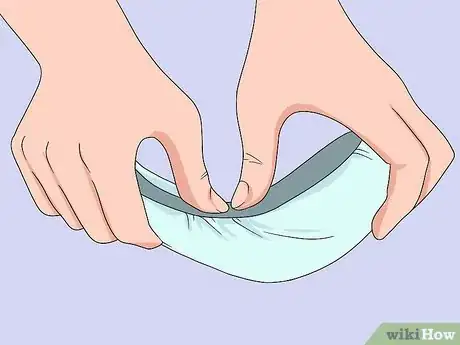
2Bend the shank. The shank is the arch-supporting insole of the pointe shoe. New shoes have very stiff shanks, so you’ll need to bend the shank so that the shoes mold properly to your feet. Find the part of the shank that contacts the breakpoint of your foot, which is the area where your heel meets your arch. Bend the shank back and forth along the breakpoint, continuing until you have achieved the desired flexibility.[3]
- Some dancers opt to cut the shank at the breakpoint with scissors.[4]
- For extra flexibility, you can cut away a quarter of the shank at the heel of the shoe.
-
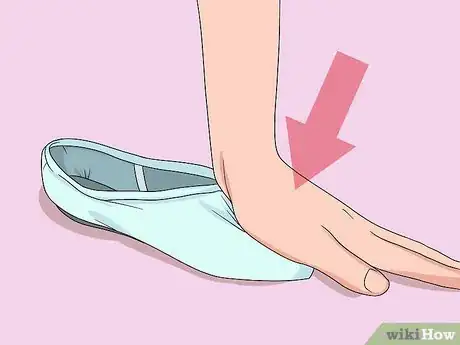
3Soften the toe box. The toe box refers to the hard part of the pointe shoe that holds your toes. It can be pretty stiff at first, so you should step on or knead the box to soften it up.
- If the fabric is too tight around your big toe bone, try blotting the area with water and rubbing alcohol.
-
4Scratch up the soles if you want more traction. You can use metal, bristled tools called scrapers and roughers to scratch the soles of your pointe shoes. This makes for a better grip on the floor. Make deeper scratches with scissors for even more traction.
-
5Bang the pleats to make your shoe quieter. The pleats are the folds of fabric on the bottom of the shoe, near the toe. These can make noise when dancing, so many dancers like to bang them on a hard surface to make them softer.
- Beware--banging the pleats makes the shoes wear out sooner.
-
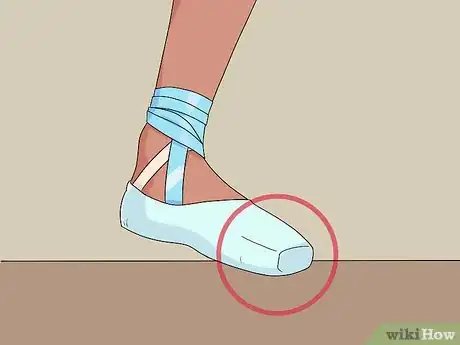
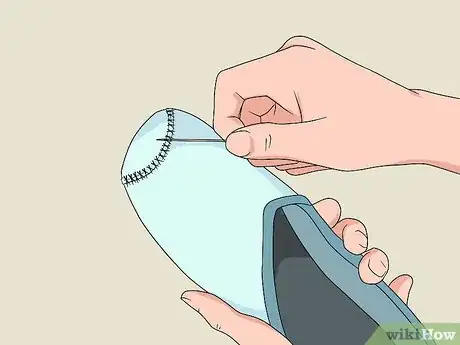
6Remove satin or darn the shoe tip for a better grip. Pointe shoe satin can be slippery. If you want a better grip, consider scraping the satin from the tip of the toe with scissors, or darning the toe platform.[5]
- To darn your shoe, sew a series of stitches around the platform of the pointe shoe with a needle and thread. The platform is the area that contacts the floor when you are en pointe. If you are younger, ask a parent or other trusted adult for help.[6]
- Keep in mind that removing the toe satin causes the shoe to break down quicker.
-
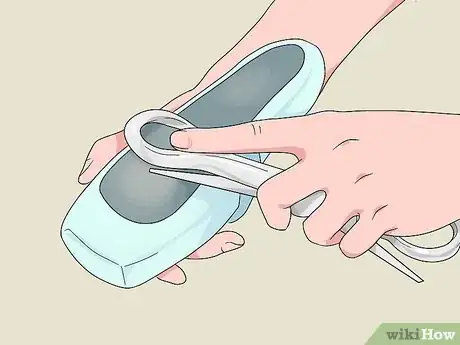
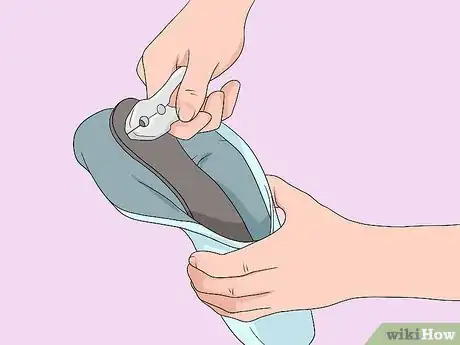
7Take out the heel nail for more flexibility. Pointe shoes have a nail at the heel that provides structure. If this nail bothers you, or you want a little more flexibility, remove the nail. You can use your fingers to pull out the nail, although you may need to use pliers for more difficult-to-remove nails.
-
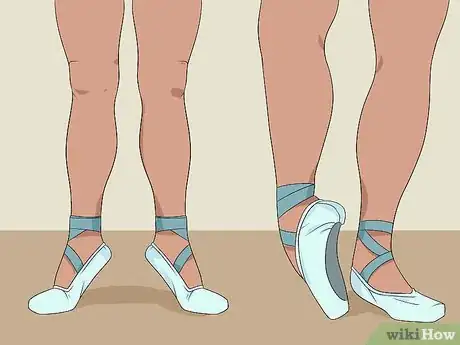
8Do pointe exercises. Once you have manipulated your pointe shoes to your liking, do some ballet exercises to finish the process of breaking them in. Try walking on demi-pointe, doing a few grand plies, and rolling from demi-pointe to pointe.[7]
- Your teacher will probably provide some exercises to help break in your pointe shoes.
- Be patient! It might take a little while to fully break them in.
-
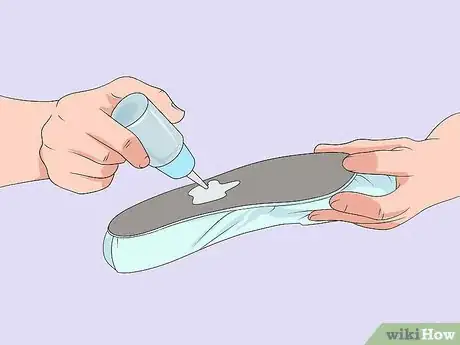
9Apply glue or shellac to strengthen your shoes. If you find that you want a little more structure, consider applying a thin layer of fast-drying glue or spray-on shellac to the inside of the toe box or around the shank to strengthen it. This should be one of the final steps after your shoes are broken in. Every dancer is different, so you’ll have to figure out the best application process for your preferences. Ask your teacher or more experienced dancers for tips.
- Make sure there are no wrinkles in the fabric when applying the glue, as these will harden and could give you nasty blisters.
- Use a professional-grade glue like JetGlue or Hot Stuff.
Community Q&A
Did you know you can get expert answers for this article?
Unlock expert answers by supporting wikiHow
-
QuestionHow do I break in my pointe shoes?
 Geraldine Grace JohnsGeraldine Grace Johns is a Professional Ballerina and the Owner of Grace Ballet in New York and Los Angeles. Geraldine toured through New Zealand, Australia, Japan, and Korea as Jammes in Ken Hill's Original Phantom of the Opera. She has studied with the Royal Academy of Dance in London and taught for the Kudo School of Ballet in Yokohama. Geraldine also ran her own Royal Academy of Dance School in New Zealand before studying at the Neighborhood Playhouse School of the Theatre in New York City. Geraldine was a guest coach and Master Class teacher in Toronto for the Canadian Royal Academy of Dance's "Dance Challenge" in 2018, 2019, and 2020. She was also a guest coach and Master Class teacher for the USA Royal Academy of Dance Challenge in Long Beach, California in 2019 and 2020.
Professional Ballerina & Ballet Instructor
-
QuestionCan I make pointe shoes out of socks?
 Community AnswerNo. Never ever ever go en pointe with anything but pointe shoes. You could hurt your feet.
 -
QuestionI just got pointe shoes, but when I go on my toes, I can't straighten my legs. What's wrong with my shoes?
 Community AnswerWhen I first went on pointe I had the exact same problem. There is nothing wrong with your shoes, it's just that you're not able to get fully up on the box of the pointe shoe. This does NOT mean you should quit pointe or that you are not ready! More than 70% of people who first begin pointe have this issue. All you need to do is really work on pointing your toes and getting strong ankles, and before you know it you will be able to go all the way up on the box and straighten your legs.
Warnings
- Never dance in dead (too soft) shoes if you are a beginner. Only experienced dancers with very strong feet have the strength to support themselves in soft shoes.⧼thumbs_response⧽
- Make sure you get your teacher's consent before buying the pointe shoes. It's dangerous to start before you're ready.⧼thumbs_response⧽
- If you are a beginner, only wear your pointe shoes in your ballet studio.⧼thumbs_response⧽
Things You’ll Need
- A pair of pointe shoes
- Pointe shoe elastic
- Pointe shoe ribbon
- Scissors
- A needle and reinforced thread or dental floss
- Sewing pins
- A lighter
- Roughers and scrapers (optional)
- Pliers (optional)
- Professional grade fast-drying glue (optional)
References
- ↑ https://dancer.com/ballet-info/about-pointe-shoes/sewing-ribbons/
- ↑ Geraldine Grace Johns. Professional Ballerina & Ballet Instructor. Expert Interview. 11 November 2020.
- ↑ http://www.danceinforma.com/2015/08/01/8-ways-make-pointe-pain-free/
- ↑ http://www.4dancers.org/2012/05/if-the-shoe-fits-pointe-shoe-preparation/
- ↑ Geraldine Grace Johns. Professional Ballerina & Ballet Instructor. Expert Interview. 11 November 2020.
- ↑ https://www.pbt.org/blog/perfect-fit-alexandra-kochis-pointe-shoe-process/
- ↑ http://www.balletforadults.com/how-to-break-in-pointe-shoes/
