This article was co-authored by Rebecca Schweiger. Rebecca Schweiger is a Professional Artist, Published Author, and the Founder of The Art Studio NY, New York City's #1-rated art school and global online art studio. Celebrated by TV networks, press, and celebrities including NBC, ABC, E!, Time Out New York, The Kardashians, and Big Bang Theory's Jim Parsons, Rebecca specializes in creating abstract artwork and teaching studio art classes. Her art studios provide 100+ weekly, beginner-friendly drawing and painting art classes to people around the globe. With more than 22 years of art experience, she is the author of Release Your Creativity: Discover Your Inner Artist with 15 Simple Painting Projects, and her artwork has been exhibited in more than 50 museums and galleries around the world. Rebecca holds a BFA in Painting from Boston University's School for the Arts and has participated in acclaimed artist residencies worldwide.
There are 12 references cited in this article, which can be found at the bottom of the page.
This article has been viewed 9,666 times.
An easel is a great tool for any painter, whether you’re a professional or a hobbyist. Setting one up is easy, but you may have some questions about putting your canvas in the right way. Luckily, although there are many different types of easels, the process for securing your canvas is overall the same. Most easels use a simple sliding holder system. There are also plug types, which are less common, but the process is still easy. No matter what type of easel you have, you should be painting in no time!
Steps
Using a Studio Easel
-
1Set the bottom holder to the height you want it. On most wooden easels, the bottom support holder is adjustable and sets the height of your painting. Start by setting the bottom holder where you want it. Unscrew the knob underneath the holder and raise or lower the piece until it’s at the right height. Then screw the knob back in to lock it in place.[1]
- You can still adjust the height after the canvas is on the easel if you want a different level.
- Some simpler easels, usually ones on a tripod, don’t have an adjustable bottom. In this case, the height for the canvas is already set.
-
2Place and center the canvas on the bottom holder. Take your canvas and rest it on the bottom holder. If there is a notch there, then set the canvas in there.[2] If not, line it up with the front edge of the bottom holder. Center the canvas so there’s equal space on each side.[3]
- If the top holder is set too low, you may need to raise it so the canvas fits. Unscrew the knob on the top holder and slide it up so you can place the canvas on the bottom holder.
Advertisement -
3Slide the top holder down until it’s snug with the canvas.[4] Unscrew the knob on the top canvas and slide it down onto the canvas. If there is a notch, then fit it over the top of the canvas. If not, then line up the canvas with the front edge of the holder. Then screw the knob back in to lock the canvas in place.[5]
- Keep your hand on the canvas until you lock it in place so it doesn’t shift.
-
4Line the canvas up with the holder edges to avoid shadows. Some artists don't like the easel holders touching the front of the canvas. This blocks the top of the canvas and could cause shadows while you're trying to paint. If you want to avoid this, line the front of the canvas up with the edges of the top and bottom holders. Make the canvas flush with both holders. Then clamp the top holder down tightly to lock the canvas in place. This should avoid any shadows or obstructions on the canvas face.[6]
- Don't press down too hard on the canvas if you use this method. The canvas could pop out if it's not in the easel slot.
-
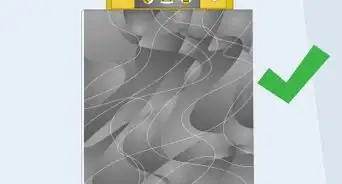
5Check that the canvas is tightly secured. You don’t want your canvas moving while you’re trying to paint, so double check that it’s secure before you start.[7] Shake the canvas a bit and make sure it doesn’t come loose. If not, then you’re all set to start painting.[8]
- If you don’t like the height, you can still adjust the bottom holder to set a new level to work at.


Working with a Plug Easel
-
1Unscrew all of the plugs so only the tips are visible. A plug easel uses small screws to lock the canvas in place, which some artists find more secure than a standard easel. Start by unscrewing all of the plugs on the ends of the support beams so only the tips are pointing out. Each beam should have 2 plugs, so make sure you don’t miss any.[9]
- Plug easels come in different shapes like triangles, so these types might have a different number of plugs.
- The plugs may have plastic coverings for safety. Check and remove these before you start.
-
2Center the canvas onto the top support beam. Lift your canvas and align the center of its top edge with the top easel support. Press it down onto the beam so the plug tips penetrate the wood.[10]
- If you have a canvas with center supports, then finding the center is easy. Simply align the easel beam with the wooden block down the middle of the canvas. If not, then do your best to estimate the center.
- Continue holding the canvas against the top beam so it doesn’t come loose while you’re working.
-
3Raise the top beam so the center of the canvas is over the easel hub. The hub is the center part of the easel where all of the support beams come out from. Unscrew the support plug on the top beam and extend the beam up until the center of the canvas lines up with the hub. Then lock the beam back in place by tightening the screw or plug.[11]
- The support beams may have clips instead of plugs or screws holding them in place. It depends on the easel model.
- Keep your hand on the canvas while you’re adjusting the height so it doesn’t fall off.
-
4Extend the 3 other supports so they touch the canvas. The other support beams all extend the same way that the top one does. Extend one at a time by loosening the support plug and pulling the beam until it reaches the canvas. Press the canvas against the plugs so they enter the wood. Then lock the beam back in place. Do this until all 4 arms are touching the canvas.[12]
- Remember to hold on to the canvas with one hand while you’re tightening the plugs. It could still come loose until you’re all done.
-
5Tighten all of the plugs so they penetrate the wood. Complete the job by screwing all of the easel plugs into the canvas. Turn each one clockwise 2 or 3 times so they penetrate the canvas wood. When all the plugs are tightened, then the canvas should be secure.[13]
- Don’t turn the plugs too many times or they might weaken the wood. Just 2 or 3 turns should be enough.
-
6Double check to make sure the canvas is secured. You don’t want your canvas coming loose while you’re working or your painting could be ruined. Give the canvas a light shake to make sure it stays in place. If it doesn’t move, then you’re ready to start painting.[14]
- The canvas will still come loose if you shake it too hard, so only apply light pressure.


Warnings
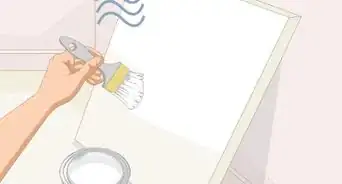
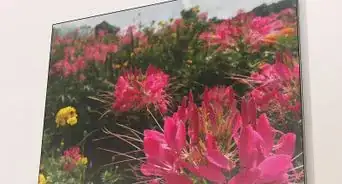
- Don’t try to paint on a display easel. These aren’t meant for painting, only displaying finished pieces. Your canvas could fall over if you try to paint it on a display easel.⧼thumbs_response⧽


References
- ↑ https://youtu.be/CT0psykopWQ?t=63
- ↑ Rebecca Schweiger. Professional Artist & Art School Founder. Expert Interview. 19 November 2021.
- ↑ https://youtu.be/TL0Cok7mI1s?t=68
- ↑ Rebecca Schweiger. Professional Artist & Art School Founder. Expert Interview. 19 November 2021.
- ↑ https://youtu.be/CT0psykopWQ?t=50
- ↑ https://youtu.be/TL0Cok7mI1s?t=143
- ↑ Rebecca Schweiger. Professional Artist & Art School Founder. Expert Interview. 19 November 2021.
- ↑ https://youtu.be/CT0psykopWQ?t=54
- ↑ https://youtu.be/wXYeoH7jwUg?t=105
- ↑ https://youtu.be/wXYeoH7jwUg?t=139
- ↑ https://youtu.be/wXYeoH7jwUg?t=169
- ↑ https://youtu.be/wXYeoH7jwUg?t=196
- ↑ https://youtu.be/wXYeoH7jwUg?t=262
- ↑ https://youtu.be/wXYeoH7jwUg?t=283
- ↑ Rebecca Schweiger. Professional Artist & Art School Founder. Expert Interview. 19 November 2021.
About This Article