X
wikiHow is a “wiki,” similar to Wikipedia, which means that many of our articles are co-written by multiple authors. To create this article, volunteer authors worked to edit and improve it over time.
This article has been viewed 15,338 times.
Learn more...
Most of the time it's easy taking something apart but trying to put it back together can be a struggle. If you've taken apart your fat PlayStation 3 to try to fix the yellow light of death or replace the battery, you now need to reassemble it. The steps can be performed by beginners, intermediate, and expert users.
Steps
-
1Use three small sliver screws to screw the fan back onto the bottom of the heat sink board.
-
2Grab the CPU and GPU. place it onto the heat sink board as the parts fall right into place when you put it on.Advertisement
-
3Get the cable from the fan. Plug it into the small white part on the bottom part of the green board where the CPU and GPU are located.
-
4Grab the gray cover plate. The top of the gray cover plate has two sliver tongs sitting up so have the top of the gray cover plate face up.
-
5Grab the bottom of the PS3, and the entire part of the green board and gray coverboard. Put it into the bottom part of the PS3 so that that the fan is on the bottom and the hard drive slot is on the left going in.
-
6Screw down the gray cover board using the small sliver screws. The board will have arrows pointing at holes where you should put the screws in.
-
7Screw both of the sliver tongues onto the top of the gray cover board using the four black screws.
-
8Grab the CD drive. Place it on the right side of the PS3 while grabbing the ribbon on the bottom of it. Put that on the green board by gently pulling the black chip up and make sure that the legs of the CD drive are aligned to the gray coverboard.
-
9Plug the cord from the CD drive into the front white part on the board.
-
10Grab the power supply. Put it on top of the gold sticks on the board and plug the cord from the power supply into the other white part on the board.
-
11Screw down the power supply with 5 small sliver screws. There should be three in the front and two in the back.
-
12Put the bluetooth back on its stand. You will have to use three small sliver screws to put it back on and one sliver screw for the string connected to the Bluetooth.
-
13Put the back part of the PS3 back on. To do this, plug the cord into the back of the power supply while sitting the back part onto the system.
-
14Grab the top part of the PS3. Put it on the top; there will be arrows pointing where you should screw it down using the tall sliver screws. There will be six tall sliver screws and one slightly shorter screw. Put that screw into the arrow that has an S above it.
-
15Grab the PS3 cover. Slide that back onto the top.
-
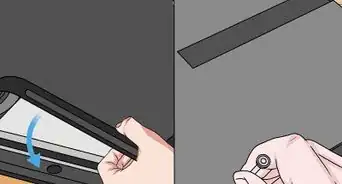
16Put the hard drive back in. Put it back into the slot and use three small screws to put it back on. Then you're all set!


Advertisement
Warnings
- Taking apart your PS3 will void your warranty.⧼thumbs_response⧽
- Make sure the PS3 is turned off.⧼thumbs_response⧽
- Be gentle when putting it back together so you won't break any parts to the system.⧼thumbs_response⧽
Advertisement
Things You'll Need
- T10 security torx screwdriver or just a regular T10 torx screwdriver
- A Philips head screwdriver
- Pliers


References
About This Article
Advertisement