This article was co-authored by Tanisha Hall. Tanisha Hall is a Vocal Coach and the Founder and Executive Director of White Hall Arts Academy, Inc. an organization based in Los Angeles, California that offers a multi-level curriculum focused on fundamental skills, technique, composition, theory, artistry, and performance at a conservatory level. Ms. Hall's current and previous students include Galimatias, Sanai Victoria, Ant Clemons, and Paloma Ford. She earned a BA in Music from the Berklee College of Music in 1998 and was a recipient of the Music Business Management Achievement Award.
wikiHow marks an article as reader-approved once it receives enough positive feedback. In this case, 100% of readers who voted found the article helpful, earning it our reader-approved status.
This article has been viewed 1,567,635 times.
This wikiHow teaches you how to make a simple voice audio recording on your Windows PC. If you're using Windows 10, your computer comes with a free recording application called Voice Recorder. If you're still using Windows 8.1, you can use Sound Recorder, which is extremely similar to Voice Recorder, but not quite as feature-rich. If you're looking to make more advanced voice recordings, you'll want to research more advanced audio recording applications, such as Audacity (free) or Ableton Live (paid).
Things You Should Know
- The Voice Recorder app for Windows 10 & 11 is easy to use. You'll find it in the Windows menu or by searching for "voice" in Search.
- Earlier Windows versions use Sound Recorder, which you can find by typing "sound recorder" on the Start screen.
- Download a third-party recording app for more features, including vocal effects and advanced sound editing tools.
Steps
Using Voice Recorder for Windows 10
-
1Open Voice Recorder. Voice Recorder is a simple audio recording app that comes with Windows 10. You will find it in the Start menu, or by typing voice recorder into the Windows search bar.
-
2Click the microphone to start recording. It's the large round button at the bottom of the left panel.
- Pressing Control + R on the keyboard will also start recording.
Advertisement -
3Sing or say whatever you want recorded. As you're recording, the time elapsed appears at the top of the window.
- To pause the recording temporarily, click the pause button (two vertical lines). You can pause and un-pause as many times as you'd like to continue recording on the same file.
- To mark a certain place in the recording with a flag so you can easily find it later, click the flag icon.
-
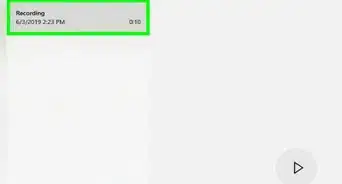
4Click the stop button when you're finished. It's the large circle with a square inside.
- The recorded audio is saved to a folder in your Documents directory called Sound recordings.
-
5Click the play button to listen. It's the large circle containing a triangle at the center of the right panel. The sound will play back through your default speakers or headphones.
- If you don't hear anything, make sure the volume is up on your computer, and that any external speakers are powered on.
-
6Trim your recording (optional). Click the Trim icon (the second from the left) to remove excess audio from the beginning or end of your recording. Use the sliders to select only the part of the recording you want to keep, and then click the disk icon to save.
- When saving a trimmed recording, you'll be asked if you want to update the original file or save the new file as a copy. Choose the option that works best for your needs.
-
7Manage your recordings. As you continue to record sounds in Voice Recorder, they'll all appear in the left panel. You can right-click any of these recordings and to access other settings, such as the ability to Share, Rename, Delete, or Open file location'.
- It's a good idea to rename your files after recording them so they don’t have generic names. This makes it easier to find what you're looking for in the future.


Using Sound Recorder for Windows 8.1
-
1Open Sound Recorder. An easy way to do this is to open the Start screen, type sound recorder into the search bar, and then click Sound Recorder in the search results.
- If it's your first time using this app, follow the on-screen instructions to give it permission to access your computer's microphone.
-
2Click the red microphone icon to start recording. It's the large red circle with a microphone inside. Once you click the icon, the time elapsed appears at the top of the window.
-
3Sing, say, or voice whatever you want recorded. The green bar will move back and forth to let you know it's capturing the recording.
- To pause the recording temporarily, click the pause button (two vertical lines). You can pause and un-pause as many times as you'd like to continue recording on the same file.
- If you move Sound Recorder to the background to use another app while recording, it will automatically pause until you bring it back to the foreground.[1] You can, however, use Sound Recorder and another app side-by-side.
-
4Click the Stop button to stop recording. It's the large red circle with a square inside. This saves the file and displays it (and other recordings, if you've made them) in the file list.
-
5Click the play button to listen. It's the large circle containing a triangle at the center of the right panel. The sound will play back through your default speakers or headphones.
- If you don't hear anything, make sure the volume is up on your computer, and that any external speakers are powered on.
- If you don't want to keep the file, you can delete it by clicking the Delete option beneath it.
-
6Trim your recording (optional). Click Trim (the first round icon under the recording) to remove excess audio from the beginning or end of your recording. Use the sliders to select only the part of the recording you want to keep, and then click the disk icon to save.
- When saving a trimmed recording, you'll be asked if you want to update the original file or save the new file as a copy. Choose the option that works best for your needs.
-
7Rename the file. To do this, click the current name of the file, click the Rename button at the bottom, and then enter a name you'll remember. This helps you keep your files organized in Sound Recorder.


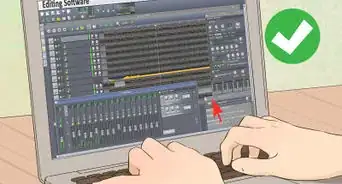
Using a Third-Party Program
-
1Find a trustworthy audio recording application that meets your needs. There are a variety of free and paid recording programs available for different uses, many made by trusted developers. Be sure to download from a website that you know, and read as many reviews as possible.
-
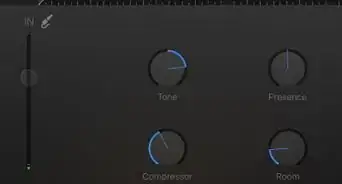
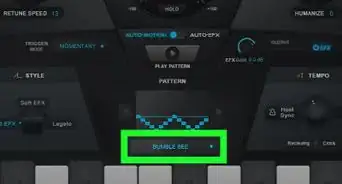
2Play around with pitch and speed. Many third-party programs will allow you to adjust the way your audio is recorded. You can slow your recording down to draw out your words, or increase the pitch to give your voice a chipmunk effect.
-
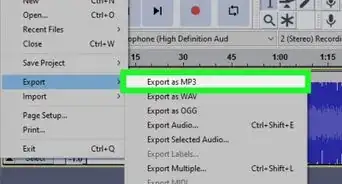
3Record higher quality sounds. High end recording programs can do a lot to improve the quality of your recording. These are useful programs if you have a high quality microphone and do a lot of voice recording and editing.
-
4Take your singing to the next level. Recording yourself is the first step to getting your name and your music out to the world. You can use free audio recording software to get started in your own home, while giving your music a professional touch!
- You should record a demo because a recording is very different than singing live.
- So, before you spend money at an expensive studio, it's best to record it at your home studio.[2]
- It will also help you to get better ideas for the background vocals.


Community Q&A
-
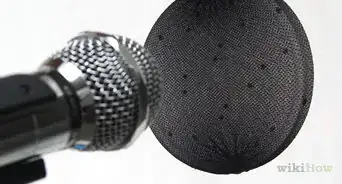
QuestionCan I use iPhone headphones to record sound?
 Community AnswerMost iPhone headphones have a microphone built in, so yes.
 -
QuestionHow do I record my voice if I don't have microphone?
 Community AnswerMost laptops have a microphone built in, as well as headsets. If you don't have a laptop or headset, then you will have to get either a microphone, a laptop, or a headset. If you have headphones that you use for your phone, I would check to see if those have a microphone that you could use as well.
 -
QuestionI want to record my voice on my windows computer in a format that can be recorded to CD and played back. How do I do that?
 Community AnswerPlug a microphone into the USB drive and then record it using a suitable program.


References
About This Article

1. Open the Windows search bar and type "voice recorder."
2. Click Voice Recorder in the search results.
3. Click the large microphone to start recording.
4. You can click the pause button to temporarily stop recording at any time. Click the pause button again to pick up where you left off.
5. Click the Stop button when you're finished to save your recording. Files you create in Voice Recorder will stay in the app's left panel so you can always find them when you need them.
6. Click the Play button to hear what you recorded.
7. If you want to remove excess audio from the beginning or end of the recording, click the ""Trim"" icon, position the sliders, and then click the disk icon to save.
8. To rename your saved file, right-click it in the left panel and click Rename
9. To share the file with others, just right-click the file, select Share, and choose a sharing method, such as your email or messaging app.